


32 Sp
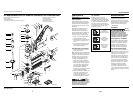
Manual de Instrucciones y Lista de Piezas
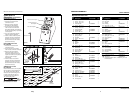
Para Ordenar Repuestos o Asistencia Técnica, Sírvase Llamar
al Distribuidor Más Cercano a Su Domicilio
Sírvase proporcionar la siguiente información:
- Número de modelo
- Número de serie (si tiene)
- Descripción y número de la pieza como se muestra en la lista de repuestos
Dirija toda la correspondencia a:
Campbell Hausfeld
Attn: Customer Service
100 Production Drive
Harrison, OH 45030 U.S.A.
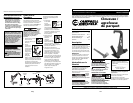
14
1
3
4
6
7
2
5
8
9
10
11
12
13
15
16
17
18
19
33
20
21
22
23
24
25
26
10
64
69
28
30
29
31b
32
27
36
35
37
38
34
58
60
59
39
13
12
23
40
41
42
43
48
44
45
46
47
49
54
50
46
53
52
51
55
57
56
62
61
35
63
68
67
66
65
31a
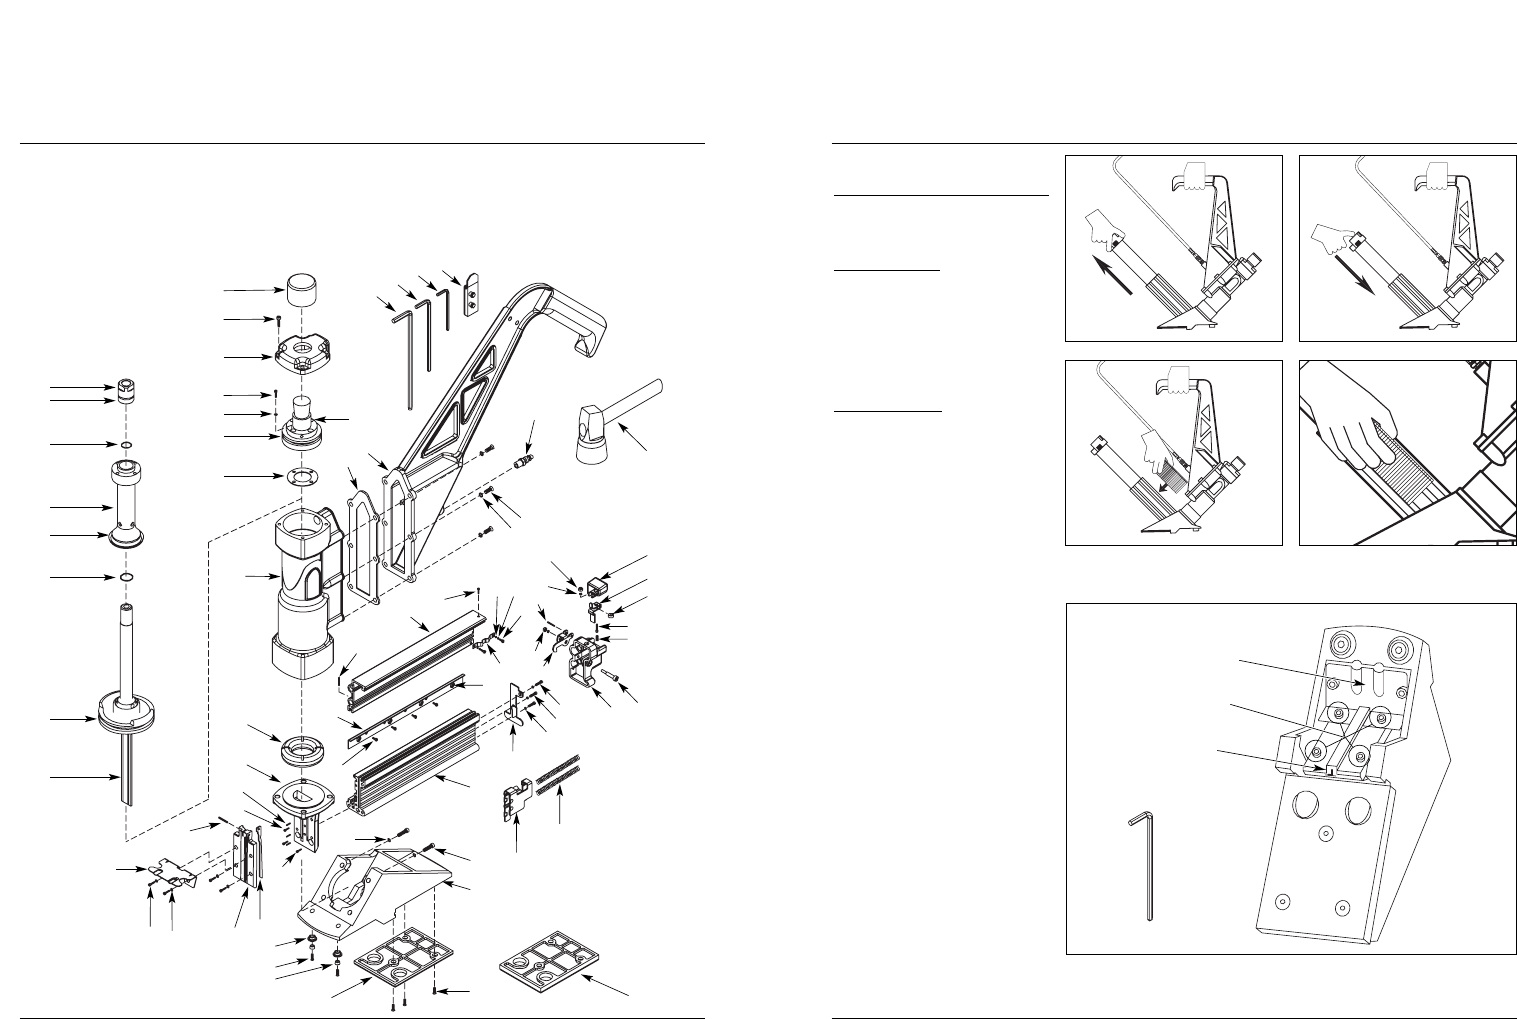
Figure 5
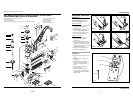
Operating The Nailer
(Continued)
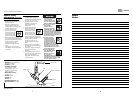
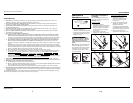
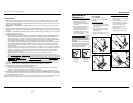
LOADING/UNLOADING THE NAILER
Always connect the tool to the air
supply before loading fasteners.
Loading the staples
1. Hold the tool firmly, press the lock
and pull the magazine door
(See figure 1).
2. Place the staples straddling the top
of the magazine (See figure 2).
3. Push and lock the magazine door
back in place (See figure 3).
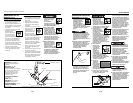
Loading the L cleats
1. Hold the tool firmly, press the
lock and pull the magazine
(See figure 1).
2. Place the specified type and size of
L cleats in the magazine from side.
The head of the L cleats should be
inserted into the notch on the fixed
magazine (See figure 4).
3. Push and lock the magazine door
back in place (See figure 3).
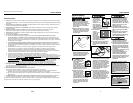
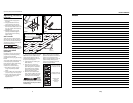
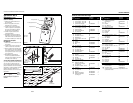
CLEARING A JAM FROM THE NAILER
(SEE FIGURE 5)
1. Disconnect the air supply from the
nailer.
2. Remove staples or L cleats from
magazine.
3. Using provided 4 mm wrench,
remove the four nose plate screws,
washers, nose plate, and dust
shield.
4. Using a small tool, pick out the
jammed fastener.
5. Reattach all hardware (apply a
good quantity of threadlock glue
on screw threads before installing;
tighten firmly).
Model CHN50399
5
www.chpower.com
Figure 1
Figure 2
Figure 3
Figure 4
4 mm Wrench
Nose Plate Screws
Nose Plate
Dust shield