


B-5
OPERATION
B-5
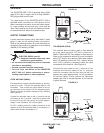
Making a TIG Weld:
1. Connect the work cable to the positive “+” output
terminal.
2. Connect the TIG torch to the negative “-“ output ter-
minal.
3. Connect the gas line from the TIG torch adapter to
the gas regulator connected to the gas bottle.
4. Open the gas valve on the gas bottle and adjust the
gas regulator to approximately 20-30 cfm.
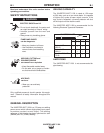
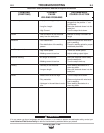
5. Set the amperage based on material thickness:
Steel Thickness Amperage Setting
(1/16”) 1.6mm 60-90 Amps
(1/8”) 3.2mm 75-120 Amps
(3/16) 4.8mm 125-150 Amps
6. Turn machine on.
7. Turn the gas valve on the torch to start shielding
gas flowing.
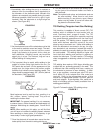
8. Touch the tungsten to the work piece and pause for
a second.
9. Slowly lift the tungsten off the work piece to estalish
the arc. (Note: Rocking the torch back onto the
ceramic shielding cup is an easy way to do this
steadily.)
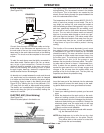
10. With the torch pointed in the direction of travel
angled about 75 degrees to the work piece slowly
move the torch in the direction of travel. Maintain
about a 1/4” distance from the tungsten to the
work piece while moving. Apply filler metal to the
weld puddle by dipping the filler rod into the weld
puddle allowing it to melt off and being careful not
to touch the filler metal to the tungsten electrode.
11. At the end of the weld lift the TIG torch quickly
away from the work piece to break the arc.
12. Turn off torch gas valve.
13. Turn machine off.
NOTE:
For more detailed information about TIG welding order
“Gas Tungsten Arc Welding Guide Book (JFLF-834)”
from the James F. Lincoln Arc Welding Foundation.
http://www.jflf.org/
INVERTER ARC™ 230