


SKU 95065 For technical questions, please call 1-800-444-3353 Page 8
CHARGING THE BATTERY
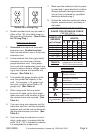
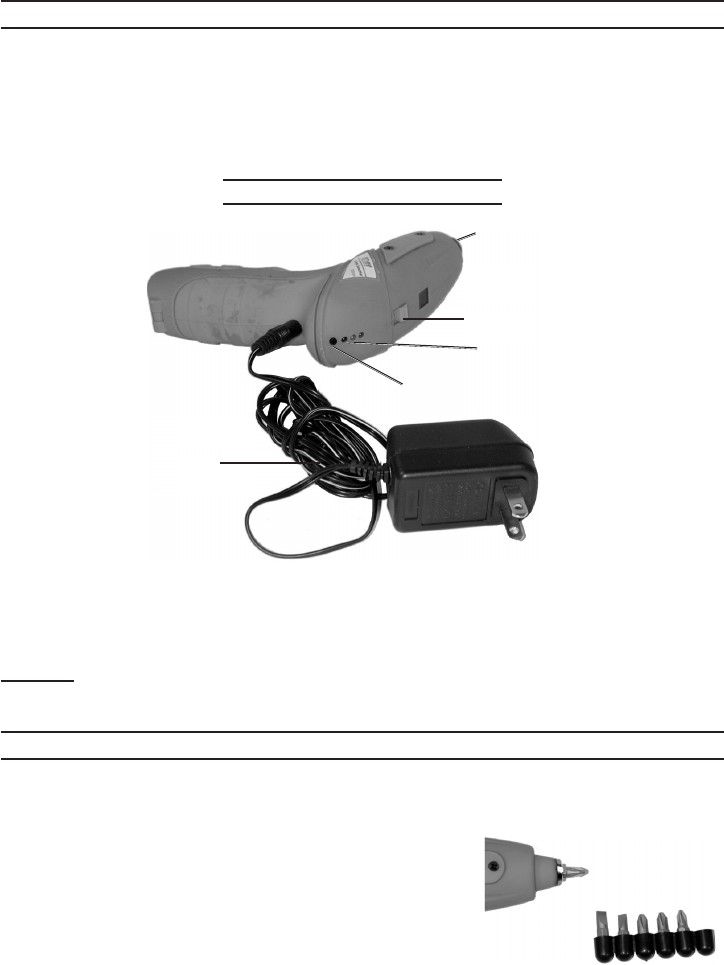
Insert the Charger Adapter (24) cord plug into the unit connector as shown below.
Plug the Charger Adapter module into an electrical outlet. The red Charging Indicator
on the Cordless Screwdriver will light. Charge the new battery for 10 hours. When the
battery is fully charged all three LEDs will light up. Remove the Charger Adapter (24)
from the electrical outlet. The red Charging indicator will turn off. See Figure D.
Testing the Battery Charge
Charging
Adapter (24)
Charging Adapter Cord
Charging Indicator LEDs
Front Operation Light Switch
Front Operation Light
Charging Test Button
Figure D
Push the charging test button to display battery power. All three LEDs lit means the
battery is fully charged. Two LEDs lit indicate that the battery is half charged. One LED lit
indicates that the tool should be charged. See Figure D above.
Caution: Do not overcharge the Battery. Never charge for more than 10 hours continu-
ously. Charger Adapter should not be left plugged in after charging is complete.
OPERATING INSTRUCTIONS
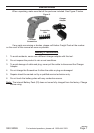
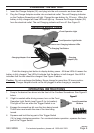
Snap in the desired hex driver into the front of the Cordless Screwdriver. See Figure E
below.
If light is needed while driving screws, turn on the Front
Operation Light Switch (see Figure D for its location).
The light will turn on when the Trigger Switch is on.
Engage the screwdriver bit over the item being turned.
The bit size must match the size of the item being
turned.
Squeeze and hold the top part of the Trigger Switch
(14) to begin clockwise operation. For counterclockwise operation, squeeze the lower
part of the Trigger Switch.
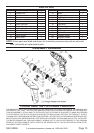
1.
2.
1.
2.
3.
4.
Figure E
Screwdriver Bits
Insert Screwdriver
Bit Here
Figure E
Screwdriver Bits
Insert Screwdriver
Bit Here
REV 07a