


Page 9SKU 96375
For technical questions, please call 1-800-444-3353.
If other metals are to be soldered, thoroughly clean and scrape the metal surfaces.
It may be necessary to apply acid flux (not included) to clean the metal surfaces
before soldering.
Note: If soldering on printed circuit boards, too much heat can soften the plastic form
or loosen the metal eyelet connections. Use the lowest heat setting possible (see
manufacturer’s directions) to perform the soldering operation. Never use acid core
solder or acid flux on wiring circuits.
If uncertain on how to proceed, it may be wise to practice on a scrap workpiece first.
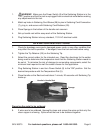
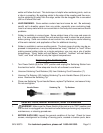
Place the Soldering Tip on the wiring, joint, or metal to be soldered.
Apply solder to the joint, wiring, or metal to be soldered, not to the Soldering Tip.
When the metal is hot enough, it will melt the solder and allow it to flow around the
wiring or metal being soldered. Slowly move Soldering Tip around to coat the entire
area being soldered.
When the entire wiring or metal surface is encased in solder, remove the Soldering
Tip and place in Rest.
Allow the soldering to cool completely before pulling gently on the item to ensure
a secure hold.
When you are finished soldering, wipe the Soldering Tip thoroughly on the Sponge
and apply a small amount of rosin-core solder to coat the Soldering Tip and keep
it clean.
Soldering Tips
The soldering process bonds two metal objects together using a metallic bonding
material (solder) which has a lower melting point than the items being joined. Sol-
dering is not appropriate for non-metallic objects such as plastic or wood.
Check to be sure the objects being joined will not be damaged by the heat of
soldering. This tool generates a temperature up to 896° F. Test a scrap piece or
inconspicuous area of your work piece with the soldering tip before proceeding.
Be sure the surfaces being soldered are clean before beginning. If necessary, use
a soldering flux (not included) for cleaning. Apply the flux to the parts being joined,
and heat the parts until the flux burns away.
Heat the parts being joined with the soldering tool, not the solder. Once the parts
being joined are sufficiently heated, touch the solder to the work pieces. The solder
will melt and adhere to the work pieces. Remove the soldering tip from the work
pieces, and hold the pieces together until they have cooled enough for the solder
to solidify.
Solder will “follow the heat”. Once a workpiece is sufficiently hot to melt the solder,
the solder can be dragged along the workpiece by moving the soldering tip. The
7.
8.
9.
10.
11.
12.
1.
2.
3.
4.
5.