


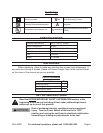

Page 10SKU 96531 For technical questions, please call 1-800-444-3353.
Note: For additional information regarding the parts listed in the following pages, refer
to the Assembly Diagram near the end of this manual.
Assembly
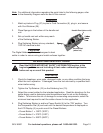
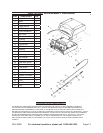
Match up holes in Plug (27) to pins in Cord Connection (6), plug in, and secure
with Cord Retainer (26).
Place Sponge in the bottom of the handle rest
unit.
Set up handle rest unit within easy reach
of the Soldering Station.
Plug Soldering Station into any standard,
120V AC electrical outlet.
Functions
The Digital Soldering Station is designed to heat
solder in order to secure wiring and metal surfaces together.
OPERATING INSTRUCTIONS
Read the ENTIRE IMPORTANT SAFETY INFORMATION section at the
beginning of this manual including all text under subheadings therein
before set up or use of this product.
Tool set up
Check for breakage, worn parts, damaged cords, or any other condition that may
effect the tool’s operation. If damaged, have the tool serviced by a qualied tech-
nician before using.
Tighten the Tip Retainer (16) on the Soldering Iron (15).
Select the correct solder for the intended application. Read the directions for the
solder being used to determine what temperature level to set on the Soldering
Station. To minimize the risk of damage to surrounding components, select the
minimum heat required to melt the solder chosen for the application.
Plug Soldering Station in and turn Power Switch (4) to the “ON” position. Turn
the Temperature Dial (8) and wait until the desired temperature is displayed on
the LCD Display (5) or push one of the Preset Buttons.
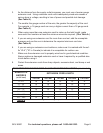
Preset Button 1 = 150ºC (302ºF)
Preset Button 2 = 270ºC (518ºF)
Preset Button 3 = 360ºC (680ºF)
1.
2.
3.
4.
1.
2.
3.
4.
•
•
•
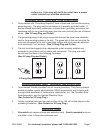
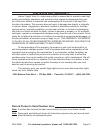
Sponge
Solder
Work
Area
Handle Rest
(when hot)
Sponge
Solder
Work
Area
Handle Rest
(when hot)
Handle Rest (when cold)