


FENCE
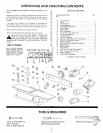
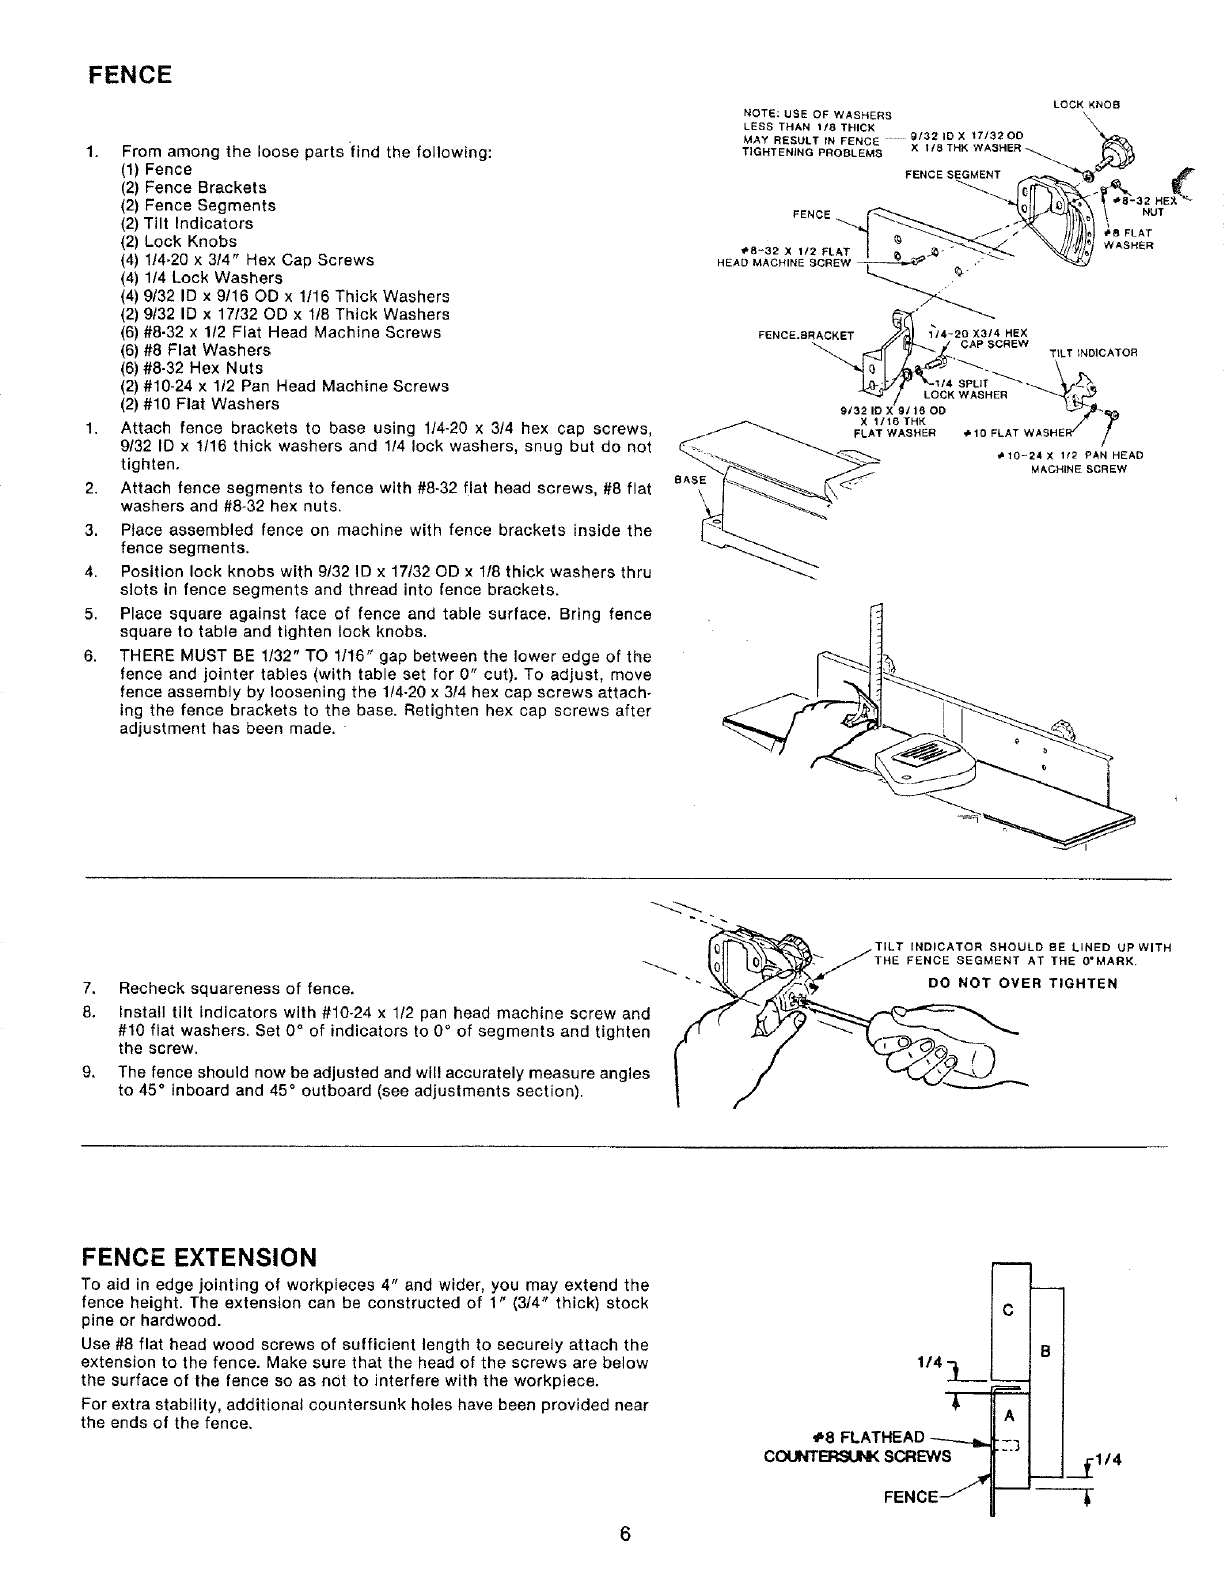
1. From among the loose parts "find the following:
(1) Fence
(2) Fence Brackets
(2) Fence Segments
(2) Tilt Indicators
(2) Lock Knobs
(4) 114-20 x 3/4" Hex Cap Screws
(4) 1/4 Lock Washers
(4) 9132 ID x 9/16 OD x 1t16 Thick Washers
(2) 9t32 ID x 17/32 OD x 1t8 Thick Washers
(6) #8-32 x 1t2 Flat Head Machine Screws
(6) #8 Flat Washers
(6) #8-32 Hex Nuts
(2) #10-24 x 1/2 Pan Head Machine Screws
(2) #10 Flat Washers
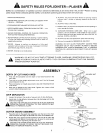
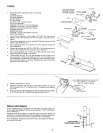
1. Attach fence brackets to base using 114-20 x 3/4 hex cap screws,
9t32 ID x 1/16 thick washers and 1/4 lock washers, snug but do not
tighten.
2. Attach fence segments to fence with #8+32 flat head screws, #8 flat
washers and #8-32 hex nuts.
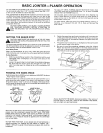
3. Place assembled fence on machine with fence brackets inside the
fence segments.
4. Position lock knobs with 9t32 ID x 17t32 OD x I/8 thick washers thru
slots in fence segments and thread into fence brackets.
5. Place square against face of fence and table surface. Bring fence
square to table and tighten lock knobs.
6. THERE MUST BE 1/32" TO 1116" gap between the lower edge of the
fence and jeinter tables (with table set for 0" cut). To adjust, move
fence assembly by loosening the 1/4-20 x 314 hex cap screws attach*
ing the fence brackets to the base. Retighten hex cap screws after
adjustment has been made.
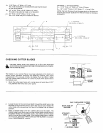
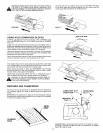
LOCK KNOB
NOTE; USE OF WASHERS \
%
LESS
THAN 118 THICK
MAY RESULT IN FENCE + g/32 ID X 17/320D
TIGHTENING PROBLEMS X 1/8 THK WASHER --_..
FENCE SEGMENT
FENCE NUT
_8 FLAT
WASHER
4*8-32 X 112 FLAT _ _"
HEAD MACHINE SCREW _ ,+
FENCE.BRACKET 1"/4-20 X314 HEX
CAP SCREW
_,._. TILT INDICATOR
// LOCK WASHER
9t32 I0 X 91 IS GO
X 1116 THK
FLAT WASHER 4' 10 FLAT
*'10-24 X 112 PAN HEAD
MACHINE SCREW
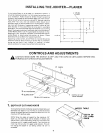
7. Recheck squareness of fence.
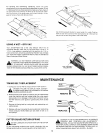
8. Install tilt indicators with #10-24 x 1/2 pan head machine screw and
#10 flat washers. Set 0° of indicators to 0 ° of segments and tighten
the screw.
9, The fence should now be adjusted and will accurately measure angles
to 45 ° Inboard and 45 ° outboard (see adjustments section).
TILT INDICATOR SHOULD BE LINED UP WITH
._" THE FENCE SEGMENT AT THE 0+MARK+
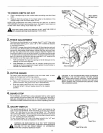
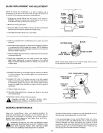
FENCE EXTENSION
To aid in edge jointing of workpieees 4" and wider, you may extend the
fence height, The extension can be constructed of 1" (3t4" thick) stock
pine or hardwood.
Use #8 flat head wood screws of sufficient length to securely attach the
extension to the fence. Make sure that the head of the screws are below
the surface of the fence so as not to interfere with the workpiece.
For extra stability, additional countersunk holes have been provided near
the ends of the fence,
114 '-_ +
+8
COUNTERSUNK SCREWS