


16
17
OPERATION cont.
OPERATION cont.
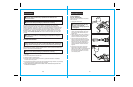
NOTE: When unplugging the drill, first make sure that the Power Lock-On
Feature is not engaged, by pressing on the trigger switch to release it. Failure to
do so will cause the hammer drill to start immediately the next time it is plugged
in. Property damage or serious personal injury could result.
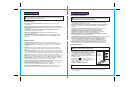
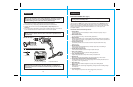
SPINDLE LOCK (Fig. 10)
The spindle lock is a convenience feature that allows you to tighten or loosen the chuck
jaws around a bit without having to use the chuck key.
1. Unplug the hammer drill.
Fig. 10
WARNING: To prevent personal injury, ALWAYS disconnect the plug from power
source BEFORE assembling parts, making adjustments or changing bits.
!
Fig. 11
WARNING: To prevent personal injury, ALWAYS disconnect the plug from power
source BEFORE assembling parts, making adjustments or changing bits.
!
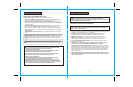
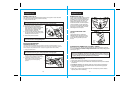
BUBBLE LEVEL (Fig. 12)
In order to insure a perfect right angle when
drilling / driving and hammer drilling into a
workpiece, you can use the built-in bubble
level on the back of the drill / driver. The
bubble level is designed to work when
the hammer drill is in a horizontal position.
Line the air bubble up in the appropriate
circle, and to the workpiece. This will help
insure that you will drill / drive or hammer
drill straight into the workpiece.
Fig. 12
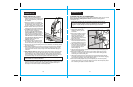
LIVE TOOL INDICATOR LIGHT
(Fig. 13)
Your hammer drill has a LIVE TOOL
INDICATOR green LED light that comes
on when the drill is plugged into a power
source. This lets you know you have a
live tool.
OPERATING THE HAMMER DRILL AS A DRILL / DRIVER
When using your 1/2-in. Hammer Drill for standard drill / driving applications, make sure
you have the Rotary and Hammer Drilling Selector Switch in the Rotary Drilling position
(see Page 13, Fig. 4).
Fig. 13
ROTARY DRILLING (Fig. 14)
1. Always unplug the drill when installing or removing bits and accessories.
2. Use sharp bits only. Always use Craftsman bits and accessories to help ensure desired
performance.
3. For drilling in wood use twist drill bits,
spade bits, power auger bits and hold saws.
4. Start drilling in wood with slow speed and increase to full power while applying firm
pressure on the hammer drill.
5. Pull the bit out of the hole frequently to clear the wood chips away from the flutes to
help keep the bit from overheating.
Bubble
Level
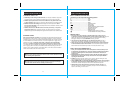
Chuck Jaws
Chuck
Key
Green
LED
Light
2. Depress and hold the spindle lock button.
3. While keeping the button depressed,
manually rotate the chuck until the spindle
shaft “clicks” into a stationary position.
Rotate clockwise for tightening, and
counterclockwise for loosening.
4. Continue to rotate the chuck until the jaws
are tight around the bit. If loosening, rotate
until the jaws are free of the bit.
5. Release the spindle lock button.
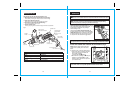
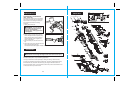
2. Insert chuck key into one of the holes in
the side of the chuck. Turn key to tighten
or loosen jaws for installing or removing bit
3. If tightening, hold bit firmly in place.
Always make sure bit is tightly secured
in the chuck jaws before beginning
operation.
You may install or remove bits using the spindle lock button as described above, or you
may simply use the chuck key inserted into the chuck. If you use the chuck key, you don’t
have to depress the spindle lock button. To loosen or tighten chuck with chuck key:
INSTALLING AND REMOVING
ACCESSORY BITS (Fig. 11)
1. Unplug the hammer drill
Spindle
Lock
Chuck Jaws
NOTE: To ensure that jaws are tight, you may want to insert the chuck key into
the chuck and add an extra tightening twist.