OPERATION
KNOW YOUR DRILL
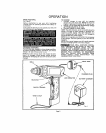
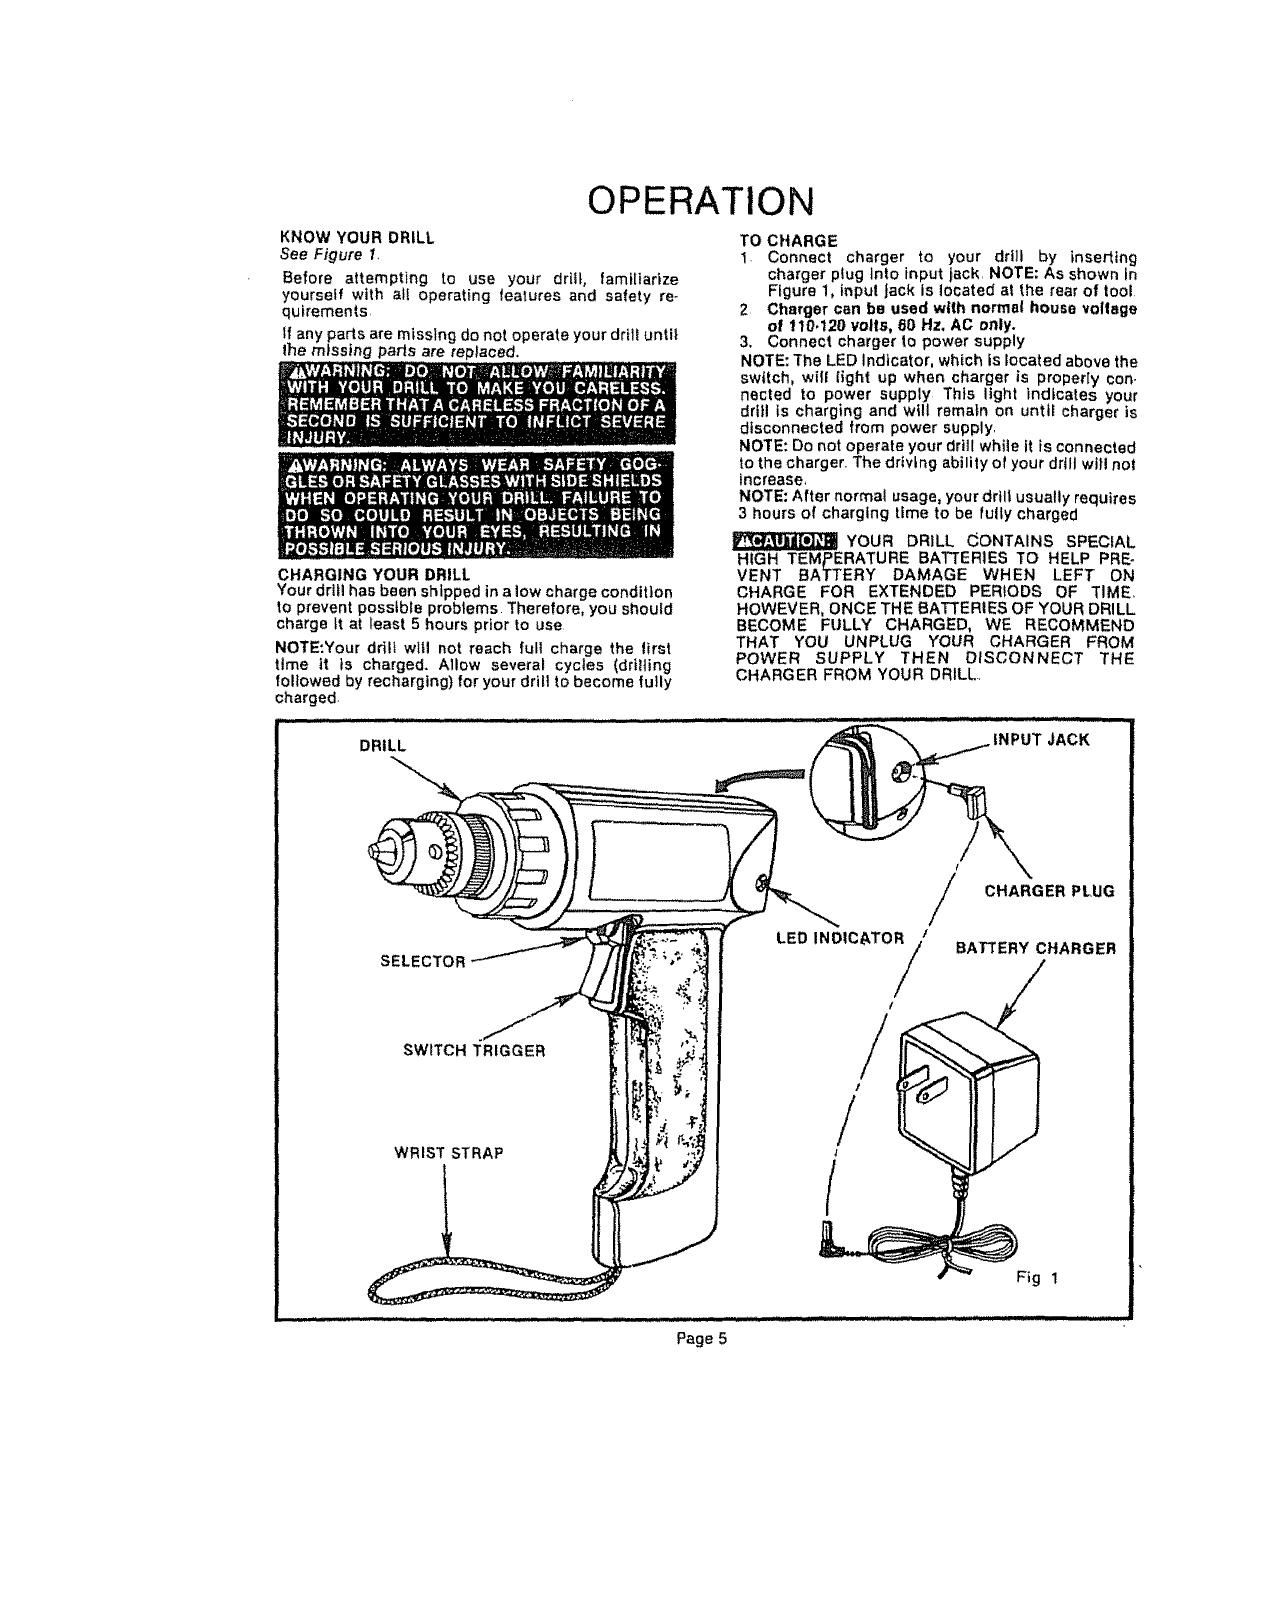
See Figure 1_
Before attempting to use your drill, familiarize
yourself with el! operating features and safety re-
quirements,
If any pads are missing do not operate your drill untie
the missing parts are replaced.
CHARGING YOUR DRILL
Your drill has been shipped in a low charge condition
to prevent possible problems. Therefore, you should
charge tt at least 5 hours prior to use
NOTE:Your drill wltl not reach fult charge the first
ttme it is charged. Allow several cycles (drilling
followed by recharging) for your drill to become fully
charged,
DRILL
SELECTOR
TO CHARGE
1, Connect charger to your drill by inserting
charger plug Into input jack, NOTE: As shown In
Figure 1, input Jack is located at the rear of toot
2 Charger can be used with normal house voltage
of 110.120 volts, 60 Hz. AC only.
3, Connect charger Io power supply
NOTE: The LED indicator, which is located above the
switch, will iight up when charger is properly con.
nected to power supply Thts light indicates your
drill is charging and will rematn on until charger ts
disconnected from power supply.
NOTE: Do not operate your drill while it is connected
to the charger. The driving ability of your drill will not
increase,
NOTE: After normal usage, your drtlI usually requires
3 hours of charging time to be fully charged
YOUR DRILL _ONTAINS SPECIAL
HIGH TEMPERATURE BATTERIES TO HELP PRE-
VENT BATTERY DAMAGE WHEN LEFT ON
CHARGE FOR EXTENDED PERIODS OF TIME,
HOWEVER, ONCE THE BATTERIES OF YOUR DRILL
BECOME FULLY CHARGED, WE RECOMMEND
THAT YOU UNPLUG YOUR CHARGER FROM
POWER SUPPLY THEN DISCONNECT THE
CHARGER FROM YOUR DRILL..
UT JACK
CHARGER PLUG
LED INDICATOi_i// BATTERY CHARGER
l
SWITCH TRIGGER
WRIST STRAP
Page 5


