


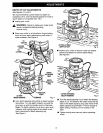

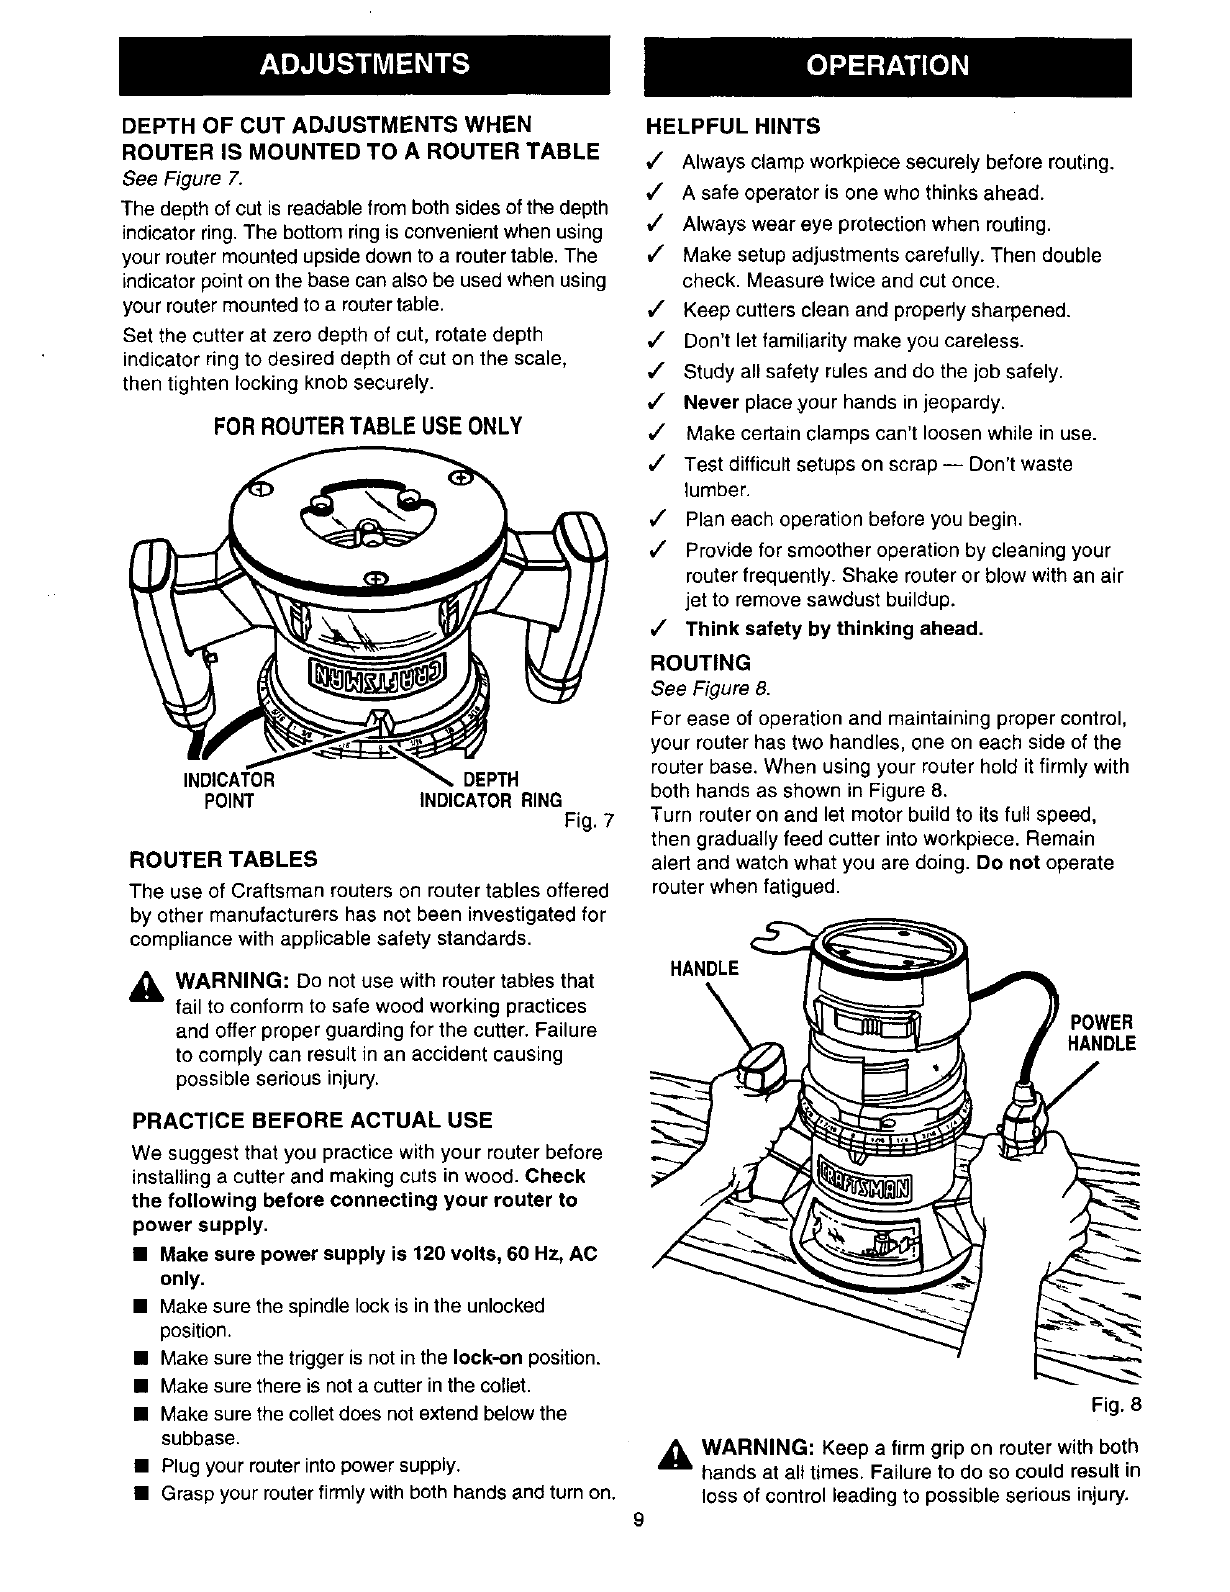
DEPTH OF CUT ADJUSTMENTS WHEN
ROUTER IS MOUNTED TO A ROUTER TABLE
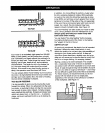
See Figure 7.
The depth of cut is readable from both sides of the depth
indicator ring. The bottom ring is convenient when using
your router mounted upside down to a router table. The
indicator point on the base can also be used when using
your router mounted to a router table.
Set the cutter at zero depth of cut, rotate depth
indicator ring to desired depth of cut on the scale,
then tighten locking knob securely.
FOR ROUTERTABLE USE ONLY
INDICATOR DEPTH
POINT INDICATORRING
Fig. 7
ROUTER TABLES
The use of Craftsman touters on muter tables offered
by other manufacturers has not been investigated for
compliance with applicable safety standards.
_1= WARNING: Do not use with router tables that
fail to conform to safe wood working practices
and offer proper guarding for the cutter. Failure
to comply can result in an accident causing
possible serious injury.
PRACTICE BEFORE ACTUAL USE
We suggest that you practice with your router before
installing a cutter and making cuts in wood. Check
the following before connecting your router to
power supply.
• Make sure power supply is 120 volts, 60 Hz, AC
only.
• Make sure the spindle lock is in the unlocked
position.
• Make sure the trigger is not in the lock-on position.
• Make sure there is not a cutter inthe collet.
• Make sure the collet does not extend below the
subbase.
• Plugyour muter intopower supply.
• Grasp your routerfirmly with both hands and turnon.
HELPFUL HINTS
,/" Always clamp workpiece securely before routing.
•/ A safe operator is one who thinks ahead.
,,/ Always wear eye protection when routing.
J" Make setup adjustments carefully. Then double
check. Measure twice and cut once.
,/ Keep cutters clean and properly sharpened.
,/ Don't let familiarity make you careless.
•/ Study all safety rules and do the job safely.
J Never place your hands in jeopardy.
4" Make certain clamps can't loosen while in use.
,/ Test difficult setups on scrap-- Don't waste
lumber.
,/ Plan each operation before you begin.
,/ Provide for smoother operation by cleaning your
router frequently. Shake router or blow with an air
jet to remove sawdust buildup.
J Think safety by thinking ahead.
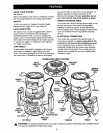
ROUTING
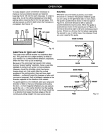
See Figure 8.
For ease of operation and maintaining proper control,
your router has two handles, one on each side of the
router base. When using your router hold it firmly with
both hands as shown in Figure 8.
Turn router on and let motor build to its full speed,
then gradually feed cutter into workpiece. Remain
alert and watch what you are doing. Do not operate
router when fatigued.
HANDLE
POWER
HANDLE
Fig. 8
WARNING: Keep a firm grip on router with both
hands at all times. Failure to do so could result in
loss of control leading to possible serious injury.