


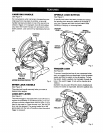
SQUARING THE SAW BLADE TO THE
FENCE
See Figures 17 - 20,
• Unplug your saw.
,_ WARNING: Failure to unplug your saw could
result in accidental startingcausing possible
serious personal injury.
• Pullthe saw arm all the way down and engage
the lock pin to hold the saw arm in transport
position.
• Loosen the miter lock handle approximately
one-half turn.
• Depress the miter lock plate and rotate the miter
table until the pointer on the control arm is
positioned at 0°.
• ReleeLsethe miter lock plate and securelytighten
the miter lock handle.
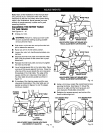
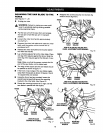
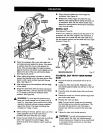
Lay a framing square flat on the miter table. Place
one leg of the square against the fence. Slide the
otherleg ofthe square againstthe flat partof saw
blade.
Note: Make sure that the square contacts the flat
part of the saw blade, notthe blade teeth.
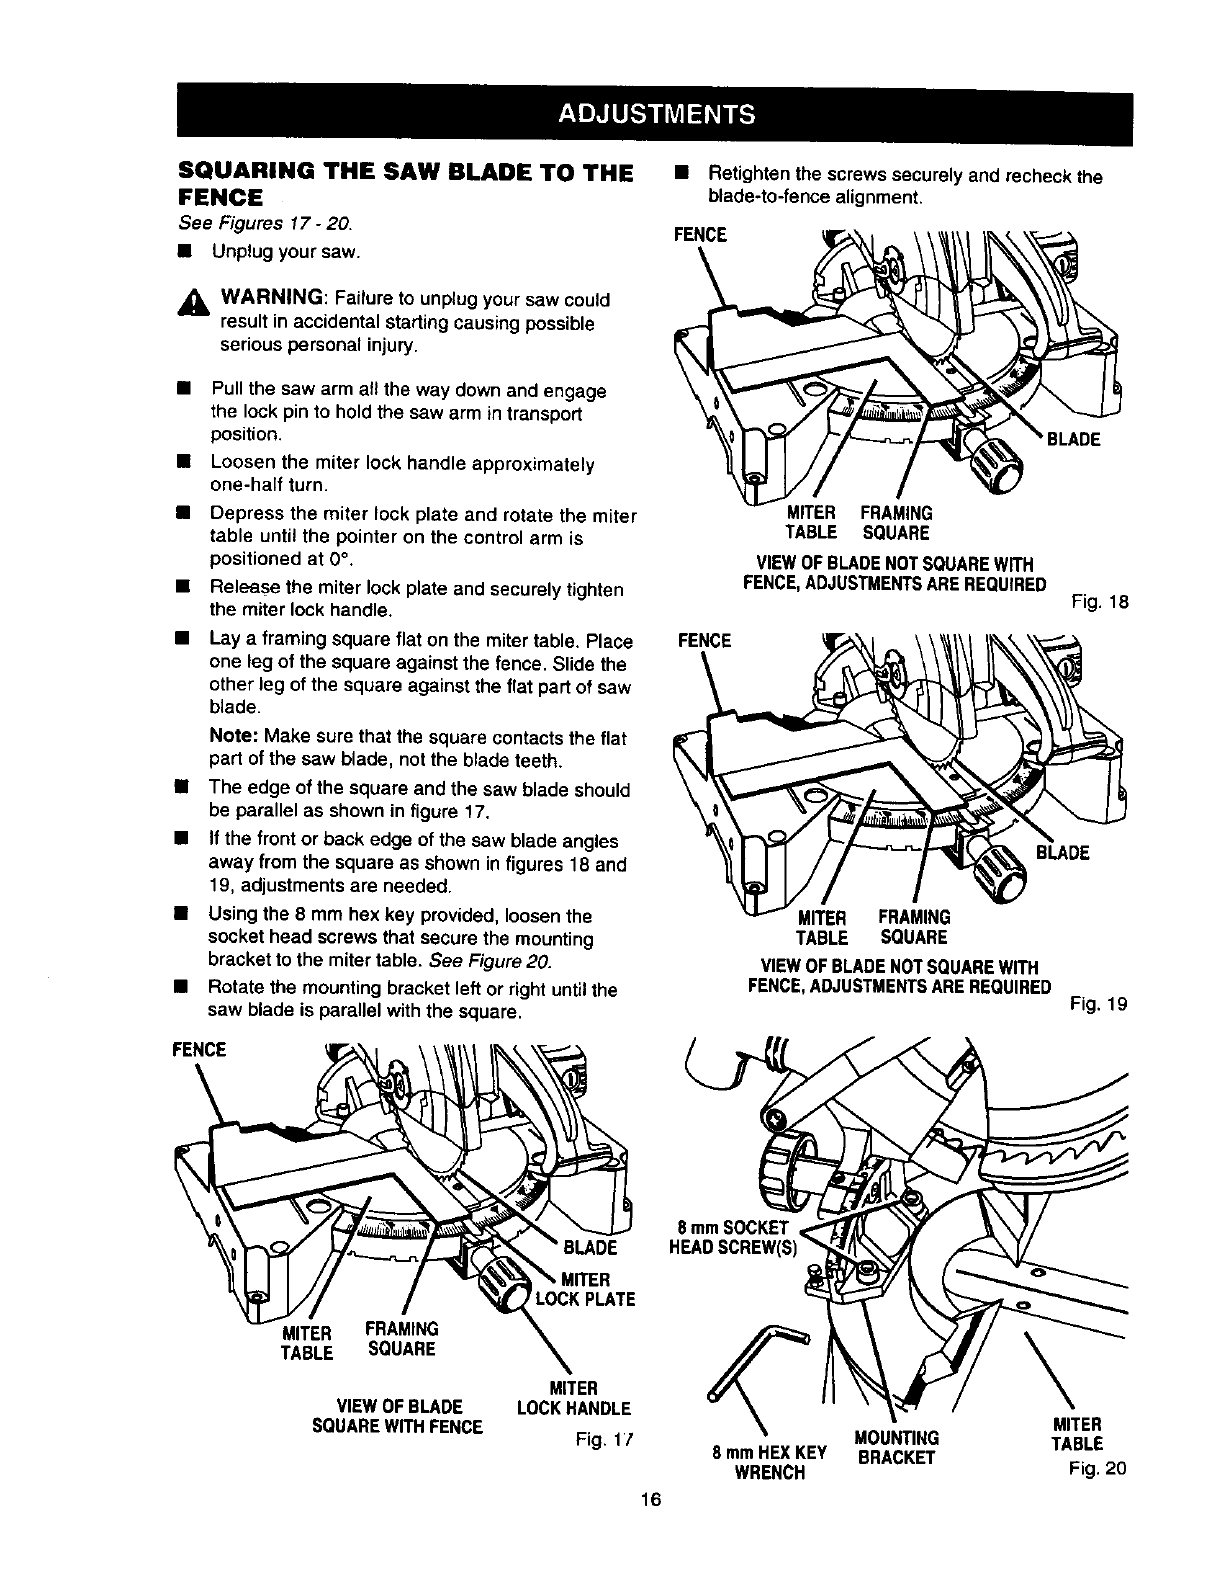
• The edge of the square and the saw blade should
be parallel as shownin figure 17.
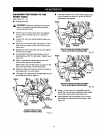
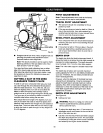
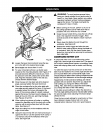
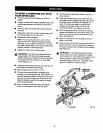
• If the front or back edge of the saw blade angles
away from the square as shown in figures 18 and
19, adjustments are needed.
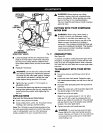
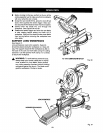
• Using the 8 mm hex key provided, loosen the
socket head screws that secure the mounting
bracket tothe miter table. See Figure20.
• Rotate the mounting bracket left or rightuntilthe
saw blade is parallel withthe square.
FENCE
BLADE
MITER FRAMING
TABLE SQUARE
MITER
VIEWOFBLADE LOCKHANDLE
SQUAREWITHFENCE
Fig, 11
• Retightenthe screwssecurely and recheck the
blade-to-fence alignment.
FENCE
MITER FRAMING
TABLE SQUARE
VIEWOFBLADENOTSQUAREWITH
FENCE,ADJUSTMENTSAREREQUIRED
Fig. 18
BLADE
MITER FRAMING
TABLE SQUARE
VIEW OF BLADENOT SQUAREWITH
FENCE,ADJUSTMENTSARE REQUIRED
Fig. 19
8 mmSOCKET
HEADSCREW
16
8 mmHEXKEY
WRENCH
MOUNTING
BRACKET
MITER
TABLE
Fig. 20