


Replacing a Hard Drive
Use this procedure to replace a failed hard drive.
Prerequisites
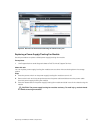
1. Use SupportAssist to send diagnostic data to Dell Technical Support Services.
About this task
Hard drives can be replaced one at a time without shutting down the storage system.
Steps
1. Remove the front bezel.
A solid amber light appears next to the failed hard drive, indicating the drive is ready to be removed.
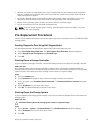
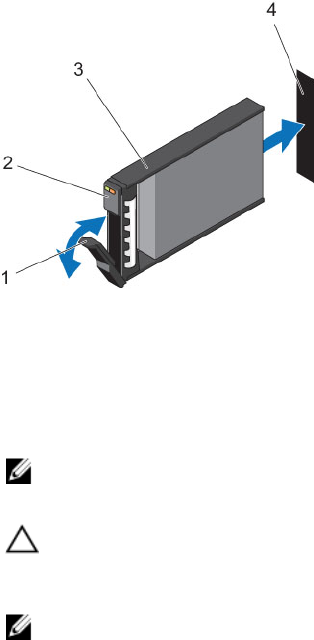
2. Press the release button to open the hard drive carrier release handle.
3. Slide the hard drive out until it is free of the hard drive slot.
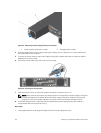
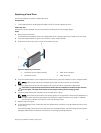
Figure 20. Replacing a Hard Drive
1. Hard drive carrier release handle 2. Hard drive indicators
3. Hard drive carrier 4. Hard drive slot
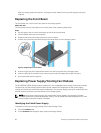
4. Press the release button on the replacement hard drive to open the hard drive carrier release handle.
NOTE: Hold the hard drive by the plastic part of the hard drive carrier or the handle.
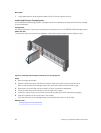
5. Insert the hard drive carrier into the hard drive slot until the carrier contacts the backplane.
CAUTION: Do not remove the hard drive blanks that are installed in hard drive slots that are
not occupied. The hard drive blanks ensure proper cooling of the storage system.
6. Close the hard drive carrier handle to lock the hard drive in place.
NOTE: Allow several seconds for the storage system to recognize the hard drive and determine
its status. When functioning properly, the hard drive’s status indicator turns green. In addition,
the hard drive indicator turns green in the Dell Storage Client.
7. Replace the front bezel.
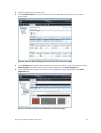
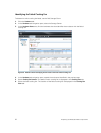
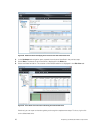
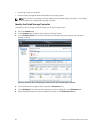
8. In the Dell Storage Client, make sure that the replacement hard drive is recognized and shown as up
and running.
If the Dell Storage Client informs you that there are unassigned disks, see the Storage Center System
Manager Administrator’s Guide for instructions on managing unassigned disks.
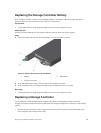
Replacing SCv2000/SCv2020 Components
27