36
English
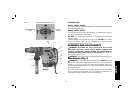
4. Adjust the side handle (front or rear position) (C).
5. Assemble the centering bit and adapter shank into core bit.
6. Mark the spot where the hole is to be drilled.
7. Place the centering bit on that mark and depress the trigger
switch (A).
NOTE: Some core drills require the removal of centering bit after
about 1 cm of penetration. If so, remove and continue hammerdrilling.
8. When hammerdrilling through a structure thicker than the depth
of the core bit, break away the round cylinder of concrete
or core inside the bit at regular intervals. To avoid unwanted
breaking away of concrete around the hole, first drill a hole the
diameter of the centering bit completely through the structure.
Then drill the cored hole halfway from each side of the structure.
9. To stop the tool, release the trigger switch. Always turn the tool
off when work is finished and before unplugging.
Chipping (Fig. 1, 5)
D25820, D25831, D25851
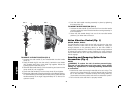
1. Set the mode selector (F) to chipping mode.
2. Set the impact control dial (G) to desired setting (refer to
Electronic Speed and Impact Control).
3. Insert the appropriate chisel and rotate it by hand to lock it into
the desired position.
NOTE: For SDS Max
®
models, only use SDS Max
®
bits.
4. Adjust the side handle (front or rear position) (C).
5. Depress the trigger switch (A).
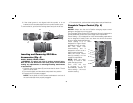
6. Apply only enough pressure to engage active vibration control
(refer to Active Vibration Control).
7. To stop the tool, release the trigger switch. Always turn the tool
off when work is finished and before unplugging.
MAINTENANCE
WARNING: To reduce the risk of injury, turn unit off and
disconnect tool from power source before installing and
removing accessories, before making any adjustments or
removing/installing attachments or accessories. An accidental
start-up can cause injury.
Your D
EWALT power tool has been designed to operate over a
long period of time with a minimum of maintenance. Continuous
satisfactory operation depends upon proper tool care and regular
cleaning.
Lubrication
Your tool was properly lubricated before leaving the factory. In from
two to six months, depending upon use, take or send your tool to
an authorized service center for a complete cleaning, inspection
and lubrication. Tools used constantly on production jobs will need
relubrication more often. Also, tools “out of service” for long periods
should be relubricated before being put back to work.
Cleaning
WARNING: Blow dirt and dust out of the main housing with dry air
as often as dirt is seen collecting in and around the air vents. Wear
approved eye protection and approved dust mask when performing
this procedure.
WARNING: Never use solvents or other harsh chemicals for
cleaning the non-metallic parts of the tool. These chemicals may
weaken the materials used in these parts. Use a cloth dampened only
with water and mild soap. Never let any liquid get inside the tool;
never immerse any part of the tool into a liquid.
Repairs
To assure product SAFETY and RELIABILITY, repairs, maintenance
and adjustment (including brush inspection and replacement) should
be performed by authorized service centers or other qualified service
personnel, always using identical replacement parts.


