


5
K
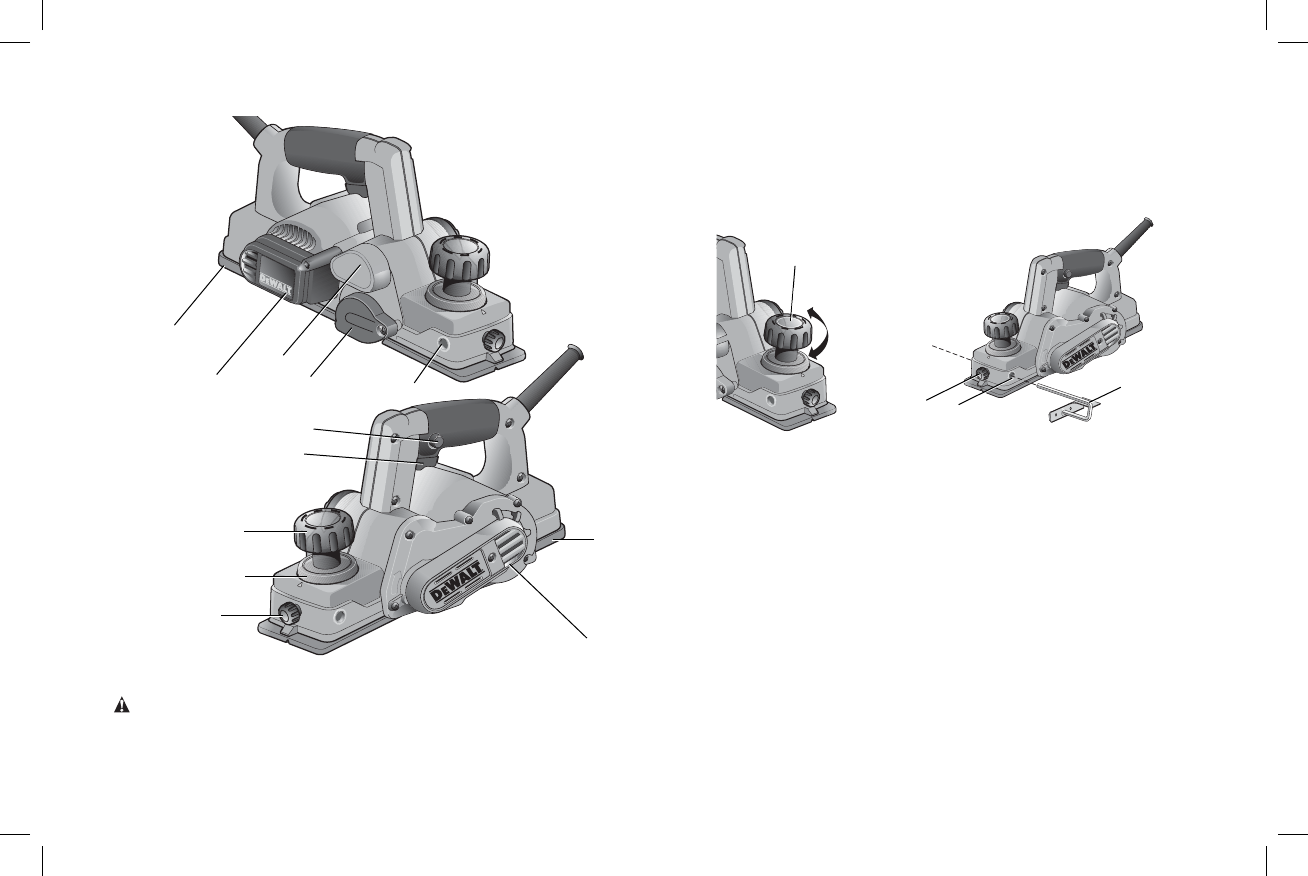
FIG. 1
I
D
C
H
G
B
A
K
J
F
E
ASSEMBLY AND ADJUSTMENTS
WARNING: To reduce the risk of serious personal injury, turn tool off and
disconnect tool from power source before making any adjustments or removing/
installing attachments or accessories. An accidental start-up can cause injury.
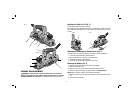
Adjusting the Depth of Cut (Fig. 2)
Turn the planing depth adjustment knob (D).
One revolution of the adjustment knob equals a 1.5 mm change in depth. Each click
of the adjustment knob represents 0.1 mm of depth, and will increase up to 1.0 mm
in depth.
D
FIG. 2
F
FIG. 3
G
L
Attaching and Removing the Parallel Fence (Fig. 3)
The parallel fence (L) is used for optimum tool control on narrow workpieces.
1. Loosen the wing parallel fence tightening bolt (F).
2. Fit the parallel fence (L) into hole (G) from either side.
3. Tighten the parallel fence tightening bolt.
4. To remove the parallel fence, proceed in reverse order.
Removing the Blades (Fig. 4)
1. Remove the three bolts (M) with the spanner (N) supplied.
2. Push the side guard (H) up.
3. Remove drum cover (Q) and remove the blade (O) from its holder.
4. Sharpen or replace the blades. To sharpen blades, see Sharpen Blades.
NOTICE: Risk of property damage. Always replace both blades.
5. Replace the drum cover (Q). Make sure the blade is flush with the planing shoe
(P).
6. Tighten the three bolts (M).