


English
8
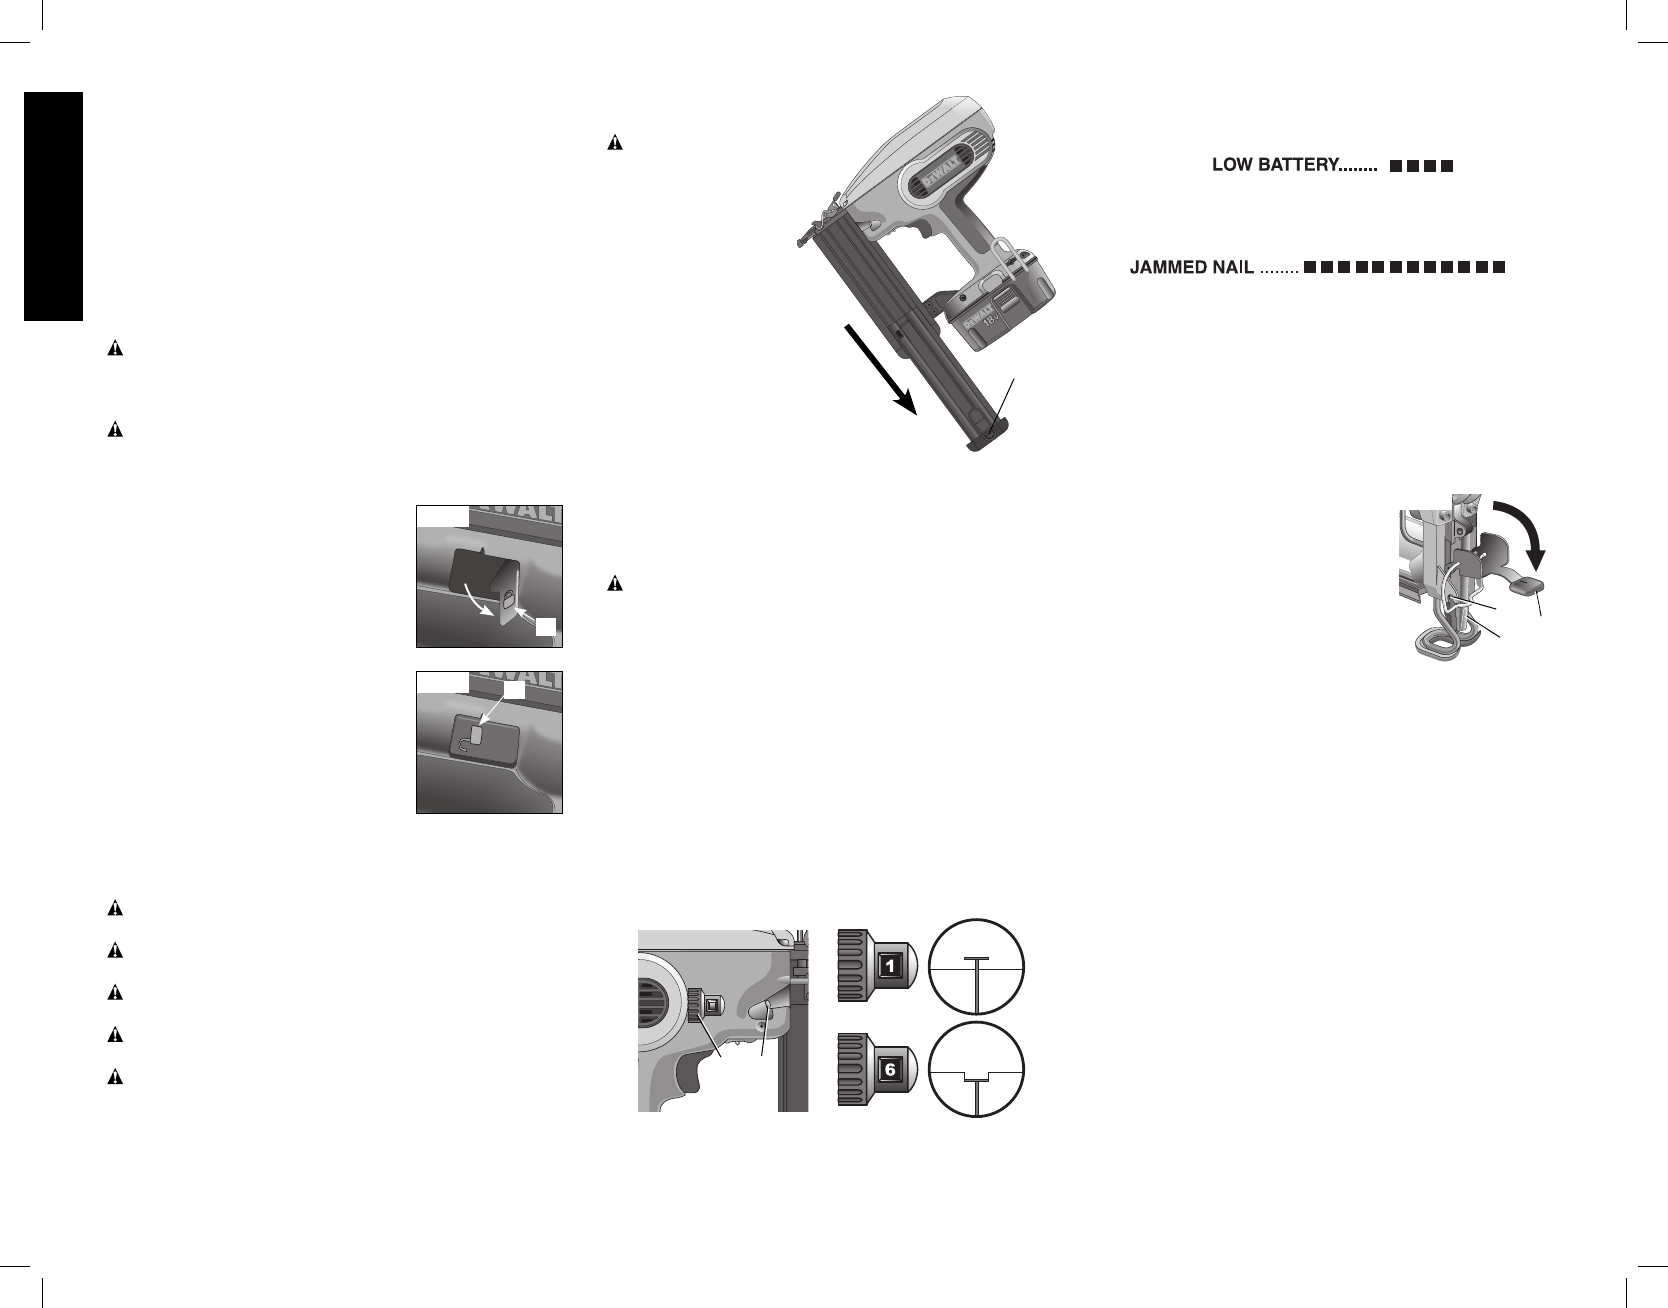
UNLOADING
H
THE TOOL
WARNING: The
contact trip lock-off
should always be
locked off whenever
any adjustments are
made or when tool is
not in use.
1. Press the nail
pusher latch
(H) and pull the
magazine (G)
rearward.
2. Tip the tool up
until the nails
slide freely out of
the magazine.
3. Open the jam clear door on the nosepiece to verify
there are no nails remaining.
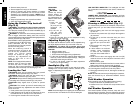
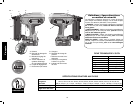
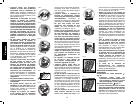
Adjusting Depth (Fig. 10)
The depth that the fastener is driven can be adjusted using
the depth adjustment wheel (C) on the side of the tool.
WARNING: To reduce risk of serious injury from
accidental actuation when attempting to adjust depth,
ALWAYS:
• Remove battery pack.
• Engage contact trip lock-off.
• Avoid contact with trigger during adjustments.
1. To drive the nail shallower, rotate the depth adjustment
wheel (C). There are twelve depth settings, 1 being the
shallowest and 6 being the deepest.
2. To sink a nail deeper, rotate the depth adjustment
wheel (C) to a higher setting.
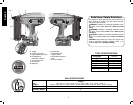
Headlights (Fig. 10)
There is a headlight (D) located on each side of the nailer.
Headlights turn on upon battery insertion, activation of the
trigger, or depressing the contact trip.
C
D
FIG. 10
NOTE: These headlights are for lighting the immediate work
surface and are not intended to be used as flashlights.
3. Remove battery from tool.
4. Ensure magazine is empty of all fasteners.
5. Check for smooth and proper operation of contact
trip and pusher assemblies. Do not use tool if either
assembly is not functioning properly. NEVER use a
tool that has the contact trip restrained in the actuated
position.
6. Keep tool pointed away from yourself and others.
7. Insert fully charged battery pack.
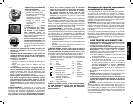
Using the Contact Trip Lock-off
(Fig. 8, 9)
WARNING: To reduce the risk of serious personal
injury, DO NOT keep trigger depressed when tool is not in
use. Keep the contact trip lock-off switch LOCKED (Fig. 8)
when the tool is not in use.
WARNING: To reduce the risk of serious personal injury,
lock off trigger, disconnect battery pack from tool and
remove fasteners from magazine before making adjustments.
Serious personal injury may result.
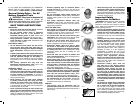
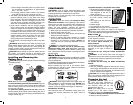
Each D
EWALT nailer is equipped with
FIG. 8
B
a contact trip lock-off (B) which when
pulled downward with the lock
symbol showing in Figure 8, prevents
the tool from firing a nail.
When the contact trip lock-off is
oriented as shown in Figure 9, the
tool will be fully operational. The
contact trip lock-off should
FIG. 9
B
always be locked off (Fig. 8)
whenever any adjustments are
made or when tool is not in
immediate use.
NOTE: Tools equipped with selective
actuation, when in bump fire mode
will allow the motor to start upon
trigger pull. This is normal operation. The contact trip lock-
off constrains the contact trip from discharging a nail.
Loading the Tool
WARNING: Keep the tool pointed away from yourself
and others. Serious personal injury may result.
WARNING: Never load nails with the contact trip or
trigger activated. Personal injury may result.
WARNING: Always remove battery pack before loading
or unloading nails. Serious personal injury may result.
CAUTION: Keep fingers clear of pusher to prevent
injury.
CAUTION: The contact trip lock-off should always be
locked off whenever any adjustments are made or when
tool is not in use.
1. Press pusher latch (H) and pull magazine back.
2. Insert fasteners into the side of the magazine. Be sure
the fasteners ride on their tips in the nail channel.
3. Push magazine closed until it locks into place.
LOW BATTERY INDICATOR: The headlights will flash
four consecutive times and then shut down to indicate low
battery.
JAMMED NAIL INDICATOR: The headlights will flash
continually if a nail becomes jammed in the nosepiece (see
Clearing a Jammed Nail).
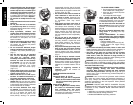
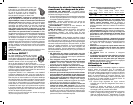
Clearing a Jammed Nail (Fig. 11)
If a nail becomes jammed in the nosepiece, keep the tool
pointed away from you and follow these instructions to
clear:
1. Remove battery pack from tool and engage contact
trip lock-off.
2. Press the nail pusher latch (H) and pull the magazine
(G) rearward.
3. Tip the tool up until the nails slide freely out of the
magazine.
E
L
FIG. 11
M
4. Lift the jam clearing latch (E)
then pull up to open front door
(L).
5. Remove bent nail, using pliers
if necessary.
6. If driver blade is in the down
position, insert screwdriver
or other rod into nosepiece
and push driver blade back in
position.
7. Close the front door and engage the wire form (M)
under the 2 arms on the nosepiece. Push latch until it
locks in place.
8. Reinsert battery pack.
NOTE: The tool will disable itself and not reset until the
battery pack has been removed and reinserted.
9. Reinsert nails into magazine (see Loading the Tool).
10. Push magazine closed until it locks into position.
11. Disengage contact trip lock-off, allowing the contact trip
to move.
NOTE: Should nails continue to jam frequently in nosepiece,
have tool serviced by an authorized D
EWALT service
center.
Cold Weather Operation
When operating tools at temperatures below freezing:
1. Keep tool as warm as possible prior to use.
2. Actuate the tool 5 or 6 times into scrap lumber before
using.
Hot Weather Operation
Tool should operate normally. However, keep tool out of
direct sunlight as excessive heat can deteriorate bumpers
and other rubber parts resulting in increased maintenance.