7
5
5-25-1
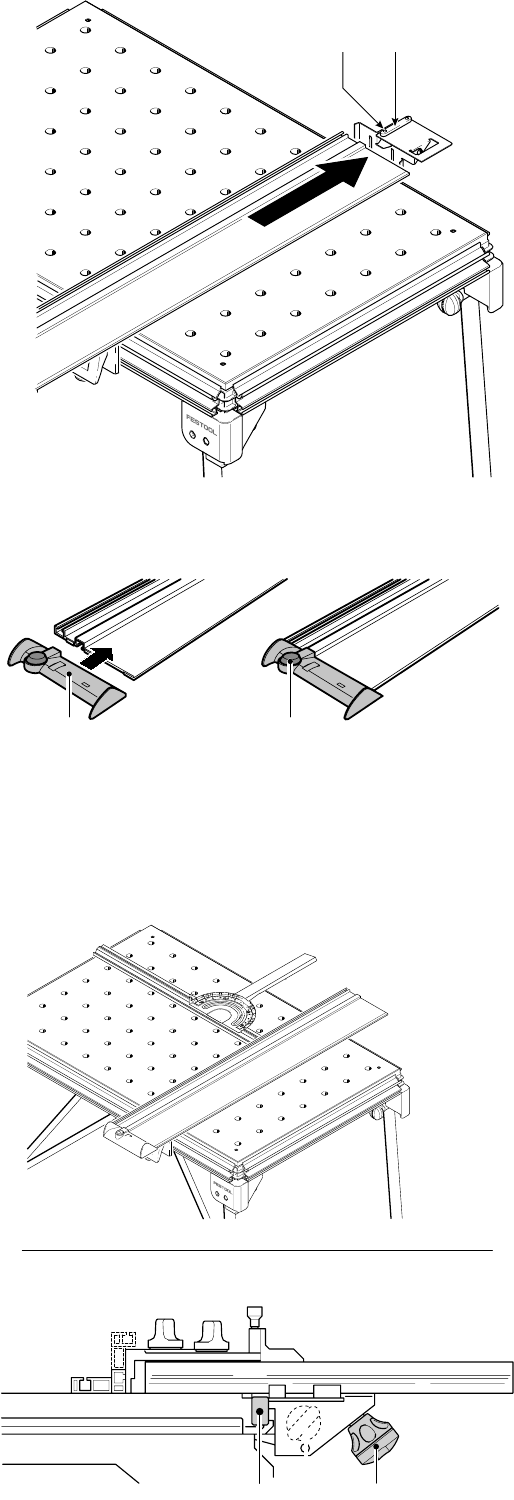
Step 4: Attaching the guide rail
To attach the guide rail, place on the key
[5-2] and make sure that the end of the
rail is resting on the support plate and the
key is located correctly in the groove.
Secure the guide rail in this position with
the two screws [5-1] and tighten using the
hexagon wrench.
Lower the guide rail onto the support unit
so that the groove in the underside of the
guide rail fi ts on to the pin [4-5] of the
support unit. The guide rail is properly at-
tached when only a very slight lateral pres-
sure is necessary for the pin to engage into
the guide rail.
The defl ector [6-1] is pushed onto the end
of the guide rail. Close the rotary knob
[6-2]. The defl ector prevents the extrac-
tion hose and the power cable from catch-
ing on the guide rail.
Step 5:
Attaching the pre-set
profi le setting rail
The rail can be attached at any point along
the clamping edge of the bench and is so
versatile, it can be used as a cross stop or
a longitudinal stop.
NOTE: Before attaching, make sure that
the V groove on the fence is not dirty.
Open the clamping jaws using the knob
[7-2]. Place the fence with guide rail [7-1]
onto the clamp rail from above. Secure the
clamp segment using the knob [7-2].
6
6-1 6-2
7-2
7-1
7


