


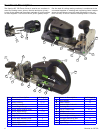


14 Domino XL DF700
Applications
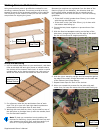
Edge Joining Boards
Edge joining boards is a common method for creating wide
boards from a series of narrower boards. The Domino
tenons add strength to the joint and also assist in aligning
the boards to be ush.
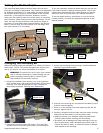
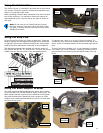
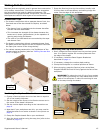
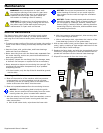
For edge joining boards, a series of tenons are placed down
the length of the joint. The rst tenon is used to register the
two boards horizontally, so it is milled at standard width.
The remaining tenons align the boards ush and may be
milled with an oversize width.
Tips for Successful Joining
► Use the stop pins (page 11) for the
rst mortise slot with the mortise width
lever set to the narrow setting (page
8).
► For subsequent mortise slots you can
keep the mortise width at the minimum
setting, but you may nd it easier to set the mortise width
dial to the next widest setting.
► Place the mortise slots 6 to 12 inches apart for standard
joints, but this spacing should be decreased for joining
plywoods or when a stronger joint is needed.
► Instead of marking the mortise placements with pencil
lines, you can use the optional Cross Stops (page 12) to
evenly space the mortises down the length of the boards.
To do this, use the stop pin in the previous mortise slot.
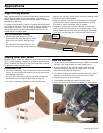
Making Miter Box Joints
Without tenons, miter box joints are fairly weak because the
joint is predominately endgrain to endgrain. Tenons signi-
cantly increase the strength of the joint and make it easier
to assemble and clamp the pieces.
Construction Tips
► For thinner materials, keep the mortise close to the inside
corner. This minimizes the chances for boring all the way
through the workpiece.
► For very thin materials, it may be necessary to shorten
the Domino tenon length as described on page 18.
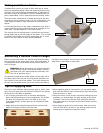
► For thicker materials, stacked mortises can be used.
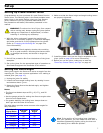
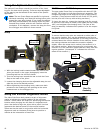
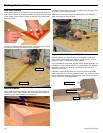
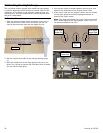
Setup and Machining
1. Tilt the fence to the appropriate angle. (Refer to the table
on page 7 for miter angles for multi-sided boxes.)
2. Lower the fence to the desired height. Note that the
mortise should be close to the inside corner to avoid
penetrating through the workpiece.
3. Tip: Before milling the mortise, double check your depth
settings to ensure you don’t cut all the way through.
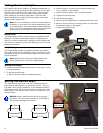
4. Plunge the joiner as shown below.
5. The stacked mortises are used for thicker stock.
6. Grasp the joiner by the auxiliary handle for best control.
Oversize
Width
Standard
Width
Pencil Lines