Supplemental Owner’s Manual 9
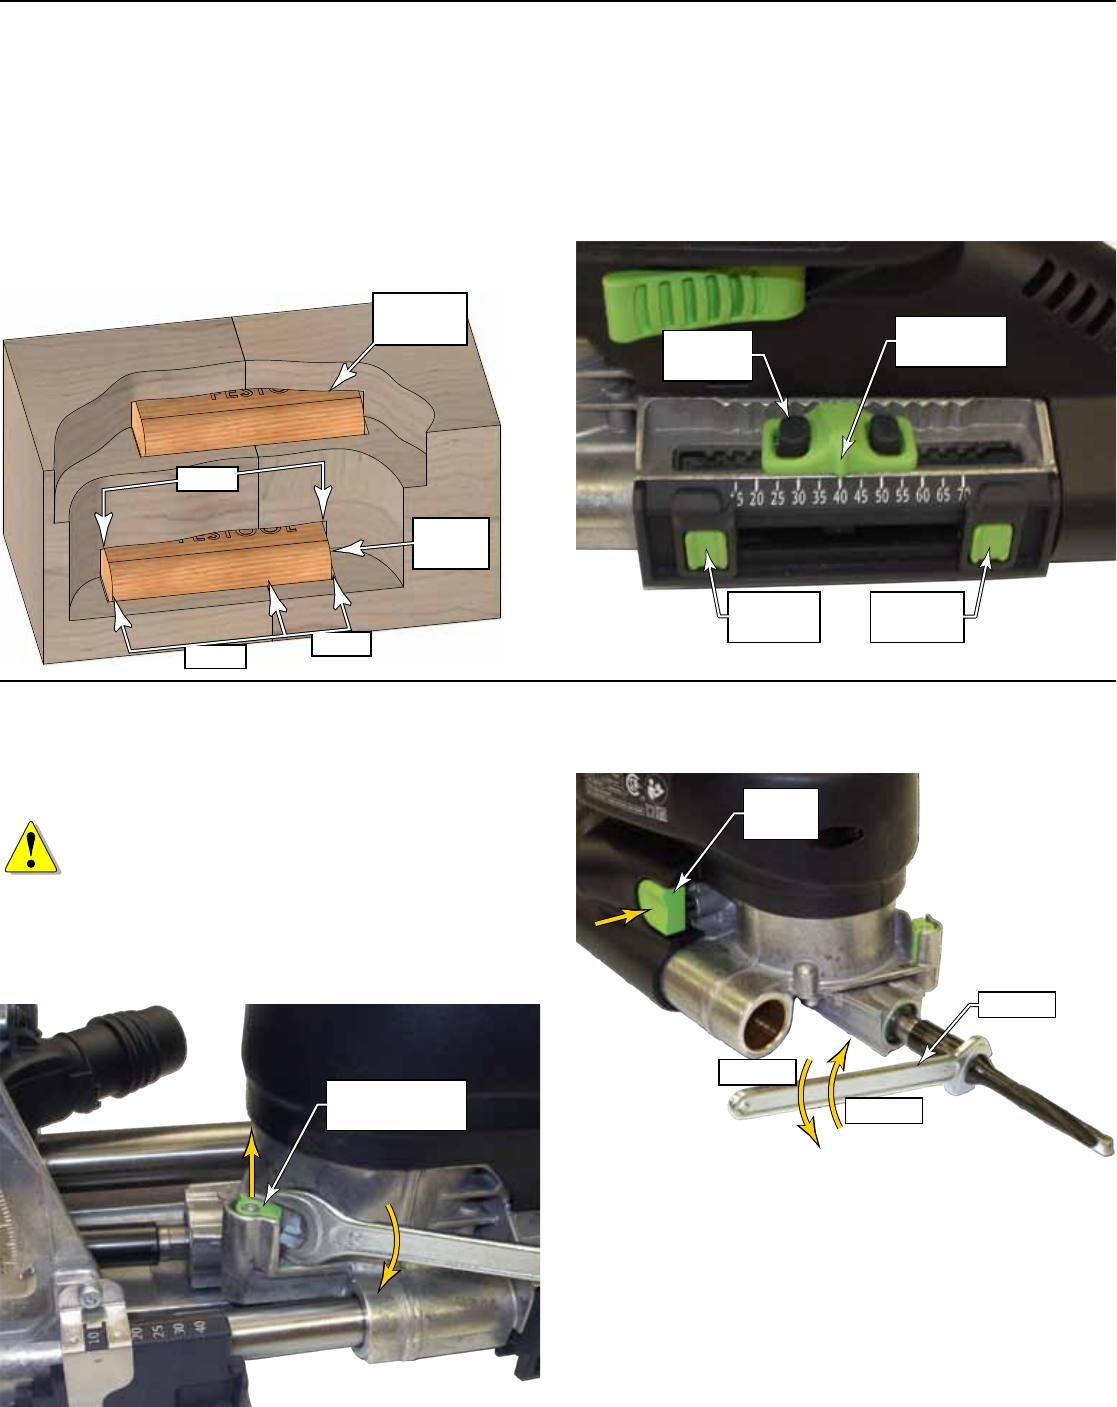
Setting the Mortise Depth
The mortising depth determines how deep into the work-
piece the mortising bit penetrates. This needs to be adjusted
for different sized tenons. In most cases, the tenon should
be centered across the joint, and the depth of the mortise
should be ½ the length of the tenon. However, in some
cases you may want to have more of the tenon in one piece
than the other (lower Domino tenon pictured below). In this
case, the sum of the two depths must equal the length of
the tenon. (In the offset tenon example below, the Domino
tenon is 50 mm long, the left mortise is 35 mm deep, and
the right mortise is 15 mm deep.)
Offset
Domino
Centered
Domino
15mm
35mm
50mm
If you are frequently switching depth settings, use the two
limit stops to assist in setting those positions. This is also
helpful when working with thin materials and you set the
maximum limit to be less than your material thickness.
To set the depth position, press down on one of the two
release buttons, and slide the adjustment pointer to the
desired setting.
Depth
Adjustment
Minimum
Limit
Release
Button(s)
Maximum
Limit
Changing the Mortising Bit
Different mortising bits are available for a variety of Domino
tenon sizes. The DF 700 comes equipped with a 12mm bit;
and 8, 10, and 14 mm bits are available as an option.
WARNING! To reduce the risk of injury from contact
with a moving mortising bit, always unplug the tool
before changing mortising bits or removing the
fence body from the motor housing.
1. Using the provided 12mm wrench, pry up on the fence
body release lever, and slide the fence body off the motor
housing. (The inset photograph on page 6 shows the
fence body and motor housing when separated.)
2. Press and hold the spindle lock button. This stops the
spindle from turning while you loosen the mortising bit.
3. Loosen the mortising bit by turning it counterclockwise
(standard right-hand thread).
Spindle
Lock
Wrench
Tighten
Loosen
4. Insert a new mortising bit, and start the threads by hand
to avoid cross-threading.
5. Press in on the spindle lock while tightening the bit. Do
not over tighten the bit.
6. Carefully reinstall the fence body onto the motor housing,
and push the fence body in until the latch clicks.
► Make sure there is no sawdust inside the guide tubes
(hollow tubes) before inserting the fence body.
► Be careful not to damage the linear bearings (inner sur-
face of guide tube) when reinstalling the fence body. If
it does not slide on easily, it means the fence is skewed
with respect to the bearings.


