


4
Note: The lower the A.W.G. number, the thicker
the cord.
Electronic control
ELECTRONIC
The sander is fitted with full-wave
electronic control offering the following
facilities:
Smooth run-up
The electronically controlled smooth run-up
ensures jolt-free starting.
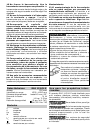
Speed control
The speed controller (2.1) allows stepless
adjustment of the drive spindle speed.
The numbers on the speed controller correspond
approximately to the following idling speed
values:
Constant speed
The selected motor speed is kept constant by
electronic control. This provides a constant
working speed, even under load.
Temperature protection
Extreme overload in continuous operation will
cause the motor to heat up. An electronic
temperature monitor is fitted to prevent
overheating (burning-out of the motor). The
electronic safety device switches the motor off
before a critical motor temperature is reached.
The rotary sander operational again and capable
of delivering full power after a cooling period of
approx. 3 - 5 minutes. The cooling period can
be reduced by keeping the motor running
(under no-load conditions).
Do not use the sander if the
electronic control is defective, since this can
lead to excessive speeds. A defect of this kind
can be recognized by the fact that the smooth
run-up is absent, the noise level under no-load
conditions is higher or the speed cannot be
controlled.
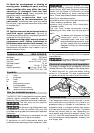
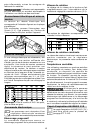
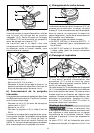
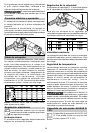
Extraction hood AH-RAS D 115
The extraction hood AH-RAS D 115 (3.1)
can be used in conjunction with the
sanding pad STF D 115.
a) Fitting
Before fitting the extractor hood, ensure that
the clamping lever is in released" position
(3.4). Press the extractor hood onto the
clamping throat (3.2) of the rotary sander and
secure the hood by moving the clamping lever
forward (3.3).
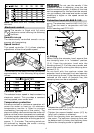
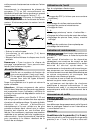
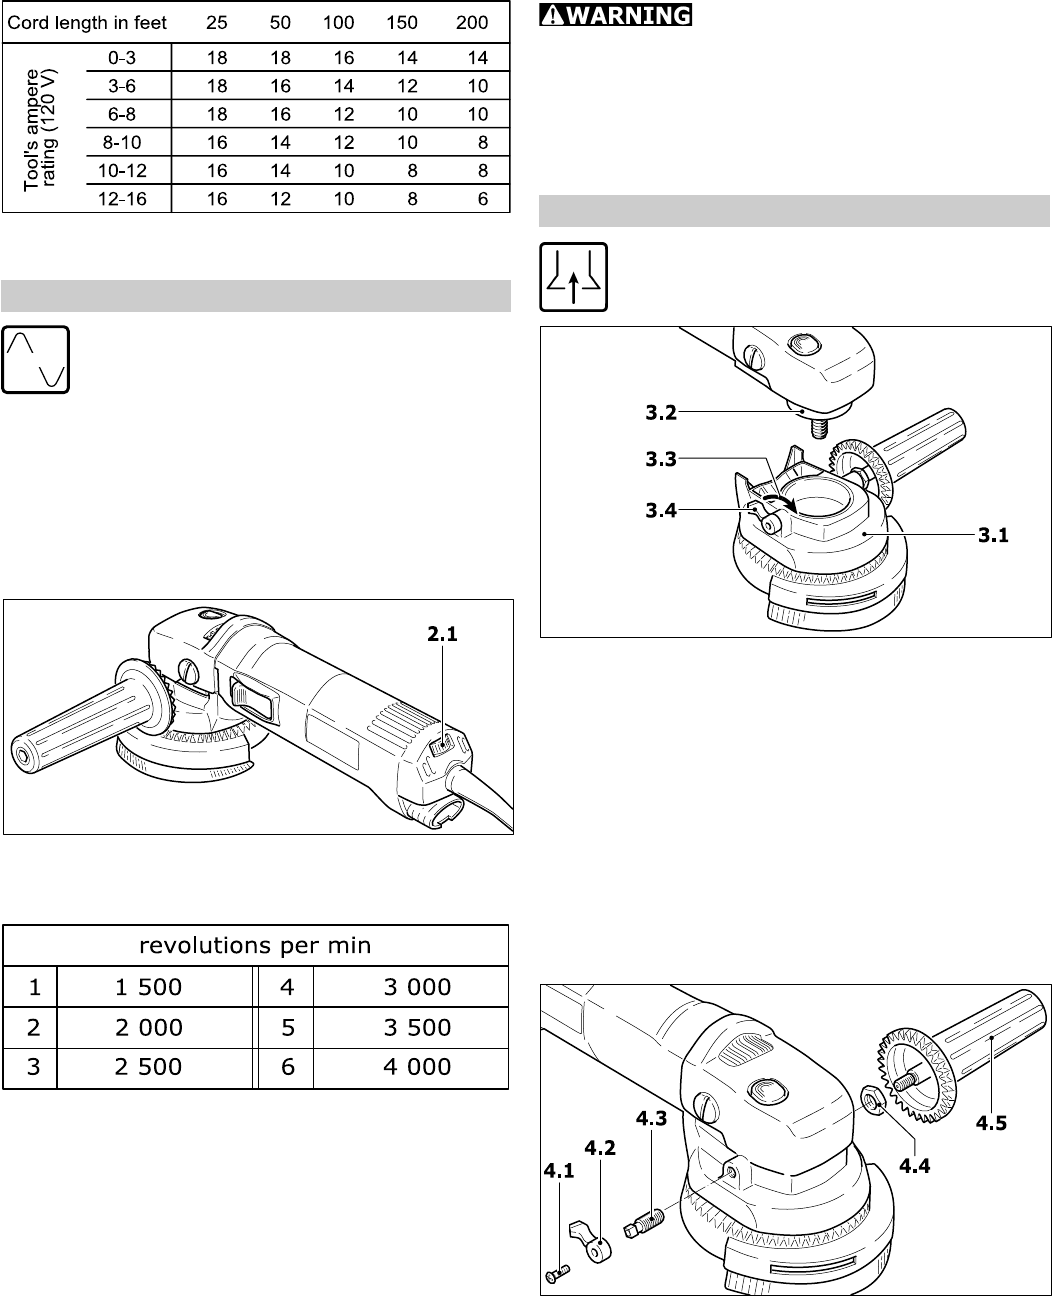
Do not work with the machine unless the
extractor hood is clamped firmly and securely
to the clamping throat. If the clamping force is
reduced as the result of frequent use, the
clamping lever can be re-adjusted:
- Release the screw (4.1) on the clamping lever
and remove the lever (4.2).
- Tighten the square-headed screw (4.3) by
hand until a tension is obtained.
- Re-fit the clamping lever and secure it with
the screw. The optimum clamping force can
be determined by closing the clamping lever
before the clamping screw is tightened.