10
ASSEMBLY & OPERATION
PRIOR TO OPERATION
1. Check Power Supply
Ensure that the power source to be utilized conforms to the power source requirements specified
on the tool nameplate. Ensure the receptacle being used accepts the plug tightly. If a faulty
receptacle is used, it may cause overheating, resulting in a serious hazard.
2. Check Work Area
Confirm that the work site is placed under appropriate conditions conforming to precautions
prescribed in the safety section of this manual.
3. Before Plugging in the Tool
Ensure that the power tool switch is in the OFF position to prevent the tool from accidental start up
which could cause serious injury.
4. Blade Installation
a) Unplug tool
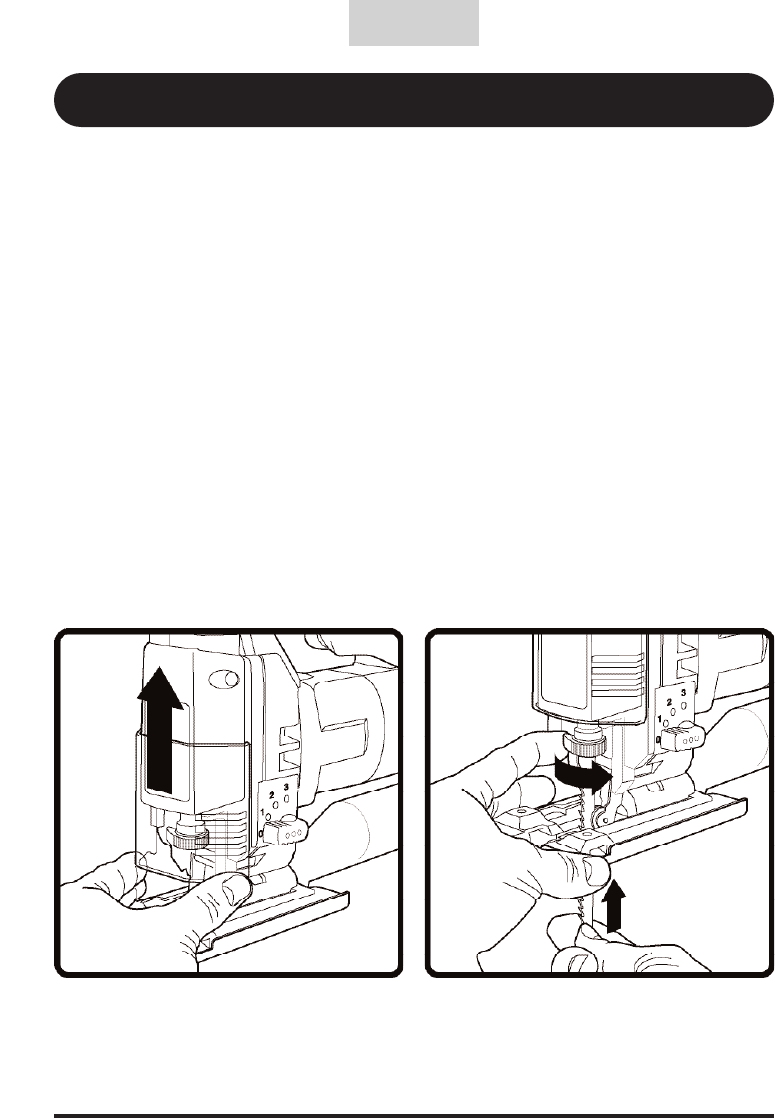
b) Slide the chip guard up to allow access to the Quick Fix knob. – Fig 1
c) Turn the “Quick Fix” knob until it stops. – Fig 2
d) Insert the blade up to the stop and make sure the smooth side of the blade is resting against
the blade roller guide. – Fig 2
e) Release the “Quick Fix” knob. - Fig. 3
f) Check that the blade is securely fixed by pulling downward.
g) Slide the chip guard down until it stops. – Fig 4
5. Adjusting the Blade Speed
a) Variable Speed Trigger Switch
This tool is equipped with a variable speed trigger switch. The tool can be turned on or off
by squeezing or releasing the trigger. The speed can be adjusted from the minimum to the
maximum speed selected on the preset adjusting dial by the pressure you put on the trigger.
English
Fig. 1
Fig. 2


