


14
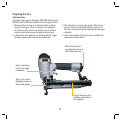
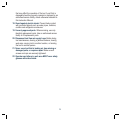
Adjusting the exhaust direction:
1. The finish nailer is equipped
with an adjustable direction
exhaust deflector (1). Simply
adjust the directional exhaust
deflector so that the exhaust
air blast will be directed away
from the operator. Grasp the
deflector and rotate it to the
desired position for the current
application.
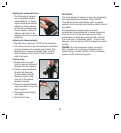
Adjusting the fastening depth:
1. Regulate the air pressure to 120 PSI at the compressor.
2. Connect the air hose to the nailer and test for penetration
by driving fasteners into a sample piece of wood. If the
fasteners do not achieve the desired depth, rotate the
depth adjustment thumb wheel (10) until the desired
depth is achieved.
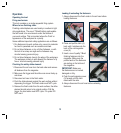
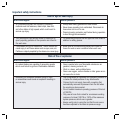
Clearing a jam:
1. Disconnect the air supply
from the nailer and remove all
fasteners from the magazine.
2. Press the quick release latch
(9) which will disengage
the driver safety cover (8).
Remove the driver safety
cover (8) so the jammed
fastener is exposed.
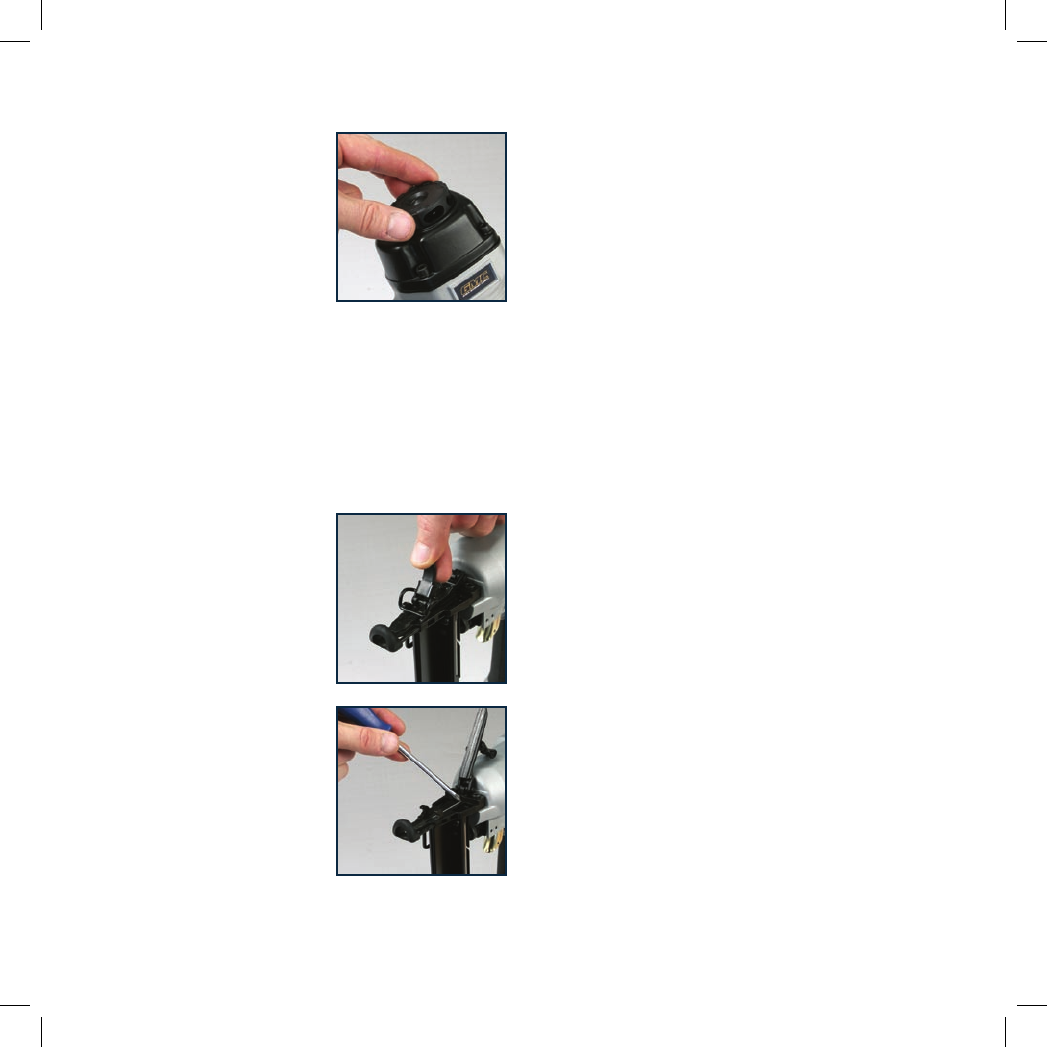
3. Remove the jammed fastener,
using screwdriver or long nose
pliers if required.
4. Close back the driver safety
cover tightly.
5. Test the finish nailer.
Air source
This tool is designed to operate on clean, dry, compressed
air at regulated pressures between 75 and 120 PSI.
The preferred system would include a filter, a pressure
regulator, and an automatic oiler located as close to the tool
as possible.
All compressed air contains moisture and other
contaminates that are detrimental to internal components
of the tool. An air line filter will remove most of these
contaminates and significantly prolong the life of the tool.
If an in-line oiler is not available, place 3 - 4 drops of non
detergent oil into the tool’s air inlet at the beginning of each
workday.
DANGER. All air line components (hoses, connectors,
filters, regulators, etc.) must have a minimum working
pressure rating of at least 120 PSI or 150% of maximum
system potential, whichever is greater.