


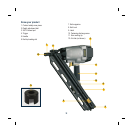
14
Operating the tool
Firing mechanism
This tool operates on a single (full sequential actuation)
firing system.
Single (full sequential actuation) firing
To fire, grip tool firmly to maintain control, position the
contact safety nose (1) of tool onto work surface, and
squeeze trigger (4) to fire a fastener. Allow tool to recoil
away from work surface as fastener is driven.
This “full sequential actuation” method provides the most
accurate fastener placement.
Where to use framing nailer
Framing nailer guns are used mainly in heavy construction
applications. Some additional important safety applications
are as follows:
1. Fire fasteners into work surface only, never into materials
too hard to penetrate such as concrete and steel.
2. Do not drive fasteners on top of other fasteners, or with
the tool at too steep an angle as the fasteners may
ricochet causing personal injury.
3. Do not drive fasteners close to the edge of the workpiece.
The workpiece is likely to split allowing the fastener to fly
free or ricochet causing personal injury.
Checking the safety strike element
1. Disconnect the air hose from the framing gun nailer and
remove all fasteners from the magazine (7).
2. Make sure the trigger (4) and the contact safety nose (1)
move freely up and down.
3. Reconnect air hose to the framing nailer.
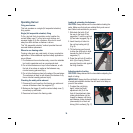
Loading & unloading the fasteners
CAUTION. Always disconnect the hose before loading the
nailer. Make sure that nails are collated firmly and are not
bent. Select nails suitable for your work.
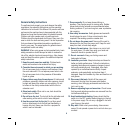
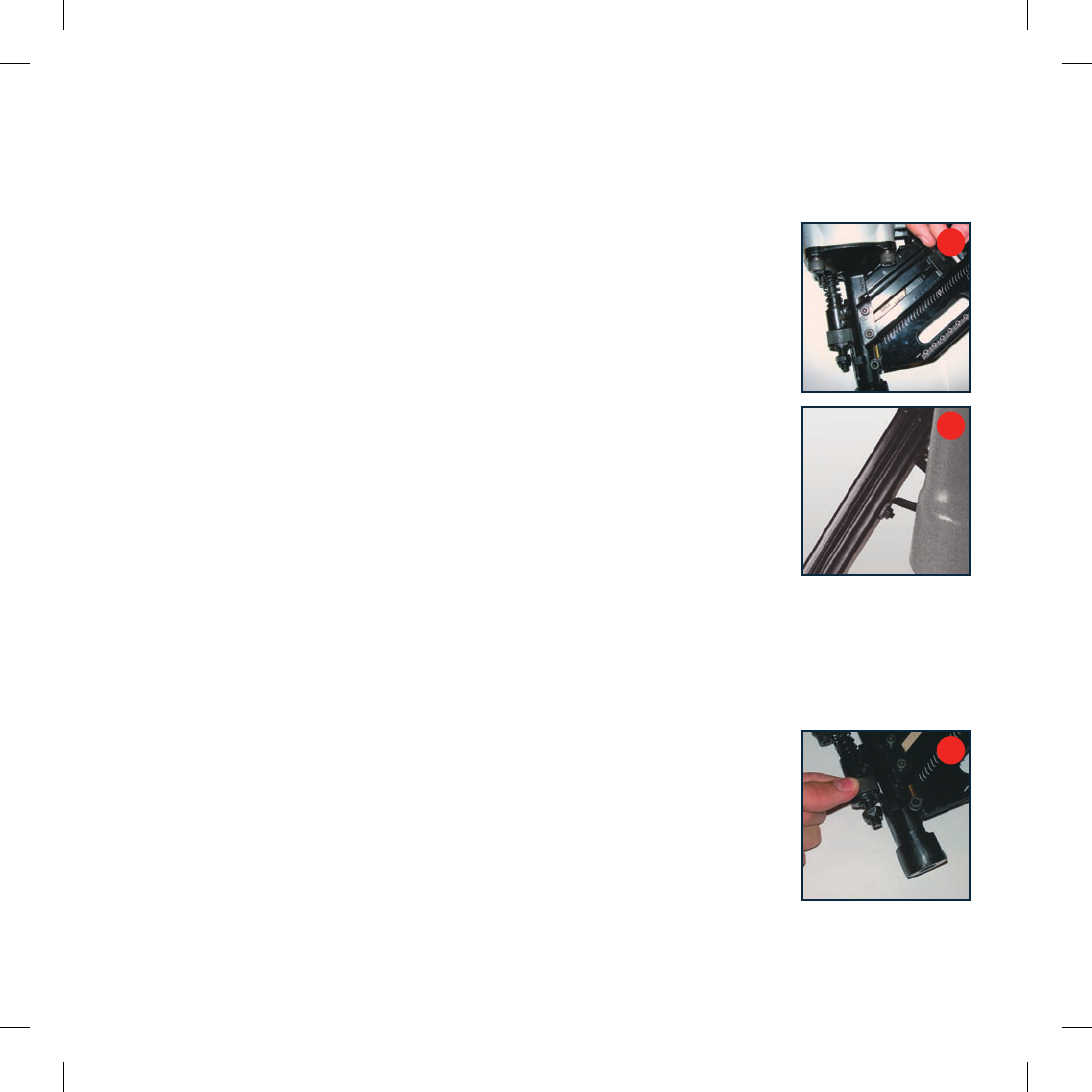
1. Slide back the latch (9) all
the way to the back of the
magazine (7) until the nail lock
(8) has been engaged (Fig. A).
2. Insert the strip of nails into
the nail top loading slot (6)
(Fig. B).
3. Tilt the framing gun forward
to allow the strip nails to slide
towards the front of the nail
magazine (7)
4. Press the nail lock (8) and the
latch (9) will spring forward,
securing the strip nails against
the firing chamber.
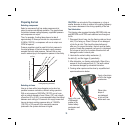
Adjusting depth of nailing
CAUTION. Always disconnect the hose before adjusting the
depth of nailing.
IMPORTANT. Always test the nail depth on a sample piece
of wood and establish whether the nail head is too deep or
proud of the surface.
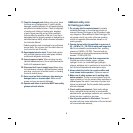
1. To adjust the nail driving
depth, rotate the Depth
adjustment dial (2) at the
front of the adjustment plate,
rotate anticlockwise (up the
thread) for deeper nail driving
and likewise, rotate clockwise
(downwards) for a flush nail
driving (flat to surface),(Fig. C).
A
B
C