


12
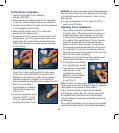
3. Connect the completed assembly to the air line by
pulling back the outer sleeve of the quick coupler at the
end of the air hose and insert the quick change blower
assembly. Once inserted, release the outer sleeve of
the coupling and make sure the accessory and hose are
securely connected.
For instructions on how to assemble the accessories to
the outlet side of the quick release blow gun refer to
page 12 of this manual.
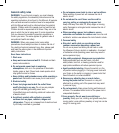
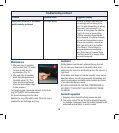
4. To discharge the air from
the gun, squeeze the trigger
(Fig. J). The further the
trigger is squeezed, the
greater the discharge.
5. To stop the air discharging,
release the trigger.
Note. When connecting accessories to the outlet of the quick
change blow gun (15) always disconnect it from the hose
first. This will allow you more freedom as well as provide
for a more easier and safer attachment/detachment of
accessories. The dust blow gun is to be used in conjunction
with either the tapered inflation fitting (17) or the inflation
needle (19).
IMPORTANT. Take extreme care when using the blow gun
air tool. The discharge air velocity is VERY high.
• Never point the air gun at anyone.
• Think when you are using the gun. Never allow
debris to be blown in the direction of another person,
or other objects.
• Use safety glasses, a face or dust mask and appropriate
clothing for the task being undertaken.
• Never apply the outlet of the air gun against a
person’s body.
• Never look down the air outlet hole of the gun.
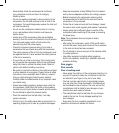
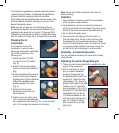
Connecting the inflation needle
to the quick change blow gun
In order to use the inflation needle you are required to
attach the blow gun adaptor (16) to the blow gun (15).
Proceed to screw in the inflation needle (19) to the safety
nozzle (Fig. K&L).
IMPORTANT. Take extreme care when using the
inflation needle.
• Never point the needle at anyone.
• Use safety glasses, a face or dust mask and appropriate
clothing for the task being undertaken.
• Never apply the outlet of the needle against a
person’s body.
• Never look down the air outlet hole of the inflation needle
• Always apply lubricant to the needle before inserting
and inflating.
• When inserting the needle, insert the open end of the
needle into the valve in a slow and safe manner.
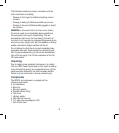
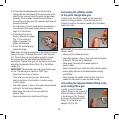
Connecting the tapered inflation fitting to the
quick change blow gun
In order to use the tapered
inflation fitting you are required to
attach the blow gun adapter (16)
to the blow gun (15). Proceed
to screw in the tapered inflation
fitting (17) to the blow gun
adaptor (16) (Fig. M).
J
L
K
M