


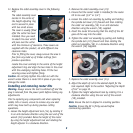
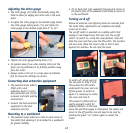
Adjusting the mitre gauge
1. The mitre gauge (10) slides horizontally along the
table to allow for edging and mitre cuts in the work
piece.
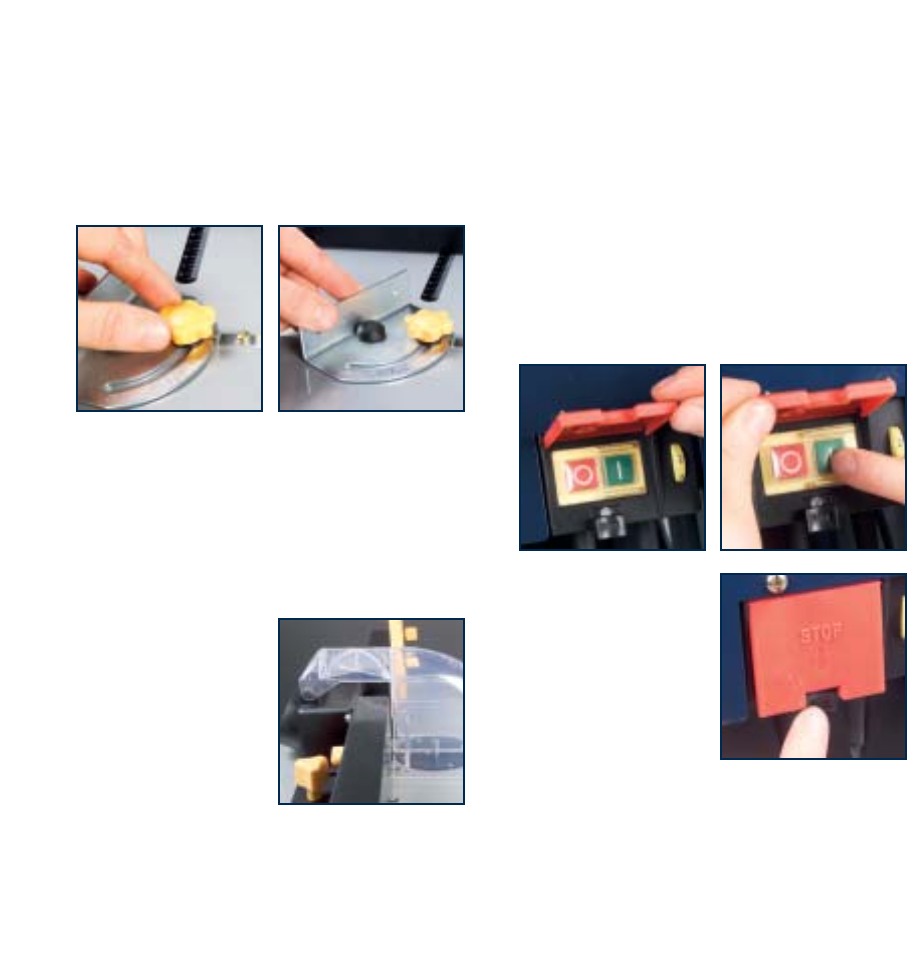
2. To adjust the mitre gauge to the desired angle loosen
the mitre gauge locking knob (11) and rotate the
mitre gauge to the desired angle from 0° to 45°.
3. Tighten the mitre gauge locking knob (11).
4. For greater ease of use when making mitre cuts the
fence can be positioned in its furthest position away
from the cutter.
5. Always make a trial cut in a scrap piece of material
first to ensure the settings are correct.
Connecting dust extraction equipment
1. The powered router table is
fitted with a dust
extraction hood (7) and a
dust extraction port (8) for
a cleaner and safer working
environment.
2. Connect the dust extraction
equipment to the dust
extraction port (8).
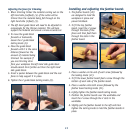
Mounting to a workbench
1. The powered router table has a hole in each corner of
the plastic foot allowing it to be bolted to a workbench
for greater stability.
2. Fit an 8mm bolt (not supplied) through each corner of
the plastic foot of the powered router table to secure it
to the workbench.
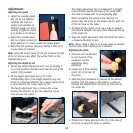
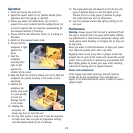
Turning on & off
Ensure all wrenches and adjusting tools are removed from
the router table, adjustments are complete and safety
covers are in place.
The on/off switch is operated via a safety switch that
employs a red hinged cover that clips over the on/off
switch. To switch on, unclip the cover fastener, raise and
hold the cover and then press the ON switch. The machine
will now start. Allow the cover to fall so that it rests
against the switches. Do not close the cover.
To switch off, simply push on
the red cover to snap it shut.
This pushes the OFF button
underneath the cover and cuts
off the power. To switch on
again it is necessary to unclip
the cover and raise it.
This product is fitted with an
electro-magnetic switch for
added protection. In the case
where the electrical supply is interrupted, the switch will
return to the off position and will need to be reset by
pressing the green "on" button again to restart the
motor.
12