


13
Adjusting the driving
depth of screws
The depth to which a screw
is driven into the wall or other
surface can be accurately set
to suit the type of screw and
the material being fastened.
It’s possible to drive screws so
that they are raised, flush or
countersunk into the material.
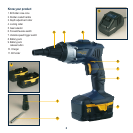
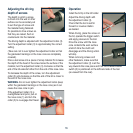
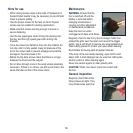
The driving depth is adjusted with the adjustment collar (3).
Turn the adjustment collar (3) to approximately the correct
setting.
(Take care not to over tighten the adjustment collar so that
the graduated markings on the nose cone are completely
covered).
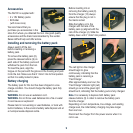
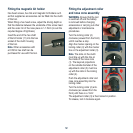
Drive a test screw into a piece of scrap material.To increase
the depth of the head of the screw below the surface of the
material, turn the adjustment collar (3) clockwise so that the
end of the bit extends further from the end of the nose cone.
To decrease the depth of the screw, turn the adjustment
collar (3) anti-clockwise so that the end of the bit is closer to
the end of the nose cone.
WARNING. Do not over tighten the adjustment collar (keep
within the graduated markings on the nose cone) as it can
cause the nose cone to jam.
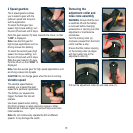
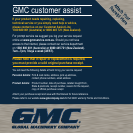
If the adjustment collar (3) is
overtightened and jams, pull on
the nose cone (1) and turn the
collar (3) to re-engage the thread.
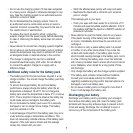
Operation
Install the bit tip in the bit holder.
Adjust the driving depth with
the adjustment collar (3).
Check that the tool is set for
forward or reverse rotation
as desired.
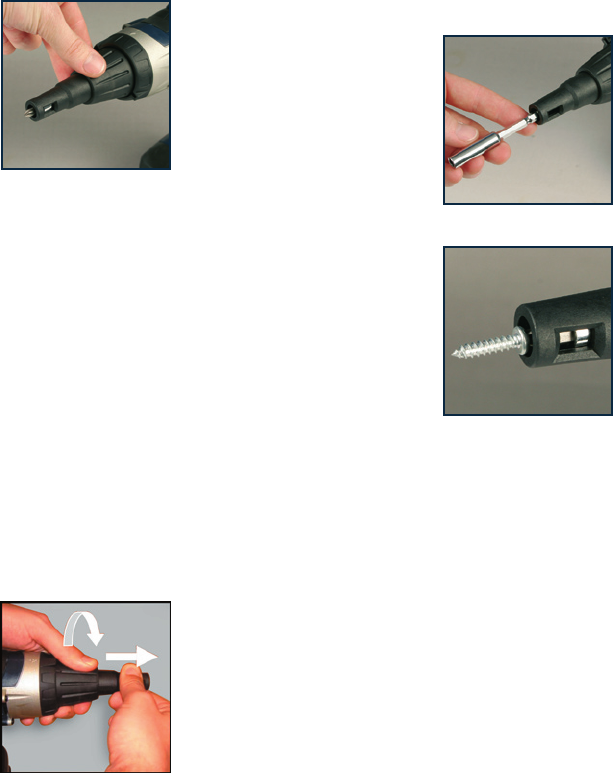
When driving, place the screw on
the bit, operate the trigger switch
and apply pressure to the tool.
Drive the screw until the nose
cone contacts the work surface
at which time the clutch will
disengage and the driving action
will stop.
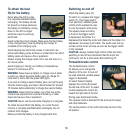
When removing screws and
other fasteners, make sure that
the adjustment collar (3) is all the
way towards the nose piece and that the forward/reverse
switch (6) is positioned on the left-hand side of the tool
(as viewed from the rear).