5
307–760
STARTUP
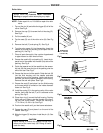
1. Place
the suction tube in the pail of paint.
2.
Plug in the sprayer
.
3.
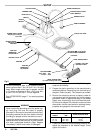
Open the priming valve 2 turns counterclockwise.
4.
T
urn the ON/OFF switch ON.
5.
You can see the paint being drawn into the suction
tube
(if the tube is clean). As soon as you see paint
flow through the priming tube, close the priming
valve.
This usually takes less than 30 seconds.
CAUTION
Failure
to completely close the priming valve after
the
system is primed will cause the valve to
erode,
greatly
shortening the valve life.
NOTE:
If your system is hard to prime, first try to force
feed
the suction tube. Hold the suction tube in a
vertical
position and pour paint into it. T
urn on
the
system.
If the system does not prime within one
minute, shut it off. Heavy viscosity paint may
need to be thinned. Be sure to follow the paint
manufacturer’s
recommendations on thinning.
6. When the outlet hose and extension tube are fully
primed, the motor will run when there is paint de-
mand,
but
appears to shut itself of
f when there is no
paint
demand.
NOTE:
An occasional start and stop of the motor when
the roller valve is not triggered is normal.
OPERATION
WARNING
To reduce the risk of electric shock, do not expose
the
system to rain. Always store the system indoors.
CAUTION
Always
allow cold equipment to warm to room tem
-
perature
before using to prevent damaging the sys
-
tem.
Always store the system indoors.
Do
not use lacquer or lacquer thinner
in the suction
and outlet hoses supplied with this system. These
fluids
quickly destroy the hose material. Use the op
-
tional
chemical–resistant hoses.
See
ACCESSORIES, page 17, for ordering optional
hoses.
CAUTION
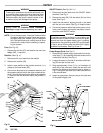
1.
With the system fully primed, trigger the roller valve
briefly until paint comes to the roller
.
2.
Experiment with triggering and rolling the paint until
you
determine just how often you need to trigger the
roller
valve to keep an even flow of paint to the roller
.
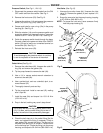
3.
To
adjust the extension tube length, loosen the
lock
-
nut
and extend or retract the tube. If retracting,
some
paint
in the tube will
be pushed out to the roller
. Roll
this
excess paint onto the wall, or completely retract
the tube, drain the excess paint into
a
pail, and then
adjust
the tube length. T
ighten the locknut
securely
.
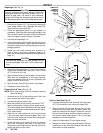
4.
Whenever you stop painting, turn the ON/OFF
switch
to OFF and trigger the roller
valve. Elevate the
roller end of the tube to prevent paint from draining
out
the roller end.
5.
Flush the system thoroughly and immediately after
each use to keep it in good working order. See
page
6.


