


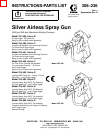


8 308-236
Installation/Operation
How to Check the Gun Diffuser Operation
WARNING
The
Fine–Finish Gun, Model 235–462, uses a
pre–orifice in the seat to develop the type of spray
pattern required for fine finishes. The pre-orifice
does not
dif
fuse the spray from the nozzle into an
irregular pattern, as with the other guns covered in
this manual. Therefore, to reduce the risk of an
injection injury when the tip guard is not installed,
such as during cleaning, take extra precautions to
keep your hands and body away from the nozzle of
the gun.
For all other guns, check the dif
fuser operation weekly
.
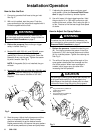
The gun dif
fuser/seat (2a) breaks up spray and re
-
duces the risk of fluid injection when the tip is not
installed. Perform the test below
. If it fails, replace the
entire Needle Kit, Part No. 235–474, as instructed on
page 9. Dif
fuser/seats are not sold separately since
the gun will leak if an old needle is used with a new
diffuser/seat.
WARNING
T
o reduce the risk of serious injury whenever you
are instructed to relieve pressure, always follow the
Pressure Relief Procedure
on page 5.
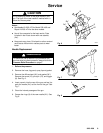
1.
Relieve the pressure.
2.
Remove the tip guard and spray tip.
3.
Start the sprayer and adjust it to the lowest
pressure.
4.
Aim the gun into a grounded metal pail while
holding it firmly to the pail. T
rigger the gun. If the
fluid emitted
is not
dif
fused into an irregular
stream, replace the entire needle kit immediately
.
See Fig. 5.
Fig. 5
2a
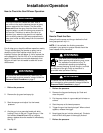
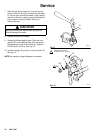
How to Flush the Gun
Always
flush the pump and the gun before the fluid
being sprayed can dry in it.
NOTE:
If it is available, the flushing procedure
provided in your pump or sprayer manual should be
used instead of this procedure.
WARNING
FIRE AND EXPLOSION HAZARD
Static sparking and splashing may cause
fire, explosion and serious injury
. To
reduce static sparking and splashing,
always remove the spray tip from the gun, and hold
a metal part of the gun firmly to the side of a
grounded metal pail when flushing.
WARNING
T
o reduce the risk of serious injury whenever you
are instructed to relieve pressure, always follow the
Pressure Relief Procedure
on page 5.
1.
Relieve the pressure.
2.
Remove the tip guard and spray tip. Soak and
clean the parts.
3.
Put the pump intake in a grounded pail of water or
solvent.
4.
Start the pump at its lowest pressure.
5. T
rigger the gun into the original pail. When solvent
appears, release the trigger
.
6.
Now trigger the gun into the solvent pail. Circulate
the fluid until the system is thoroughly flushed.
7.
Relieve the pressure.