


-14-
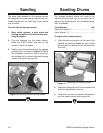
G0565 Adjustable Sponge Sander
3. Remove the belt and place a new belt on the
sanding drums
.
4. Center the sanding belt on the aluminium
drum and the sponge drum.
5. Tension the belt by rotating the handwheel,
then lock the belt in place. Note—The sponge
drum will expand when at full RPM, so ten
-
sion the belt just tight enough that the alumi
-
num drum rotates when the belt is turned by
hand.
Belt Tracking
Tracking is the process of adjusting the belts
so they remain centered on the drums. Always
adjust the tracking after replacing a sanding belt.
Neglecting to adjust tracking will damage sand
-
ing belts and they will need to be replaced before
they are worn out.
To adjust the sanding belt tracking:
1. Disconnect the machine from power!
2. Rotate the sanding belts by hand.
—If the belt remains centered in the drum,
go to step 7
.
—If the belt pushes against one edge of the
sanding drum, adjust the tracking.
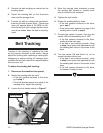
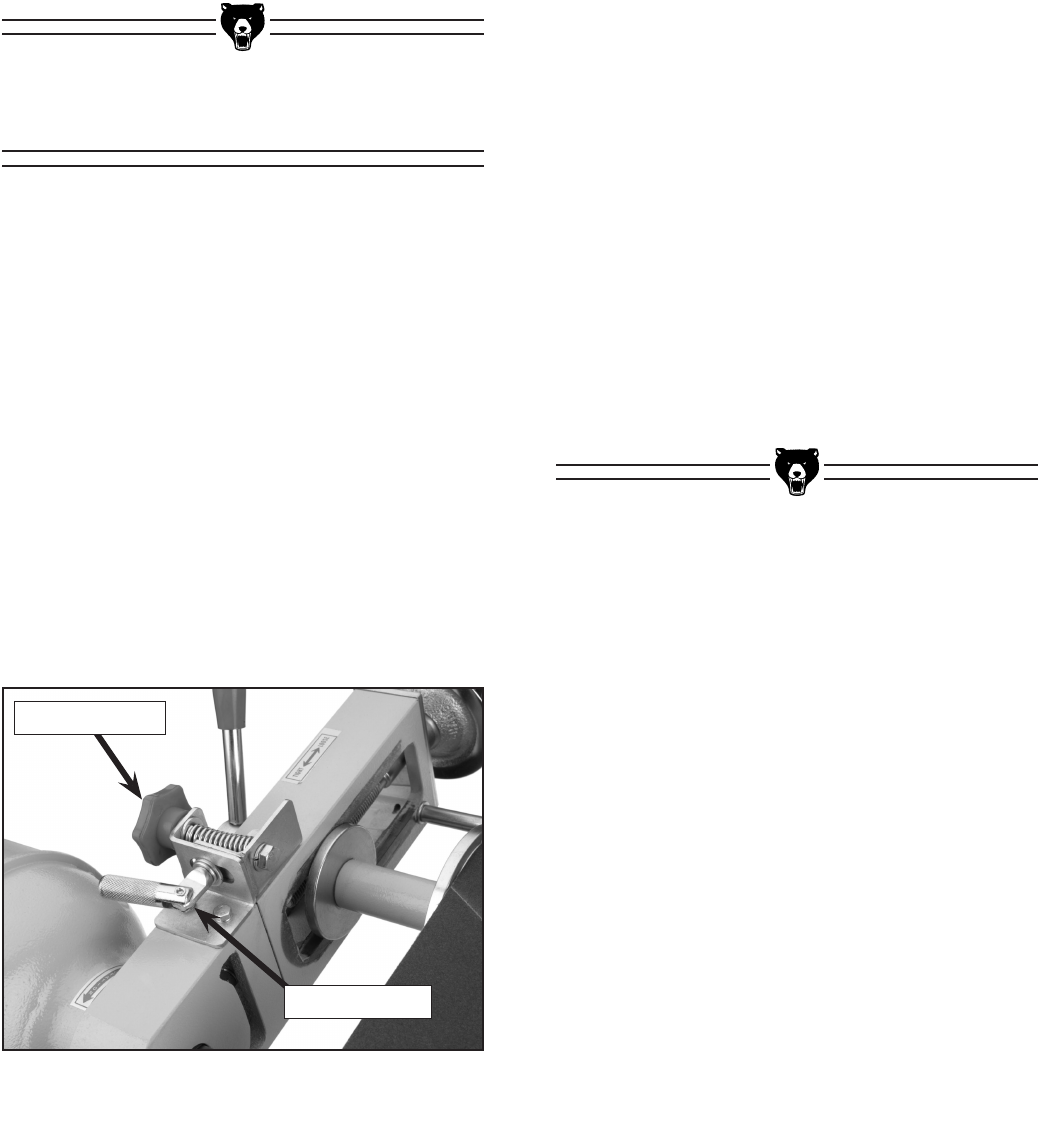
3. Loosen the lock handle shown in Figure 7.
4. Move the tracking knob clockwise to move
the sanding belt inwards or counter-clock
-
wise to move the belt outwards.
5. Tighten the lock handle.
6. Rotate the sanding belts by hand.
—If the belt remains centered in the drum,
go to step 7
.
—If the belt pushes against one edge of the
sanding drum, return to
step 3.
7. Connect the sander to power, then turn the
sander ON and immediately turn it OFF.
—If the belt remains centered in the drum,
continue to the next step.
—If the belt is not tracking correctly, return
to step 3 and make fine adjustments until
the sanding belt tracks in the center of the
drum.
8. Turn the sander ON and allow it to run for
several minutes without use.
—If the belt is not tracking correctly, return
to step 3 and make fine adjustments until
the sanding belt tracks in the center of the
drum.
—If the belt remains centered in the drum,
the sander is ready for use.
Figure 7. Tracking adjustments.
Lock Handle
Tracking Knob