


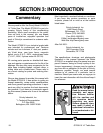

-14- G7209/10 14'' Table Saw
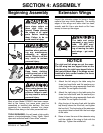
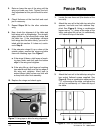
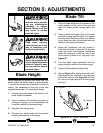
Figure 7. Using tape to shim for wing alignment.
Masking Tape
5. Raise or lower the rear of the wing until the
wing and table are flush. Tighten the bolt.
Any adjustment at this point should be mini-
mal.
6. Check flushness at the front bolt and read-
just if necessary.
7. Repeat Steps 3-4 for the other extension
wing.
8. Now, check the alignment of the table and
both wings with a straightedge. The straight-
edge should run flat across both wings and
the table top. If the straightedge contacts
both wings and the table evenly, you are fin-
ished with this section. If it does not, contin-
ue to Step 9.
9. If the extension wings tilt up or down at the
outside edges, remove the wings and shim
them with masking tape. See Figure 7.
a. If the wings tilt down, stick layers of mask-
ing tape under each bolt near the bottom
edge of the wing and retighten.
b. If the wing tilts up, stick layers of masking
tape above each bolt near the top edge of
the wing and retighten. Allow tape to
extend above table surface and trim with
a sharp knife after final assembly.
10. Replace the wings and check again.
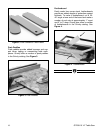
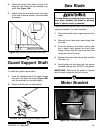
Fence Rails
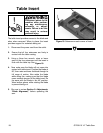
1. Locate the rear fence rail (the shorter of the
two rails).
2. Attach the rear rail to the table top using the
spacers, hex bolts and lock washers sup-
plied. See Figure 8. Using a combination
square set at
15
⁄32", place at the edge of the
table, and adjust the rail so it is consistently
15
⁄
32" below the top of the table.
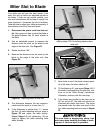
3. Attach the front rail to the table top using the
hex socket flathead screws supplied. See
Figure 9. Place a combination square set at
25
⁄32", at the edge of the table, and adjust the
rail so it is consistently
25
⁄32" below the top of
the table.
Figure 8. Rear rail attachment procedure.
Figure 9. Front rail attachment procedure.