-20-
G9749 Variable Speed Drill Press
Drilling
If the workpiece is not clamped down, the
operator's hand could get pulled into the bit
or the workpiece can be thrown with great
force. Clamp the workpiece to the table
before drilling.
The basic operation when drilling is:
1. Line up your drill bit with the intended hole
location.
2. Clamp the workpiece to the table.
3. Turn the drill press ON.
4. Use the downfeed handles to move the spin-
ning drill bit into the workpiece.
For safe operation and optimum results when
drilling, follow these guidelines:
CLEAR CHIPS: Raise the drill bit often to clear
chips and cool the drill bit. This will ease the work
of the drill press motor and extend the life of your
drill bits.
SECURE WORKPIECE TO TABLE: Clamp the
workpiece to the table or in a vise that is secured
to the table before drilling.
PROTECT THE TABLE: Protect the table by plac
-
ing the workpiece on scrap wood when through
drilling. Also, use the depth stop to ensure that the
drill bit goes no deeper than necessary.
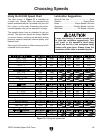
USE CORRECT SPEEDS: Use the correct speed
for the diameter of the drill bit being used and the
type of material being drilled. Refer to Choosing
Speeds on Page 19 to select the correct speed
for your application.
ADJUST SPEED TO DIAMETER OF BIT: Reduce
speed when using large diameter bits; increase
speeds when using smaller diameter bits.
ADJUST SPEED TO MATERIAL: Use slower
speeds with harder materials. Softer materials
can be drilled with higher speeds. However, some
materials, such as plastics, can melt at high
speeds.
APPLY LUBRICANT: Use some form of lubricant
on all materials except wood or cast iron. Refer to
Lubrication Suggestions on Page 19 to find the
correct lubrication for your application.
DRILL ACCURATELY: Mark the hole location
with a center punch before drilling to prevent drill
bit wandering and to ensure accurate placement
of holes. Consider using a center-point drill to
start the hole.
Quill Travel
The Model G9749 has both a rapid and a fine
downfeed control for quill travel. Quill travel can
be set to a specific distance using the depth
gauge and depth stop.
To use the quill lock:
1. To lock the quill in place, rotate the quill lock
lever (see
Figure 18 on Page 21) clockwise
and hand tighten.
2. Unlock the quill by rotating the quill lock lever
counterclockwise.
Note: The quill has a strong tendency to trav-
el upward quickly if not controlled. Use the
downfeed control to manage the quill move
-
ment when the quill is not locked in place.
Also, for maximum rigidity, the quill should
not be extended any more than necessary to
drill the hole. Adjust the table height if greater
distances are needed.


