


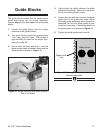


24" & 27" Resaw Bandsaws -21-
NOTICE
Lead adjustments will change when new
blades are mounted in the saw.
NOTICE
If the table is shifted, the fence will be affect-
ed since it is attached.
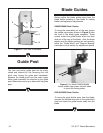
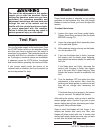
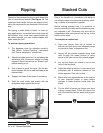
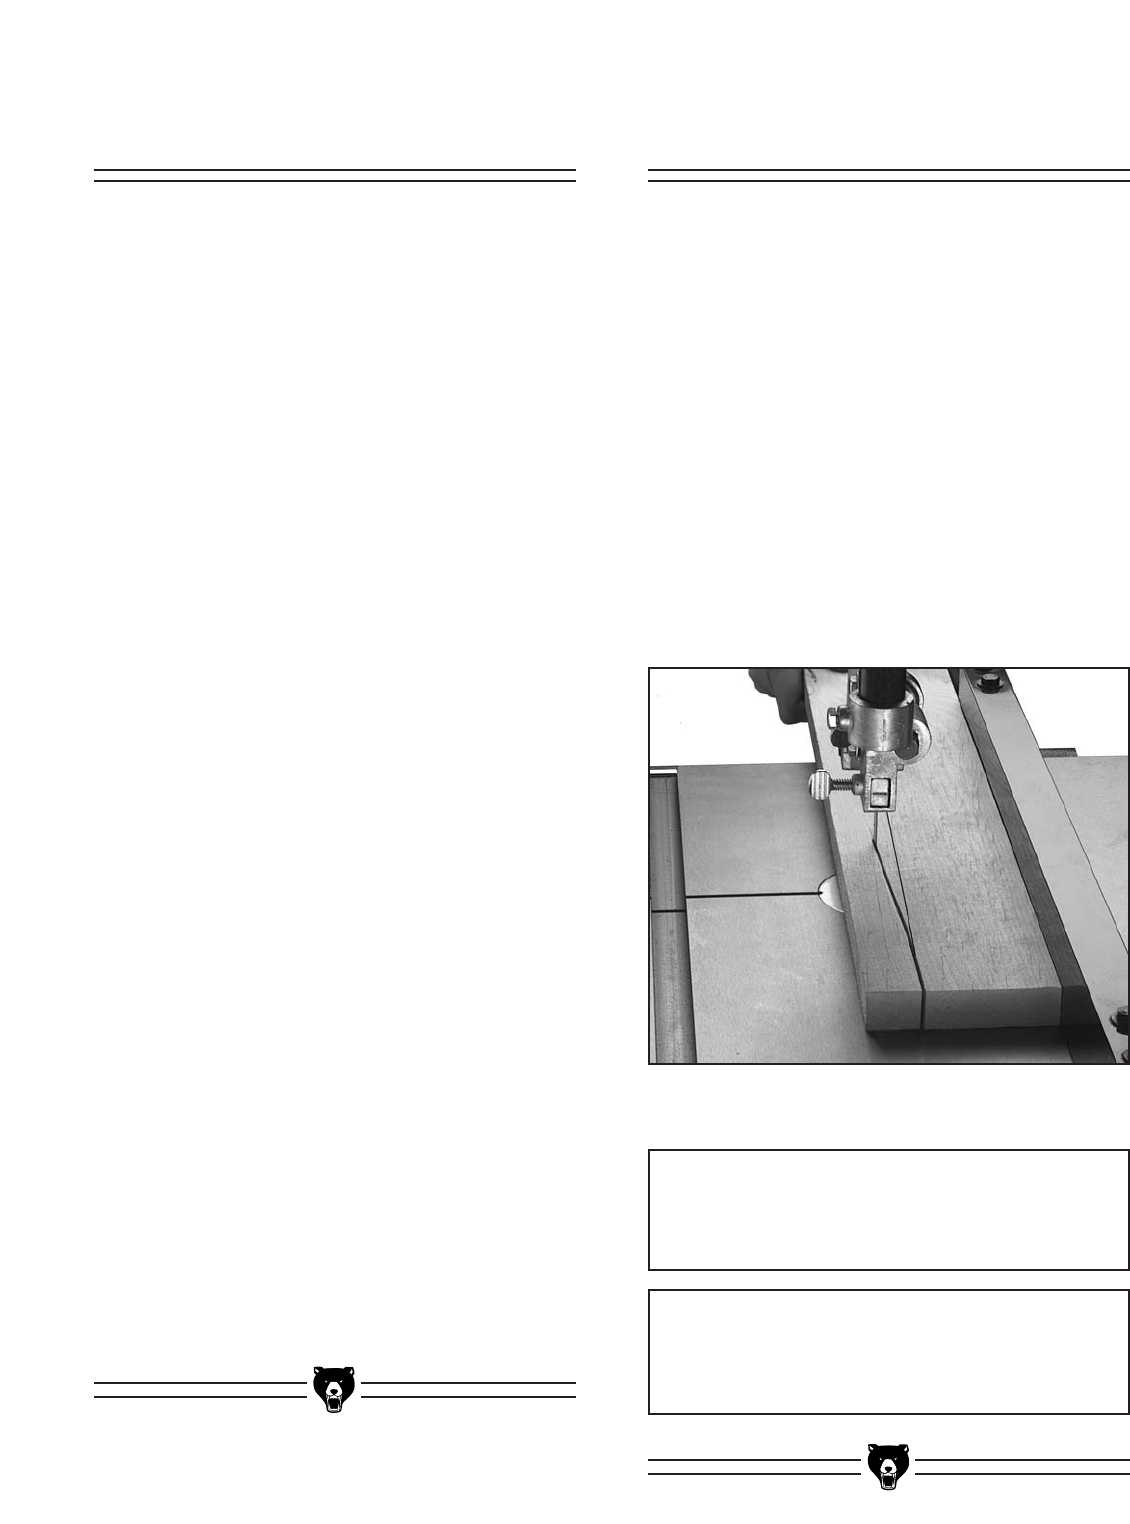
Blade Lead
Sometimes the bandsaw blade will not cut
straight even when the fence and blade are par-
allel (see Figure 17). This condition is called
“lead.” Lead occurs (1) if the blade tension is
incorrect, (2) if the teeth are dull on one side, or
(3) if the teeth are set heavier on one side of the
blade than the other.
If you determine that your blade is causing lead
problems, you should consider:
• Checking/adjusting the blade tension
• Replacing the blade
• Sharpening the blade
• Skewing the fence to match the lead
• Attaching an aftermarket or shop made
resaw fence attachment.
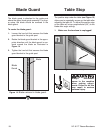
Fence Adjustment
The fence slides along the rail for adjustment and
secures in place by tightening the star knob.
If you notice that the fence is not parallel to the
blade, it can be adjusted where the rail mounts to
the bottom of the table.
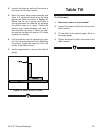
To adjust the fence so it is parallel with the
blade:
1. With a different saw, cut a board to 1" x 4" x
28". Down the length of the board, joint one
edge perfectly straight, or rip a narrow strip
off the length of the board with a table saw.
2. On a wide face of the board, draw a straight
line parallel to the jointed/ripped edge.
3. Slide the bandsaw fence out of the way and
cut free-hand along the line. Stop at the
halfway point. Turn the bandsaw OFF and
wait for the blade to stop.
4. Clamp the board to the bandsaw table with-
out moving it. Now slide the fence over to the
board so it barely touches one end of the
board.
5. Loosen the two hex bolts that secure the
fence rail to the underside of the table.
6. Skew the fence left or right so it is parallel to
the edge of the scrap piece. You may need
to re-adjust the fence locking mechanisms to
gain maximum adjustment.
7. While maintaining the skew, tighten the rail
mounting bolts.
8. Make a few cuts using the fence. If the fence
still does not seem parallel to the blade, read
the “Blade Lead” instructions, or repeat
steps 1-7 until the blade and fence are par-
allel with each other.
Figure 17. Typical example of blade leading
away from line of cut.