


Shop Fox
®
Classic Fence -11-
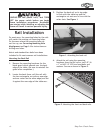
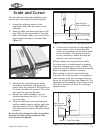
Figure 10. Lead adjustment.
1
⁄64"
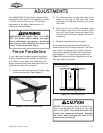
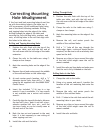
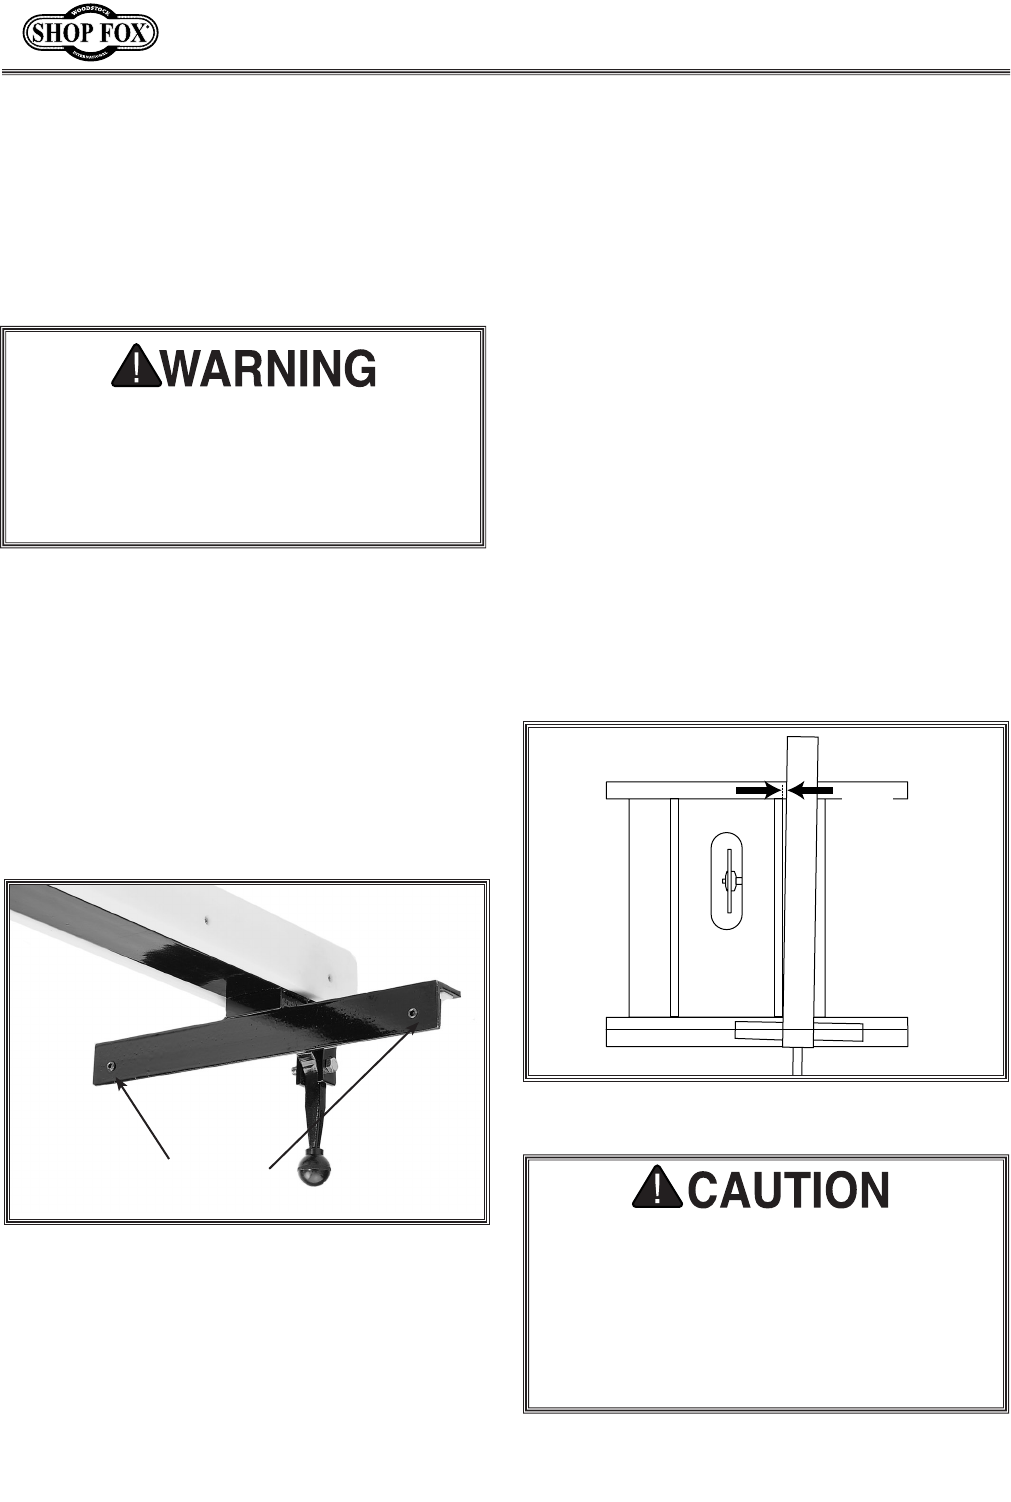
Figure 9. Setscrews on bracket.
Your SHOP FOX
®
Classic Fence requires little
adjustment since most of the features are built-
in to the fence at the factory. The primary
adjustment is to adjust the fence so it is
parallel to the saw blade.
Setscrews
Shown exaggerated for
illustration purposes
Fence Parallelism
If your table saw has been properly adjusted,
the saw blade should be parallel to the miter
slot. Refer to your table saw manual for the
proper procedure to check and adjust the saw
blade to the miter slot correctly.
1. Locate the two setscrews on the lower edge
of the fence bracket. See Figure 9.
ADJUSTMENTS
UNPLUG the saw power cord, and TURN
OFF the power switch before you begin
fence adjustment procedures. Accidental
saw startup while adjusting the fence will
result in serious personal injury.
2. Turn the setscrews to align the edge of the
fence to the edge of the miter slot while
alternately locking and unlocking the fence
lock lever.
3. Check to see if the fence is parallel along
the length of the miter slot, carefully slide
the tip of your finger along the edge of the
miter slot and the fence to detect a variation
in spacing.
4. Readjust the setscrews as required.
If the wood is binding when fed through the
table saw and the cut edge is burned, the fence
may need to be adjusted out slightly. Use the
setscrews to
adjust the back end of the fence
approximately
1
⁄64" away from the miter slot.
Figure 10
shows the fence adjusted for use on
the right side of the blade.
DO NOT cut on the left side of the blade if the
fence was adjusted for cutting on the right
side of the blade. The wood will pinch and
could cause dangerous kick-back. Readjust
the fence when changing the side of the
blade you are cutting on.