


Figure 12
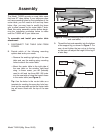
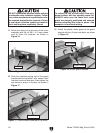
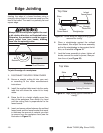
Note: After reinstalling the router table,
remove all excess masking tape with a razor
blade.
Tape
Figure 12.
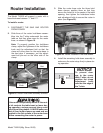
10.
Figure 14
Figure 14.
8.
9.
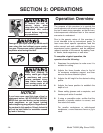
Figure 13
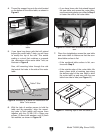
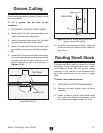
Note: The router table double-cross T-slots
offer two different orientations for the router
fence—choose the one that best suits your
operation.
Figure 13.
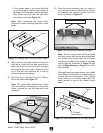
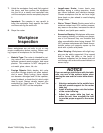
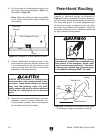
Note: The two fence board shims provided
with your router table can be placed between
the outfeed fence board (left) and the fence
to offset the outfeed fence board for full edge
routing (see the illustration in Figure 15 and
refer to Edge Routing on Page 16 for addi-
tional details).
With additional shop-made shims, the outfeed
fence board can be offset up to approximate-
ly 4mm from the infeed board. If you require
more offset, you can obtain longer M6-1 flat
head screws to secure the outfeed fence
board.
Shims
Outfeed
Fence Board
Fence
Figure 15.