


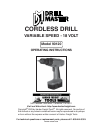


SKU 90120 For technical questions, please call 1-800-444-3353. PAGE 12
Drill Setting ( ):
This setting essentially prevents the clutch from slipping entirely. It is designed
for drilling, but is not advised for using the screwdriver because it offers no
protection against stripping the head or splitting the wood.
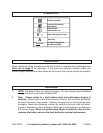
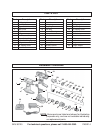
Set the driving torque by turning the Torque Setting Ring (8) to align the torque
indicator arrow with the desired setting. (See Figure E, previous page.)
5. When drilling in light gauge metal or wood, use a wooden block to back up the
material to prevent damage to the workpiece.
6. Mark the center of the hole to be drilled with a center punch to give a Drill Bit a start
and to prevent it from “walking”.
7. Lubricate the Drill Bit with cutting oil when drilling iron or steel. Use a coolant when
drilling nonferrous metals such as copper, brass, or aluminum.
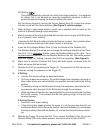
8. Insert the fully charged Battery Pack (4) into the Handle of the Cordless Drill.
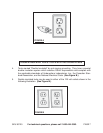
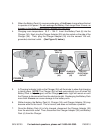
9. The Rotation Button (33) allows you to change the rotational direction of the Cord-
less Drill. For a
clockwise rotation, move the Rotation Button to the
right
. For a
counterclockwise rotation, move the Rotation Button to the
left
. The center position
locks the Trigger (3), helping to prevent the Drill from operating. (See Figure E.)
10. Make sure to hold the Cordless Drill firmly with both hands, as torque from the
Motor will cause the tool to twist.
11. Operate the Drill, by squeezing the Trigger (3). The speed of the Drill can be con-
trolled by varying the pressure on the Trigger (3).
12. If Drilling:
• Use the Drill torque setting, as described above.
• Drill only as deep as necessary. Do not drill deeper than necessary into walls or
other areas where you cannot identify any possible hazards behind the drilling
surface.
• To reduce jamming as the Bit breaks through the workpiece, decrease the drill-
ing pressure when the point of the Bit breaks through the workpiece.
• When you have drilled the hole, remove the Bit from the hole while the Cordless
Drill is still running. This prevents the Bit from getting caught in the hole and
causing damage.
If Driving Screws:
• Start with a low torque setting.
• If the clutch starts slipping before the screw is in all the way, stop the drill, put
the Reverse Button (33) in the center position, remove the Battery (4), and change
the torque setting. Reinstall the Battery (4), and set the direction before continu-
ing.
13. Release the Trigger (3) to stop the Drill. Then, remove the Battery Pack (4), put the
Reverse Button (33) in the center position, and remove the bit from the Drill.