


Page 5For technical questions, please call 1-800-444-3353.SKU 92703
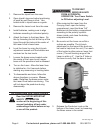
Press the button for the desired line(s) 4.
on the top of the unit to switch “ON”. The
LED for the line will turn on when that
line is switched on.
The Laser Level will work properly if it is 5.
positioned within its self-leveling range.
Allow 4-6 seconds for the horizontal and 6.
vertical Laser lines to be stabilized. After
stabilization, the Laser lines can be used
for measurement reference. Laser lines
may swing slightly due to vibration from
surroundings.
To prevent damage to the level, tighten 7.
the pendulum lock after use and store in
the carrying case.
Accuracy Checking
NOTE: Due to the complicated, sensitive
nature of these procedures, ordinarily
only a qualied technician would attempt
them.
Level Beam Accuracy
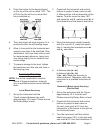
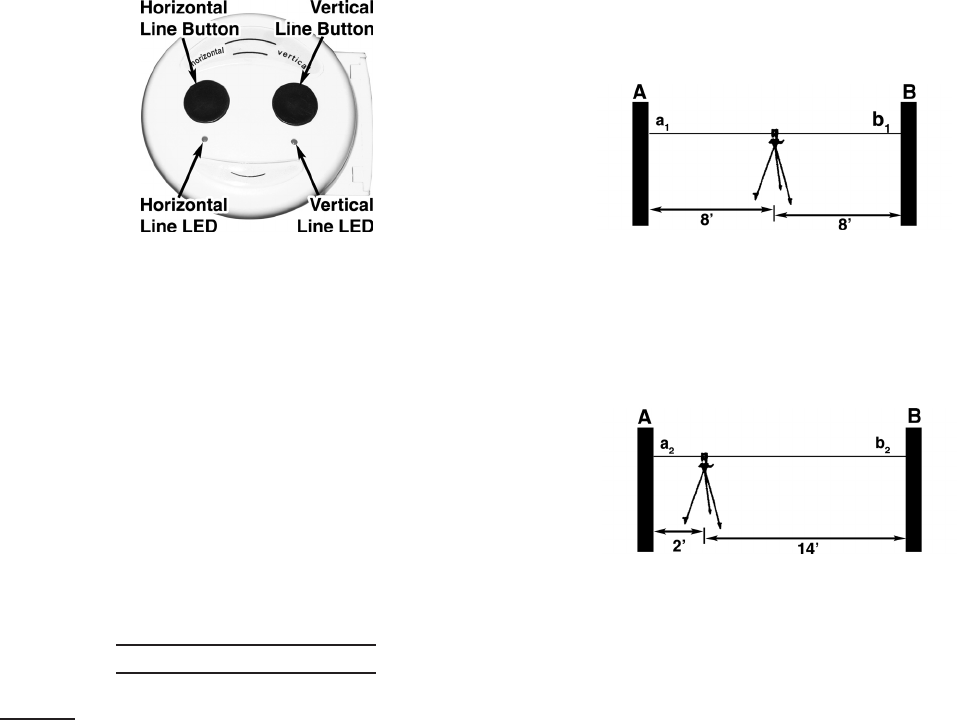
Set up the instrument with the 1.
Tripod centered between two walls
approximately 16 ft. apart. Please ensure
the Rotary Base is level.
Press both the horizontal and vertical 2.
buttons to project a laser cross on wall
A. Mark point a
1
at the intersection of the
beams. Turn the cross line laser 180°
and repeat on wall B, marking point b
1
at
the intersection of the beams, see below.
Move the instrument straight towards 3.
wall A to a point 2 ft. away and repeat
step 2, marking the intersections as a
2
and b
2
, see below.
a distance (4. d
a
)=|a
1
-a
2
|
b distance (d
b
)=|b
1
-b
2
|
If |d
a
- d
b
| <1mm, the accuracy is
within tolerance. Otherwise, return the
instrument to a qualied technician for
repair.
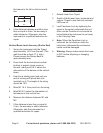
Horizontal Beam Level Accuracy
(End to End)
1. Set up the instrument with the Tripod
approximately 16 ft. from the wall.
Please ensure the Rotary Base is level.
2. Press both the horizontal and vertical
buttons to project a laser cross on
the wall, mark point a 8 ft. from the
intersection of the beams to the right on
the horizontal beam.
3. Turn the instrument until the vertical
beam has moved 16 ft. to the right side,
and mark b 8 ft. from the intersection of