


For technical questions, please call 1-800-444-3353;
Troubleshooting section at end of manual.
SKU 93305 Page 10
IMPORTANT: Before using for the rst time, the spray gun must be cleaned
using a solvent based thinner. If not removed, the red oil used by the
manufacturer for testing and corrosion protection may contaminate paint.
IMPORTANT: The Spray Gun must be cleaned immediately after use.
Improper cleaning is a common reason for the Spray Gun not to work.
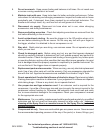
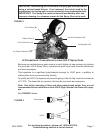
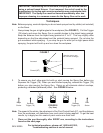
2. To ensure you don’t allow paint to build up, start moving the Spray Gun before you
Squeeze the Trigger (78). When you are nished spraying, release the Trigger (78)
before you stop moving the Spray Gun. Doing so will eliminate distinct overlaps,
producing a blended (feathered) affect. See FIGURE 8 below.
Techniques
Note: Before spraying, mask all objects you do not want sprayed and lay cloths (not included)
on the oors.
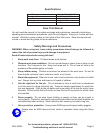
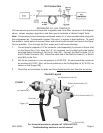
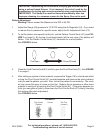
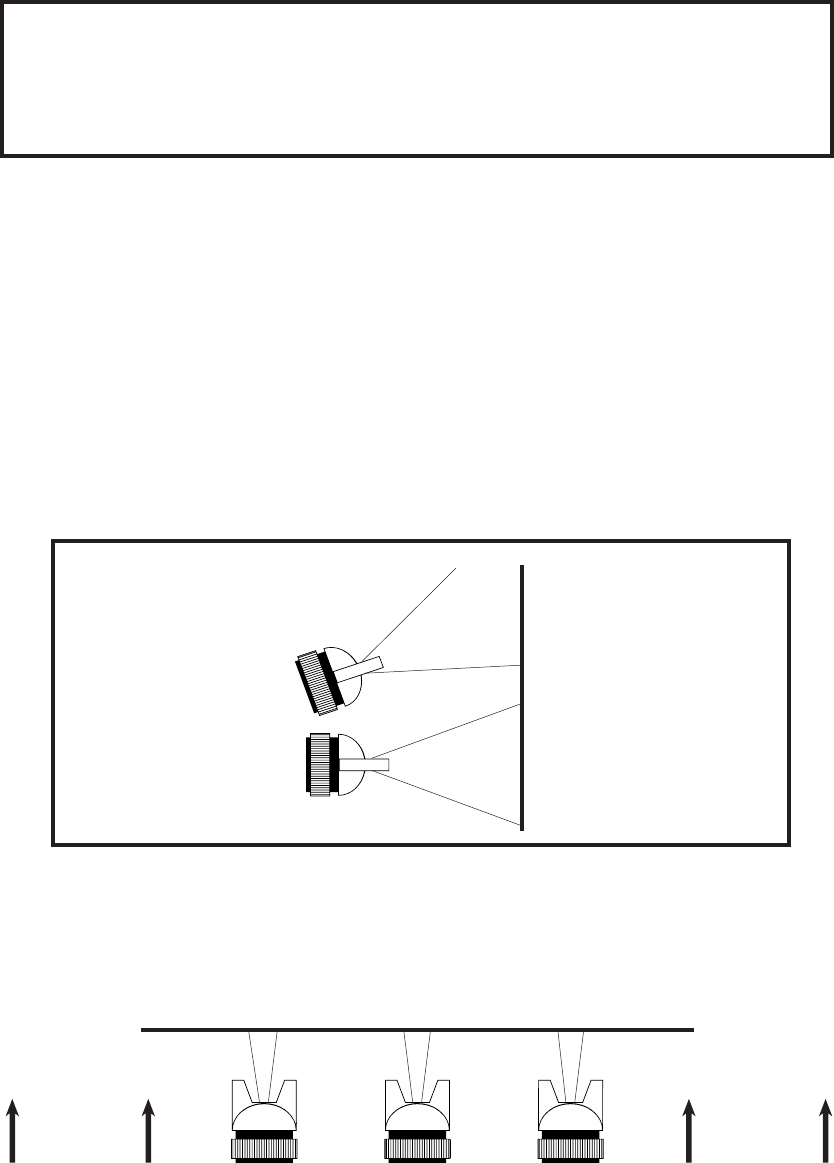
1. Always keep the gun at right angles to the workpiece (See FIGURE 7). Pull the Trigger
(78) slowly and move the Spray Gun in parallel strokes to the object being painted.
Keep the distance from the object being painted at 6” to 9”. This may slightly differ
depending on the ow adjustment and the material being sprayed. Do not stop the
gun movement while spraying. If you stop the gun for even just a slight pause while
spraying, the paint will build up and run down the workpiece.
Note: The speed of the stroke, the adjustment of the Fluid Control Knob (67), and the distance
from the workpiece, will determine how much paint is being applied. To get the best
results, try to apply two thin coats of paint versus one thick coat.
3. Clean out the gun thoroughly after EVERY use, according to the instructions
found on the next page.
FIGURE 7
Correct (90
o
)
Incorrect
(Heavier coat on one
side, uneven coverage)
(Even coverage)
FIGURE 8
(Top View)
End
Stroke
Begin
Stroke
Release
Trigger (78)
Squeeze
Trigger (78)