


Page 10For technical questions, please call 1-800-444-3353.SKU 96289
Do not heat up the wood surface
excessively.)
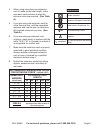
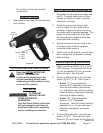
Product Features
See below for the Heat Gun features and 1.
and controls:
OPERATING INSTRUCTIONS
Read the ENTIRE IMPORTANT
SAFETY INFORMATION
section at the beginning of this
manual including all text under
subheadings therein before set up
or use of this product.
Tool Set Up
TO PREVENT
SERIOUS INJURY
FROM ACCIDENTAL
OPERATION:
Turn the Power Switch of the tool
off and unplug the tool from its
electrical outlet before adjusting
tool or installing accessories.
Work Piece and Work Area Set Up
Designate a work area that is clean and 1.
well-lit. The work area must not allow
access by children or pets to prevent
distraction and injury.
Route the power cord along a safe 2.
route to reach the work area without
creating a tripping hazard or exposing
the power cord to possible damage. The
power cord must reach the work area
with enough extra length to allow free
movement while working.
Secure loose work pieces using a vise 3.
or clamps (not included) to prevent
movement while working.
There must not be objects, such as utility 4.
lines, nearby that will present a hazard
while working.
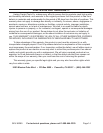
General Operating Instructions
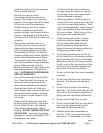
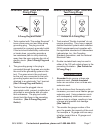
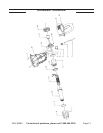
Make sure Power Switch (3) is in its 1. “0”
(OFF) position. Then plug Power Cord
(1) into the nearest 120 volt, grounded,
electrical outlet. See Figure A.
To turn on the Heat Gun, set its Power 2.
Switch (3) to “l” or “ll”. See Figure A.
Switch “l” - • Low temperature
position (572° Fahrenheit maximum).
Used for mild heating applications,
i.e., heat shrink tube, heat shrink bag,
plastic bending, shaping and welding,
removing old paint coating.
Switch “ll” • - High temperature
position (1112° Fahrenheit
maximum). Used for intense heating
applications, i.e., frozen water pipe,
defrosting refrigerator, and metal
welding.
To turn off the Heat Gun, set its Power 3.
Switch (3) to “l”. Then set the Power
Switch to “0” and unplug the tool from its
REV 08b, 10a
Figure A
Power Switch (3)
I - LOW
0 - OFF
II - HIGH
Barrel
Cover (8)