Page 8SKU 03664 For technical questions, please call 1-800-444-3353.
Welding
Warning: Before arc welding, read and understand all safety precautions and warnings
listed on pages 2 through 5.
1. Connect and secure the Argon/CO
2
gas hose to the rear of the MIG Welder.
2. Securely clamp the Ground Cable Clamp as close as possible to the metal object to
be welded, or to the metal work bench where the object is mounted and electrically
connected.
3. Set the Welding Current Adjustment Knob ( 30~200 Amps) to the desired current
setting for the type of metal being welded.Thinner metals use lower current. Heavier
metals use higher current.
4. Verify that the Power Switch is in the OFF (0) position, then plug the MIG Welder plug
into a dedicated, 220 VAC, 20 amp line with delayed action type circuit breaker or
fuses. If an extension cord is used, it must have the following wire size: up to 30 feet,
use 10 AWG size wire; 30 to 50 feet, use 8 AWG wire; Over 50 feet, use 6 AWG wire.
5. While holding the Torch Handle with electrode wire clearly out of the way of any
grounded objects, turn the Power Switch to the ON (I) position.
6. Momentarily press the Torch Trigger Switch to test the wire feed speed.
Adjust the speed by turning the Wire Feed Speed Control knob.
7. Orient yourself on the area to be welded, then place the Arc Shaded Face Shield over
your eyes.
Warning: Never look at the ignited arc without ANSI approved, arc shaded, eye protec-
tion in a full face shield. Permanent eye damage or blindness can occur. Skin burns can
occur. Never breath arc fumes.
8. Press (and hold) the Torch Trigger Switch and stroke the area to be welded with the
electrode wire to ignite the arc.
Never tap the electrode wire into the welding surface to ignite the arc. This damages
its external coating on the electrode which prevents oxygen in the air from coming into
contact with the molten metal, causing it to oxidize.
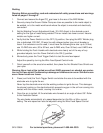
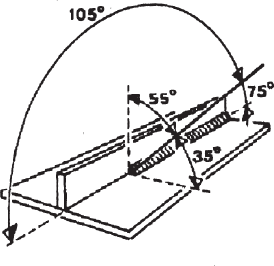
9. Once the arc is ignited, tilt the electrode wire forward at an angle of about 35°. Refer
to the illustration below.
The wire feeds automatically at a speed dependent on the Min. or Max. current
setting. The wire speed can also be adjusted using the Wire Feed Speed Control.


