


English
9
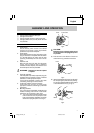
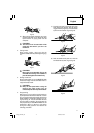
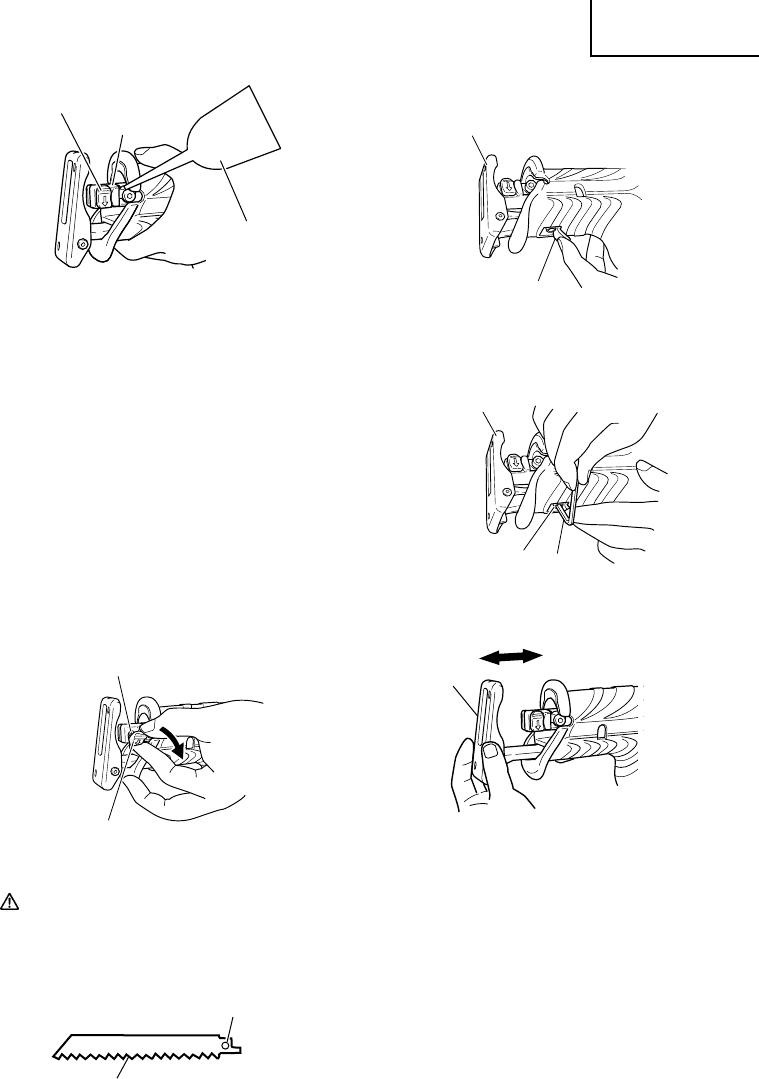
NOTE:
Continued use of the tool without cleaning
and lubricating the area where the saw blade
is installed can result in some slack
movement of the lever due to accumulated
sawdust and chips. Under the circumstances,
pull a rubber cap provided on the lever in the
direction of an arrow mark as shown in Fig.
10 and remove the rubber cap from the lever.
Then, clean up the inside of the blade holder
with air and the like and carry out sufficient
lubrication.
The rubber cap can be fitted on if it is pressed
firmly onto the lever. At this time, make
certain that there exists no clearance between
the blade holder and the rubber cap, and
furthermore ensure that the saw-blade-
installed area can function smoothly.
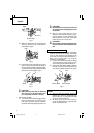
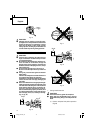
CAUTION:
Do not use any saw blade with a worn-out
blade hole. Otherwise, the saw blade can
come off, resulting in personal injury. (Fig.
11)
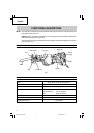
Blade Holder
Machine Oil
Fig. 9
Lever
Lever
Rubber Cap
Fig. 10
Blade Hole
Blade
Fig. 11
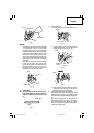
8. Adjusting the base
(1) Lift the front cover up as illustrated in Fig. 12.
(2) If a base setting screw is loosened with an
attached allen wrench, you can adjust a base
installing position. (Fig. 13, Fig. 14)
(3) After adjusting the base installing position,
tighten the base setting screw with the
attached allen wrench completely.
9. Adjusting the blade reciprocating speed
This unit has a built-in electronic control circuit that
makes it possible to adjust the variable speed of
the saw blade by pulling the switching trigger. (Fig.
15)
If you pull the trigger further in, the speed of the
blade accelerates. Begin cutting at a low speed to
ensure the accuracy of your target cut position.
Once you’ve obtained a sufficient cutting depth,
increase the cutting speed.
Base
Front Cover
Fig. 12
Fig. 13
Base
Allen
Wrench
Set Screw
12 mm
Fig. 14
Base
01Eng_CR13V2_US 10/22/08, 18:089