


14
English
OPERATION
How to make the batteries perform longer.
○ Recharge the batteries before they become
completely exhausted.
When you feel that the power of the tool
becomes weaker, stop using the tool and
recharge its battery. If you continue to use the
tool and exhaust the electric current, the battery
may be damaged and its life will become
shorter.
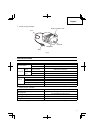
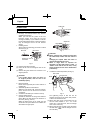
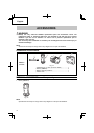
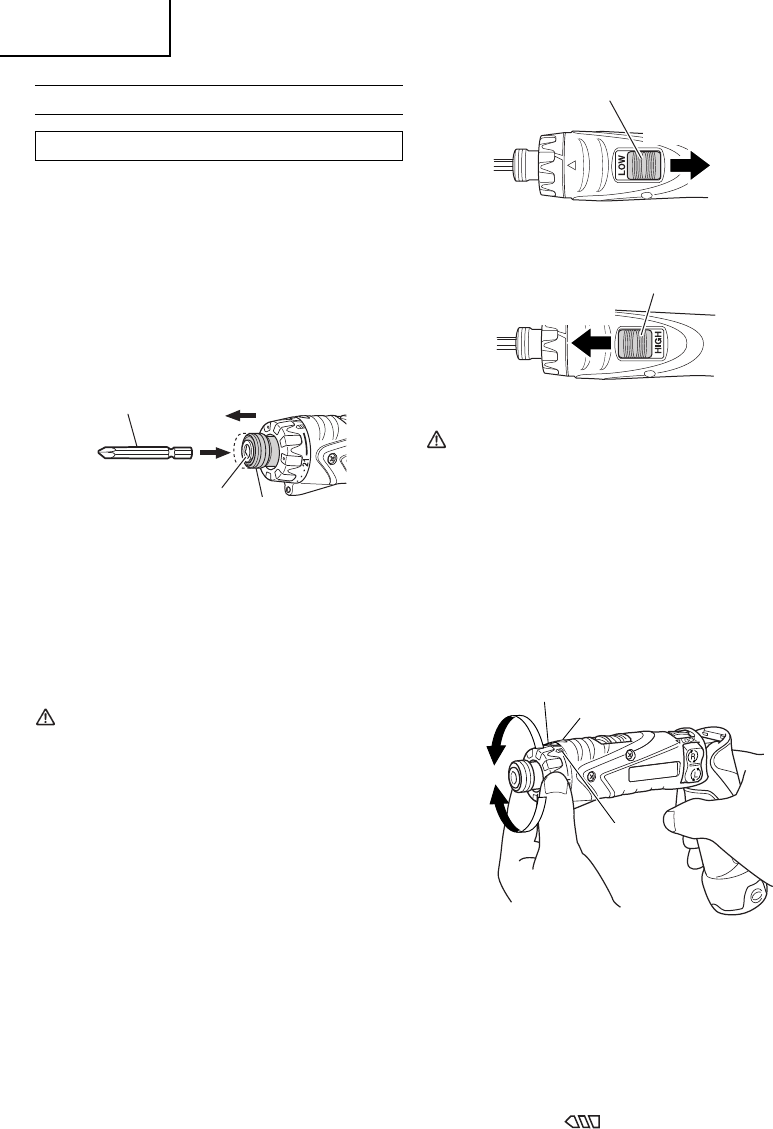
1. Installing the bit
Always follow the following procedure to install
driver bit. (Fig. 5)
Driver bit
Hexagonal hole in
the socket
Movement
Guide
sleeve
Fig. 5
(1) Pull the guide sleeve forward.
(2) Insert the bit into the hexagonal hole in the
socket.
(3) Release the guide sleeve and it returns to its
original position.
CAUTION
If the guide sleeve does not return to
its original position, then the bit is not
installed properly.
2. Removing the bit
Please do the opposite point on the method of
installing bit.
3. Automatic spindle-lock mechanism
When the main switch is off , the bit is locked in
place, and the tool can be used as a manual
screwdriver.
4. Confi rm that the battery is mounted correctly
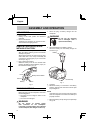
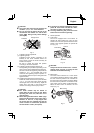
5. Change rotation speed
Operate the shift knob to change the rotational
speed. Move the shift knob in the direction of
the arrow. (See Fig. 6 and 7)
When the shift knob is set to “LOW”, the drill
rotates at a low speed. When set to “HIGH”, the
drill rotates at a high speed.
Shift knob
Low speed
Fig. 6
Shift knob
High speed
Fig. 7
CAUTION
● When changing the rotational speed with
the shift knob, confi rm that the switch is
off .
Changing the speed while the motor is
rotating will damage the gears.
● When a large force is required for
operation, set the shift knob to “LOW”. If
“HIGH” is set and the unit is used, it may
cause the motor to burn out or malfunction
prematurely.
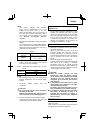
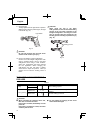
6. Confi rm the clutch dial position (see Fig. 8).
Clutch dial
Triangle mark
Weak
Strong
Drill mark
Fig. 8
The tightening torque of this unit can be
adjusted according to the clutch dial position,
at which the clutch dial is set.
(1) When using this unit as a screwdriver, line up
the one of the numbers “1, 5, 9 ... 21” on the
clutch dial, or the black dot, with the triangle
mark on the outer body.
(2) When using this unit as a drill, line up the clutch
dial drill mark “
” with the triangle mark on
the outer body.