


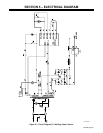

OM-929 Page 21
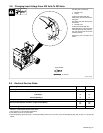
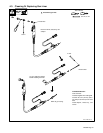
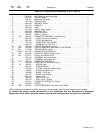
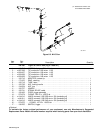
4-5. Replacing Gun Contact Tip
Ref. 800 797-C
Y Turn Off unit.
1 Nozzle
2 Contact Tip
Cut off welding wire at contact tip.
Remove nozzle.
Remove contact tip and install new
contact tip. Reinstall nozzle.
1
2
Tools Needed:
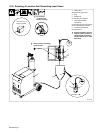
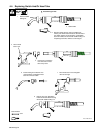
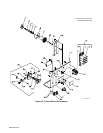
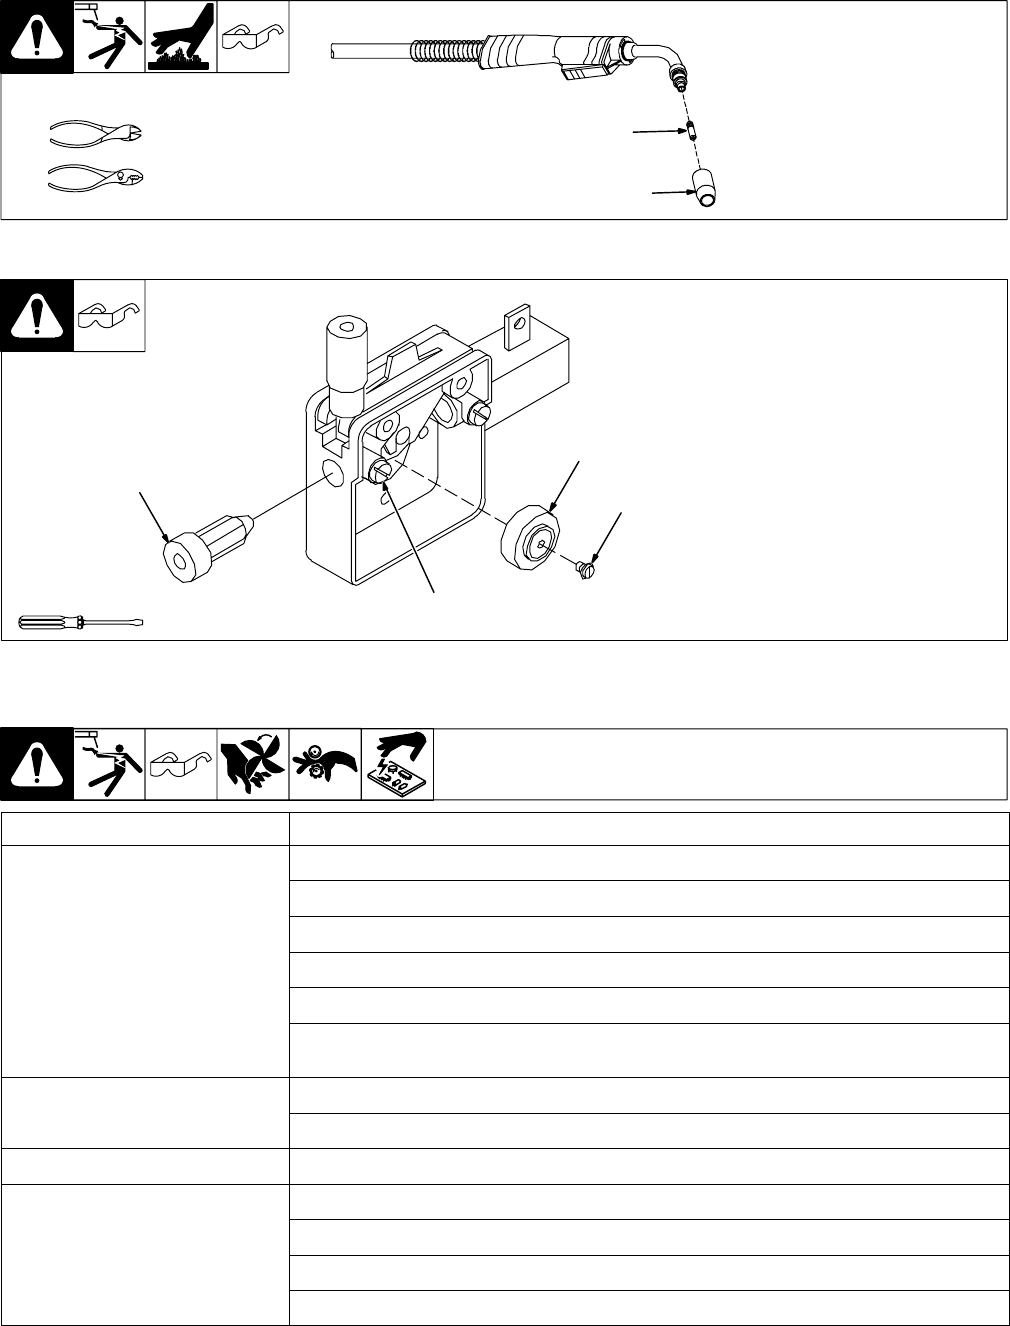
4-6. Changing Drive Roll And Wire Inlet Guide
Ref. ST-801 875
1 Inlet Wire Guide Securing
Screw
2 Inlet Wire Guide
Loosen screw. Slide tip as close to
drive rolls as possible without
touching. Tighten screw.
3 Drive Roll
Install correct drive roll for wire size
and type.
4 Drive Roll Securing Screw
Secure drive roll with screw as
shown.
Tools Needed:
2
1
3
4
4-7. Welding Troubleshooting Table
Welding Trouble Remedy
No weld output; wire does not feed. Secure power cord plug in receptacle (see Section 2-10).
Check and replace power switch if necessary.
Check circuit breakers CB1 and/or CB2, and reset if necessary (see Section 4-2).
Replace building line fuse or reset circuit breaker if open (see Section 2-10).
Secure gun plug in receptacle or repair leads, or replace trigger switch (see Sections 2-4 and 4-4).
Thermostat TP1 open (overheating). Allow fan to run; the thermostat will close when the unit has cooled
(see Section 2-2).
No weld output; wire feeds. Connect work clamp to get good metal to metal contact.
Replace contact tip (see Section 4-5).
Low weld output. Connect unit to proper input voltage or check for low line voltage (see Section 2-10).
Low, high, or erratic wire speed. Readjust front panel settings (see Section 3-1).
Change to correct size drive roll (see Section 4-6).
Readjust drive roll pressure (see Section 2-11).
Replace inlet guide, contact tip, and/or liner if necessary (see Section 4-6).