


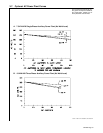
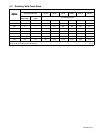

OM-480 Page 16
ether1 12/96 – ST-153 382-A / Ref. ST-188 448
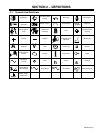
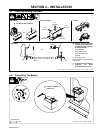
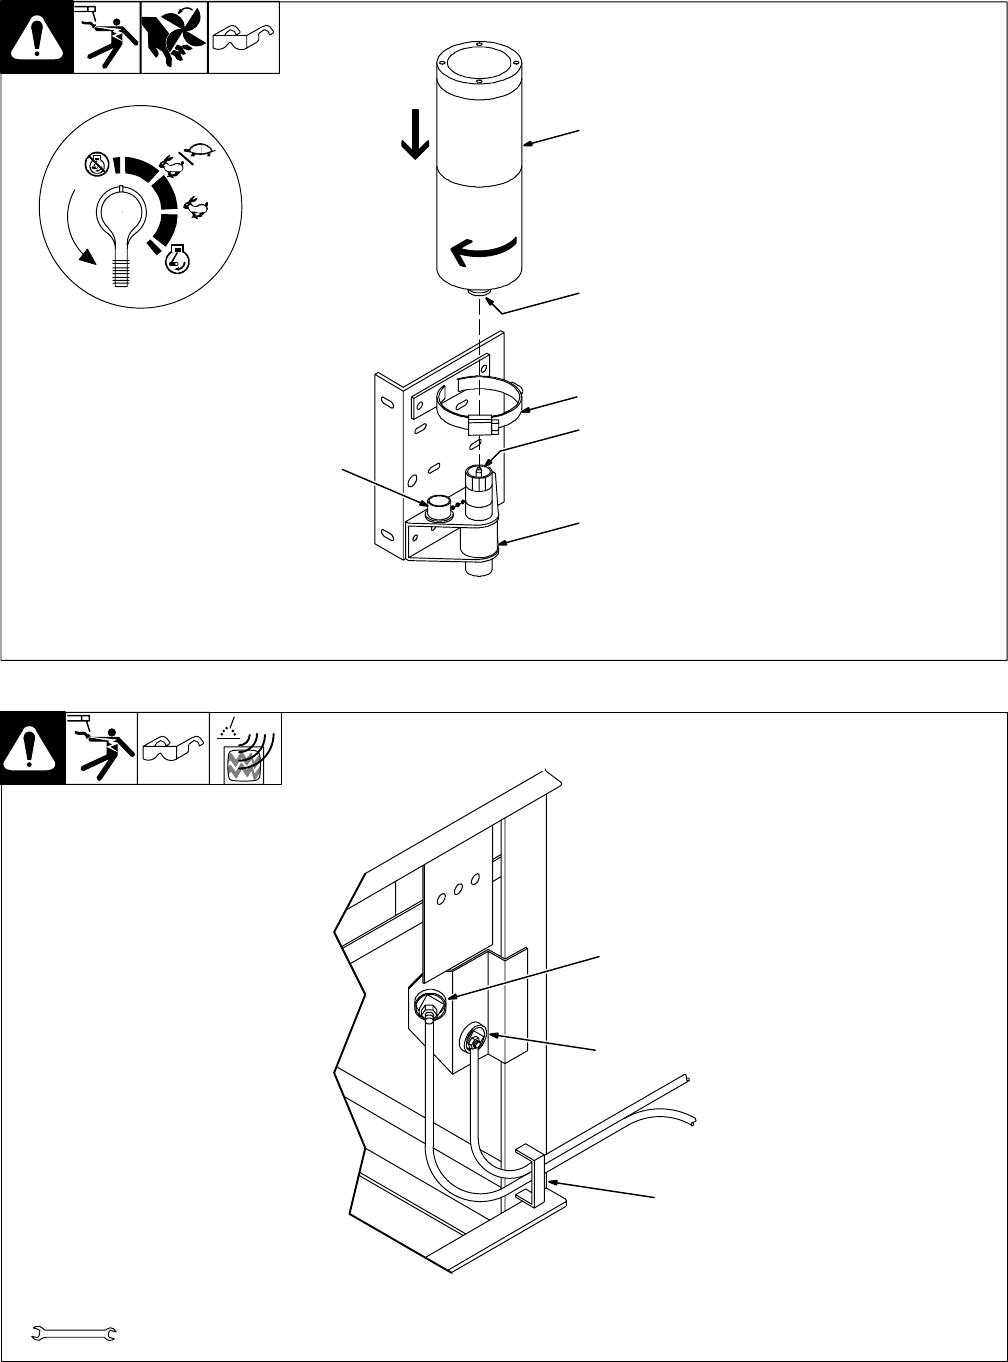
Y Stop engine.
Y Improper handling or expo-
sure to ether can harm your
health. Follow manufactur-
er’s safety instructions on
cylinder.
Y Do not use Ether Starting Aid
while engine is running.
Open side door(s).
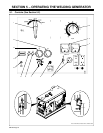
1 Ether Cylinder
2 Nozzle
Remove cover and clean cylinder
nozzle.
3 Clamp
4 Fitting
5 Cap
6 Valve
Remove cap and clean fitting.
Install cylinder on fitting. Tighten
clamp.
. After installing cylinder, wait at
least 10 minutes before using
to let ether particles settle and
prevent atomizer plugging.
Put cap on fitting when cylinder is
removed.
1
2
3
4
6
5
4-5. Installing Ether Cylinder (Optional Ether Starting Aid)
Ref. ST-800 162-A
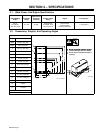
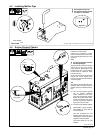
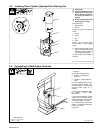
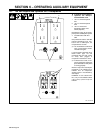
Open left side door.
1 Bracket
Route cables through bracket.
2 Positive (+) Weld Output
Terminal
3 Negative (–) Weld Output Ter-
minal
For Stick welding Direct Current
Electrode Positive (DCEP), con-
nect work cable to (–) terminal and
electrode holder cable to (+)
terminal.
For Direct Current Electrode Nega-
tive (DCEN), reverse cable
connections.
If equipped with optional polarity
switch, connect electrode holder
cable to Electrode (–) terminal and
work cable to Work (+) terminal.
For FCAW welding, connect work
cable to (–) terminal and wire feeder
cable to (+) terminal.
Close door.
Tools Needed:
4-6. Connecting To Weld Output Terminals
3/4 in
1
2
3