


8
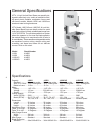
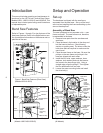
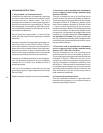
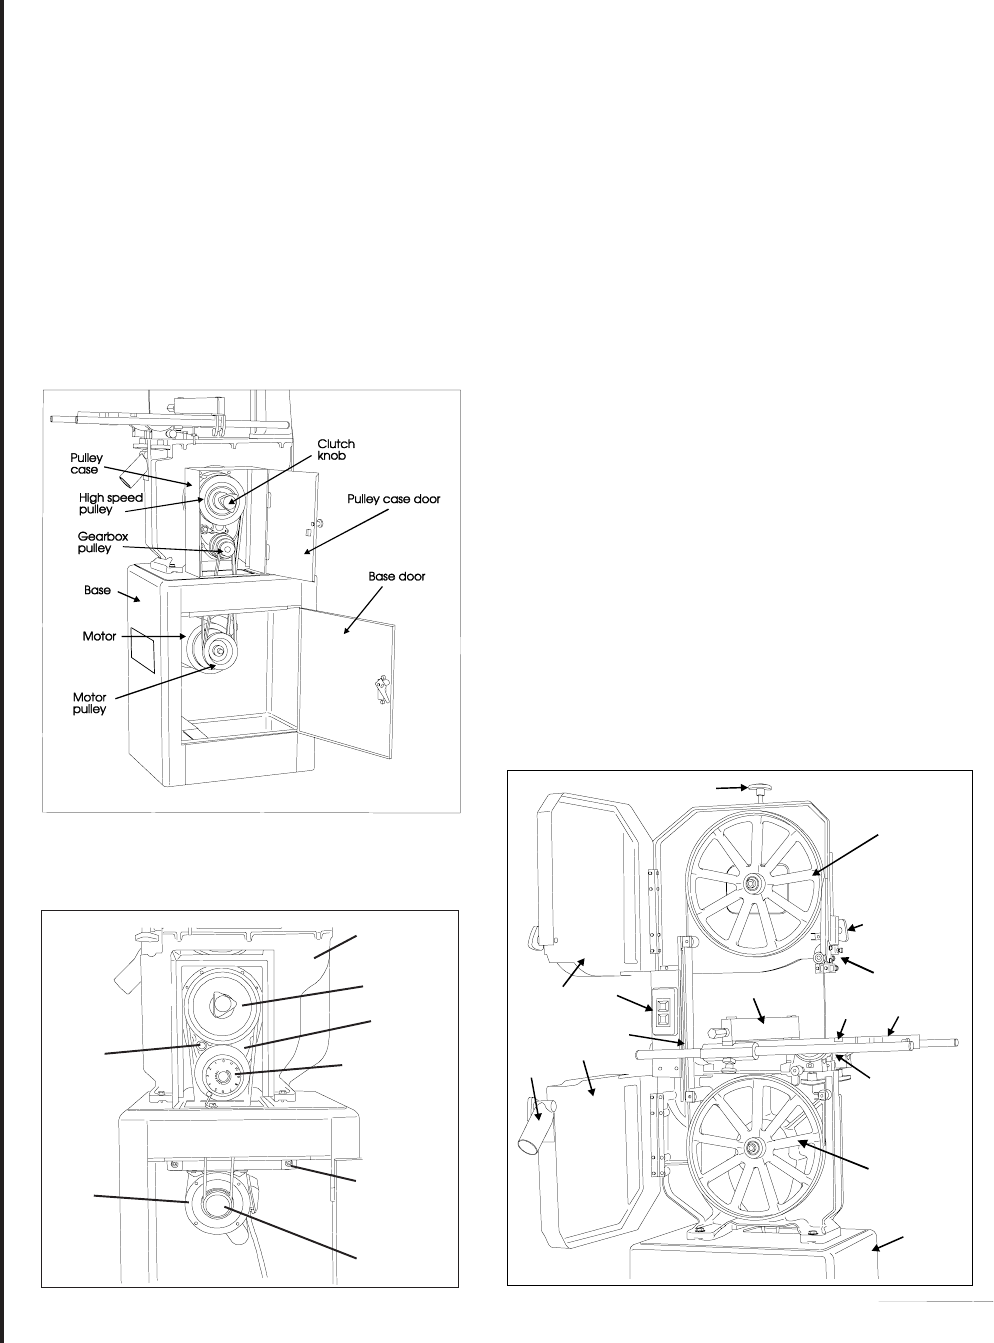
Upper blade
guide and
support
assemblyON/OFF
switch
Optional rip
fence
Miter
slot
Table
Lower blade
guide and
support
assembly
Lower drive
wheel
Upper
blade
guide
support
assembly
Blade guard
Lower wheel guard
Dust chute
Upper
wheel
guard
Blade tension adjustment
knob
Upper drive
wheel
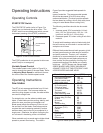
Introduction
This manual includes operating and maintenance in-
structions for the JET14-Inch Vertical Band Saws,
Models J-8201, J-8203, J-8201VS, and J-8203VS. This
manual also includes parts listings and illustrations
of replaceable parts.
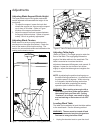
Base
Figure 3: Band Saw Features (Front View)
(All Models)
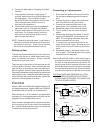
Band Saw Features
Refer to Figures 1 through 3 for key features of the
band saw machine. Refer to the Specifications sec-
tion for additional information on the features and ca-
pabilities of the saw.
Figure 1: Band Saw Features (Rear View)
(Models J-8201/J-8203)
Figure 2: Band Saw Features (Rear View)
(Models J-8201VS/J-8203VS)
Saw Head
Clutch Knob
Gearbox
Variable Speed
Control
Pivoting
Motor
Mounting
Plate
Motor Pulley
Drive
Motor
Oil Level
Gauge
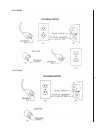
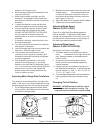
Setup and Operation
Set-up
The band saw is shipped with the saw frame
separated from the saw base. Set-up of the band
saw involves installing the frame and setting-up the
saw on the shop floor.
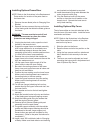
Assembly of Band Saw
The saw is shipped as two separate units — saw
frame and base. The saw frame must, therefore,
be assembled to the base.
1. Remove loose parts from the saw base and
sawframe.
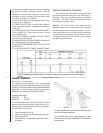
2. Place the base in the location in the shop and
bolt the base to the floor. (See following
section on spotting saw.) Put shims under the
hold-down bolts as required to make sure the
saw is level.
3. Place the saw frame on the base. Be sure the
pulleys on the saw frame and pulleys in the
base are aligned with each other.
4. Install the four bolts, upper washers, lower
washers, lock washers and nuts that secure
the frame to the base finger tight. Using a
straight edge, align the pulleys. Then tighten
the four attachment bolt and nuts.
5. Loosen the motor mounting bolts and install
the drive belt(s).
Lock Knob