


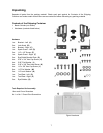
11
Operation
A bench grinder is designed for hand-grinding
operations such as sharpening chisels,
screwdrivers, drill bits, removing excess metal,
and smoothing metal surfaces.
A Medium Grain Abrasive Grinding Wheel is
suitable for rough grinding where a considerable
amount of metal must be removed or when
obtaining a smooth finish is not important.
A Fine Grain Abrasive Grinding Wheel should be
used for sharpening tools of grinding to close
size tolerances because it removes metal more
gradually for precision grinding and gives work a
smooth finish.
Always use approved safety
glasses or face shields! Failure to comply
may cause serious injury!
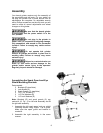
Switch
The switch is located on the front of the grinder
near the bottom. To turn the tool on, depress the
rocker switch at the top near the word ON. To
turn the tool off, depress the bottom part of the
rocker switch near the word OFF.
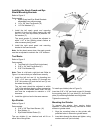
Precautions
Before starting the grinder, turn the wheels by
hand making sure they are clear of obstructions
and that they turn freely. The tool rests and
spark guards should not touch the wheel.
Turn on the grinder and allow it to reach full
running speed before starting to grind.
Keep a steady, moderate pressure on the
workpiece and keep it moving at an even pace
for smooth grinding. Pressing too hard
overheats the motor and prematurely wears
down the grinding wheels. Note the original
bevel angle on the item to be sharpened and try
to maintain the same shape. The grinding wheel
should rotate into the object being sharpened.
Keep a tray filled with water and dip your work
into in regularly to prevent overheating.
Overheating can weaken metals.
Do not use the side of the grinding wheel; this
puts dangerous stress on the wheel.
When the wheel becomes loaded of dull, use an
approved grinding wheel dresser and dress the
wheel face.
Keep the tool rest and spark guard to within
1/16" of the grinding wheel. See the Adjustment
section to adjust.
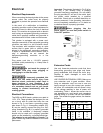
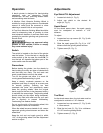
Adjustments
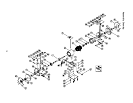
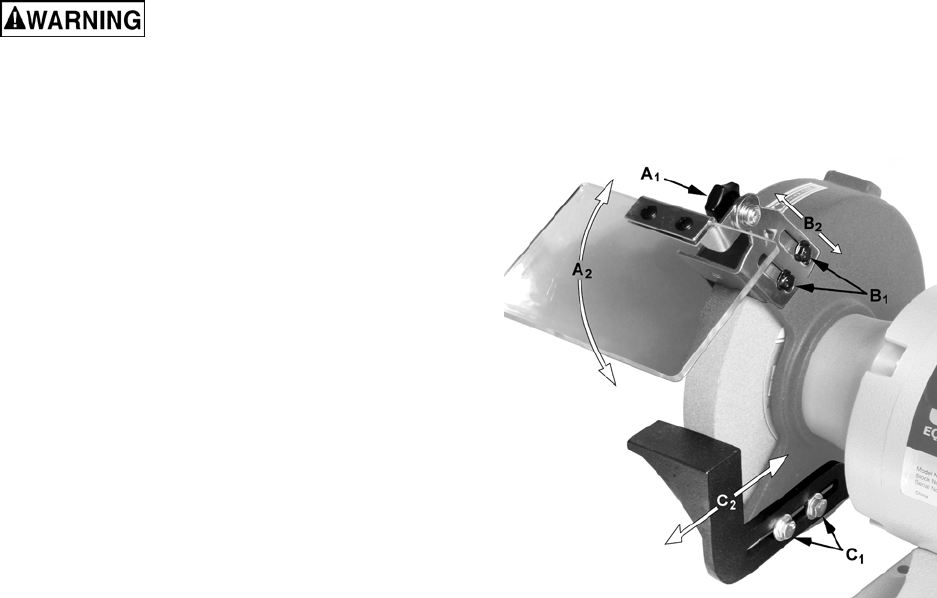
Eye Shield Tilt Adjustment
1. Loosen lock knob (A
1
, Fig. 3).
2. Adjust eye shield to the desired tilt
angle (A
2
, Fig. 3).
Spark Guard
As the wheel wears down, the spark guards
must be re-adjusted to maintain a 1/16"
distance.
To adjust:
1. Loosen two hex cap screws (B
1
, Fig. 3) with
a 10mm wrench.
2. Slide the spark guard (B
2
, Fig. 3) to 1/16"
distance from the grinding wheel surface.
3. Tighten screw (B
1
, Fig. 3).
Figure 3
Tool Rest
As the wheel wears down, the tool rests must be
re-adjusted to maintain a 1/16" distance.
1. Loosen two hex cap screws (C
1
, Fig. 3) with
a 12mm wrench.
2. Slide the tool rest (C
2
, Fig. 3) to a distance
of 1/16" from the grinding wheel.
3. Tighten screws (C
1
, Fig. 3).