


9
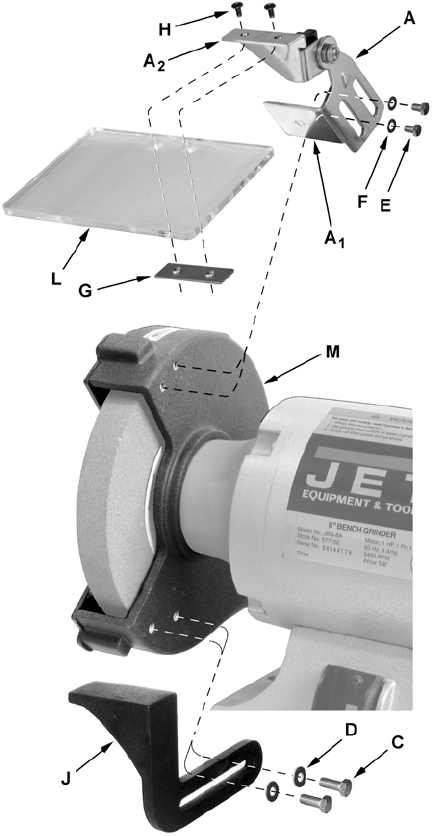
Installing the Spark Guard and Eye
Shield Mounting Brackets
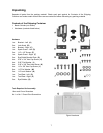
Refer to Figure 2:
Parts needed:
2 Spark Guard and Eye Shield Brackets
assembled from previous page
4 1/4” x 3/8” Hex Cap Screws (E)
4 1/4" Flat Washers (F)
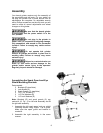
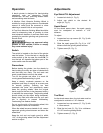
1. Install the left spark guard and mounting
bracket (A) to the left wheel housing (M) with
two 1/4” x 3/8” hex cap screws (E) and two 1/4"
flat washers (F).
The spark guards (A
1
) should be adjusted to
within 1/16" of the grinding wheel surface or
other accessory being used.
2. Install the right spark guard and mounting
bracket in the same manner.
Note: As the wheel wears down, the spark guards
must be re-adjusted to maintain the 1/16" distance.
Tool Rests
Refer to Figure 2:
Parts needed:
2 Tool Rest Left (J) and Right (not shown)
4 5/16" x 3/4" Hex Cap Screws (C)
4 5/16" Flat Washers (D)
Note: There is a left and a right tool rest. Refer to
Figure 1 to ensure that you install them correctly.
1. Install the left tool rest (J) by threading two
5/16" x 3/4" hex cap screws (C) through two
5/16" flat washers (D) and the tool rest (J) into
the wheel housing (M).
The tool rests should be adjusted to within
1/16" of the grinding wheel or other accessories
being used. As the wheel wears down, the tool
rest must be re-adjusted to maintain a 1/16"
clearance.
2. Install the right tool rest in the same manner.
Eye Shields
Refer to Figure 2.
Parts needed:
4 3/16” x 3/8” Pan Head Screws (H)
2 Eye Shields (L)
2 Eye Shield Bracket Plates (G)
The eye shields (L) are identical and will fit on
either side of the grinder.
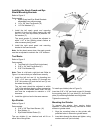
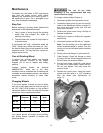
Figure 2
To install eye shields (refer to Figure 2):
Insert two 3/16” x 3/8” pan head screws (H) through
the mounting plate (A
2
), eye shield (C), and bracket
plate (G) containing threaded mounting holes.
Tighten the screws (H).
Mounting the Grinder
To prevent the grinder from moving during
operation, it should be securely mounted to a work
surface or grinder stand.
1. Align the mounting holes on the grinder with
predrilled holes in a bench or grinder stand.
2. Insert bolts through the holes and tighten, using
washers and nuts (not included).