11
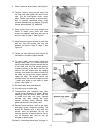
9. Place
v
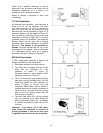
-belt over both pulle
y
s. See Fi
g
ure 8.
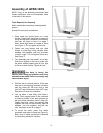
10. Tension v-belt by moving motor away from
the saw body and tighten the motor mount
nuts. (Do not over-tighten motor mount
bolts. Tighten just enough to tension belt.)
Belt is properly tensioned when finger
pressure between the two pulleys (Figure 8)
causes approximately 1/2” deflection.
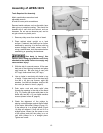
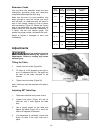
11. Place pulley cover over both pulleys and
fasten to stand using three pan head
screws, six washers, and three hex nuts, as
shown in item D, page 7. See Figure 9.
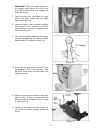
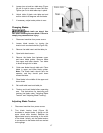
12. Attach trunnion support bracket to saw body
with two hex cap screws and two lock
washers as shown in item E, page 7. See
Figure 10.
13. Thread nut onto table stop bolt (Figure 10)
and attach to trunnion support bracket.
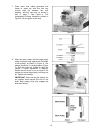
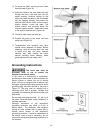
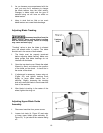
14. To mount table, remove table insert and
table pin (see Figure 11). Orient the table so
that the saw blade will pass through the slot
in the table and into the center opening.
Continue holding up the table, and turn the
table so the two screws that are hanging
vertically from below the table will slide into
the holes on the trunnion support bracket.
Lower the table. The screws should now
protrude below the trunnion support bracket
- attach lock knobs to the ends of these
screws. See Figure 11.
15. Re-install table insert and table pin.
16. Join motor plug to switch plug.
17. Transportation and handling may have
caused some fasteners to loosen. Before
operating, check all screws, bolts, and nuts
to make sure they are snug. Operate
machine only after reading the entire
manual including blade tracking, blade
guide adjustments, and safety rules.
18. Exposed metal surfaces, such as the table,
have been given a protective coating. This
should be cleaned with a soft cloth and
solvent, such as kerosene. Do not use
acetone, gasoline, or lacquer thinner. Do not
use an abrasive pad, and do not get
solvents on plastic parts.
Proceed to “Grounding Instructions” on page 14.
Figure 8
Figure 9
Figure 10
Figure 11


