


16
Extension Cords
Use only three wire extension cords that have
three-prong grounding plugs and three-pole
receptacles that accept the tool’s plug.
Make sure the cord is in good condition, and
heavy enough to carry the current your band
saw will draw. An undersized cord will cause a
drop in line voltage, resulting in loss of power
and overheating. Figure 25 shows the correct
size to use depending on cord length and the
ampere rating on your machine’s nameplate. If
in doubt, use the next heavier gauge. The
smaller the gauge number, the heavier the cord.
Repair or replace a damaged or worn cord
immediately.
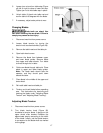
Adjustments
Unplug the machine from the
power source before making any repairs or
adjustments. Failure to comply may cause
serious injury.
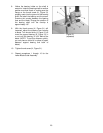
Tilting the Table
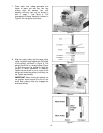
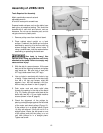
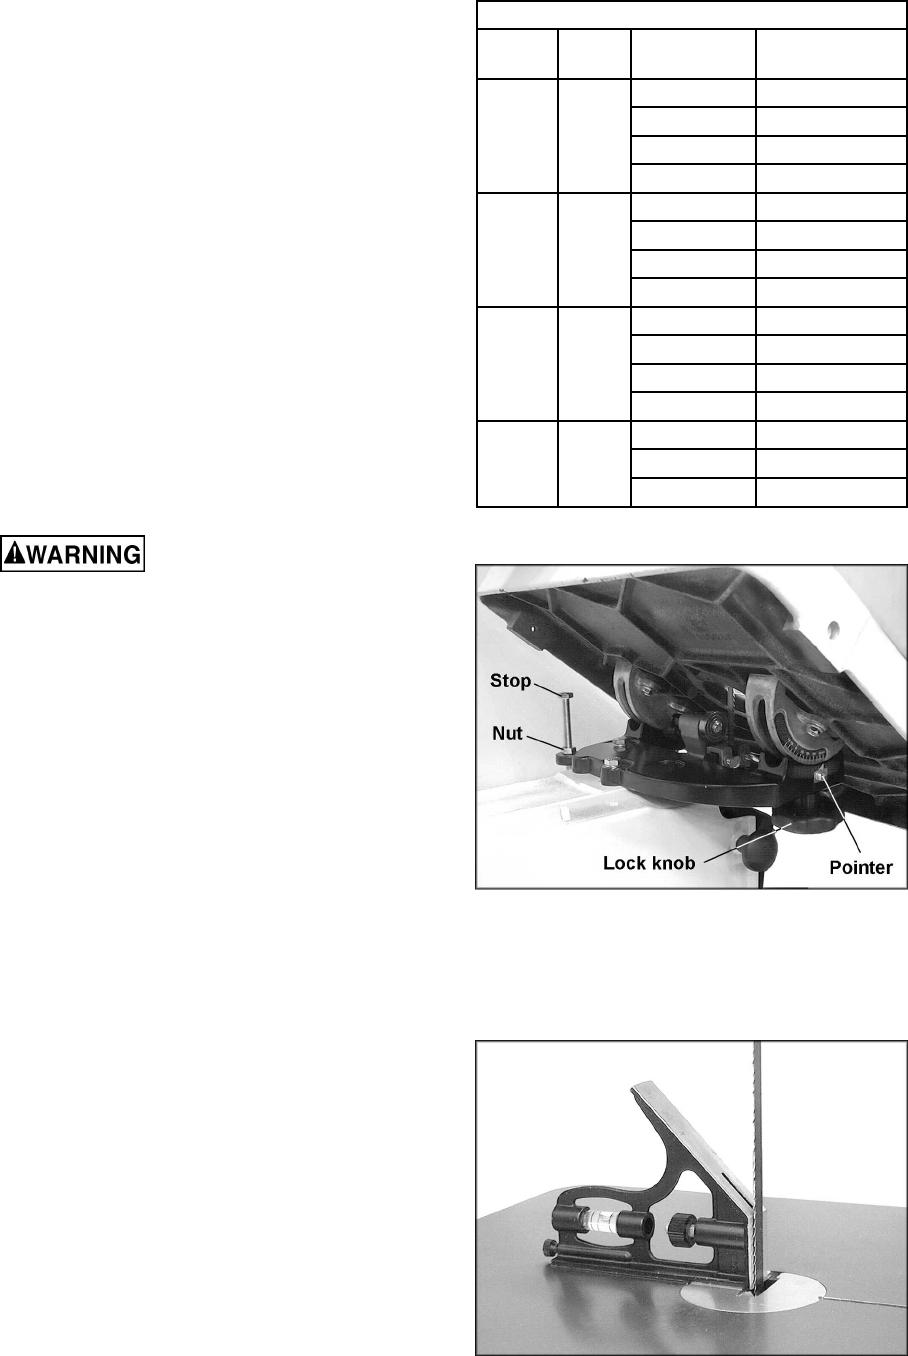
1. Loosen two lock knobs (Figure 26).
2. Tilt table up to 45 degrees to the right or
up to 10 degrees to the left. The angle can
be read on the scale mounted to the
trunnion.
3. Tighten two lock knobs (Figure 26).
Note: Table stop must be removed to tilt table to
the left.
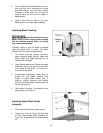
Adjusting 90°
°°
° Table Stop
1. Disconnect machine from power source.
2. Loosen lock knobs (Figure 26) and tilt
table left until it rests against the table
stop.
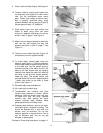
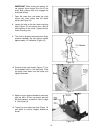
3. Use a square placed on the table and
against the blade (Figure 27) to see if the
table is 90 degrees to the blade.
4. If an adjustment is necessary, loosen lock
knobs, tilt table to the right, and lock in
place.
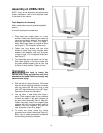
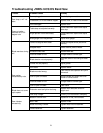
Minimum Gauge Extension Cord
Amp
rating
Line
voltage
Total length of
cord in feet
Cord gauge
(AWG)
0 to 25 18
25 to 50 16
50 to 100 16
0-6 120
over 100 14
0 to 25 18
25 to 50 16
50 to 100 14
6-10 120
over 100 12
0 to 25 16
25 to 50 16
50 to 100 14
10-12 120
over 100 12
0 to 25 14
25 to 50 12
12-16 120
over 50
not recommended
Figure 25
Figure 26
Figure 27