


20
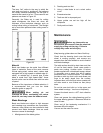
Replacing the V-Belt
Disconnect machine from
power source before making any adjustments.
1. Release blade tension as described in the
Blade Tension section.
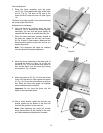
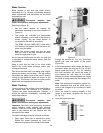
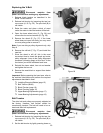
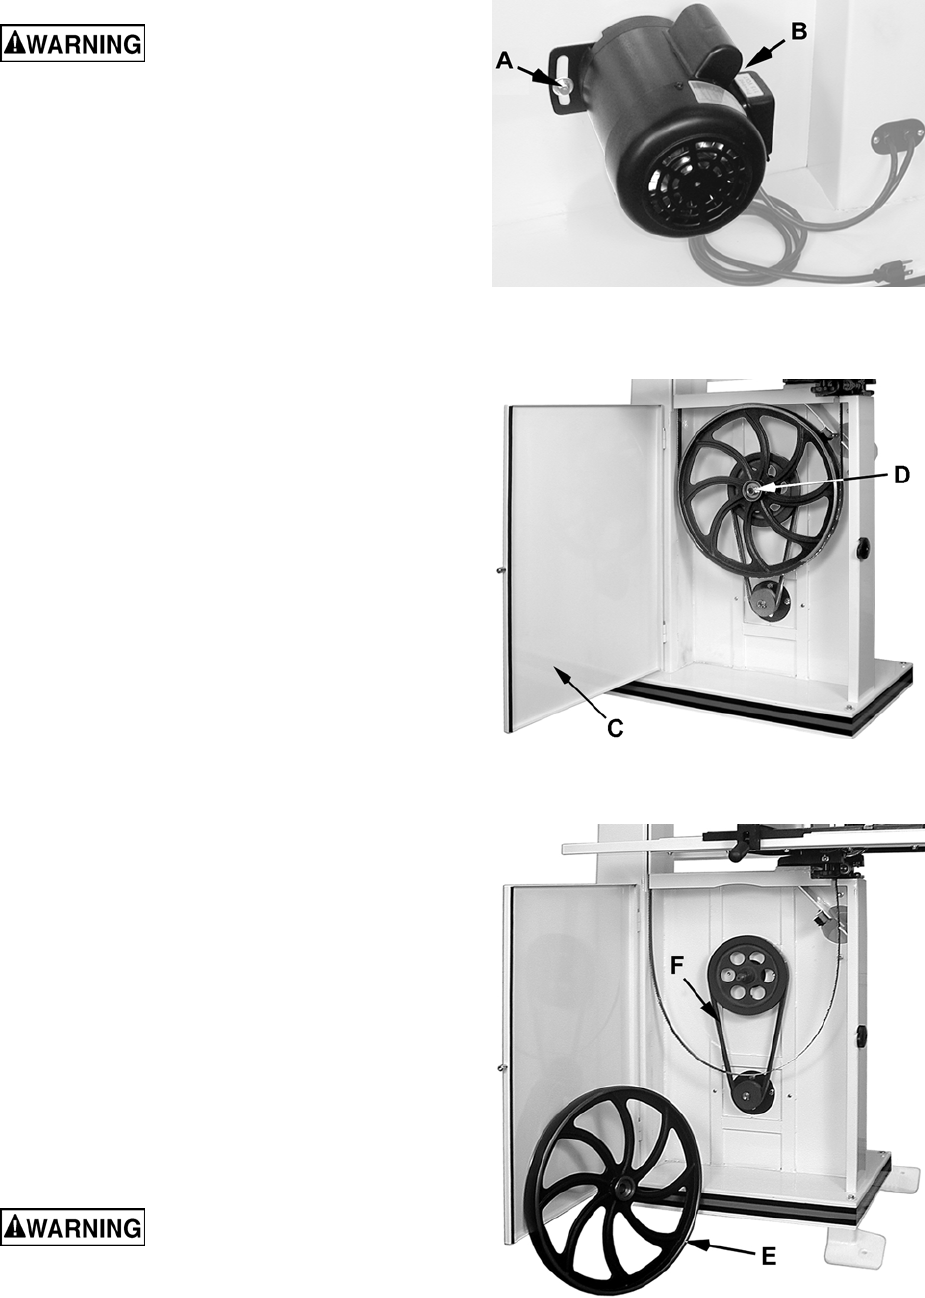
2. Release belt tension by loosening the two hex
cap screws (A, B, Fig. 25). The pivot bolt (B) is
not visible.
3. Raise the motor and place a block of wood
under the motor to take the tension off the belt.
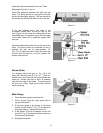
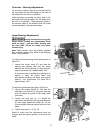
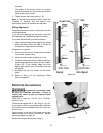
4. Open the lower wheel door (C, Fig. 26) and
remove the hex nut and washer (D, Fig. 26).
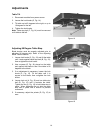
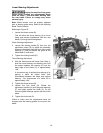
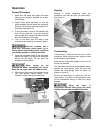
5. Remove the wheel (E, Fig. 27). If the lower
wheel does not come off easily you may need
to use a pulley puller to remove it.
Note: If you are doing a pulley alignment only, skip
Step 6.
6. Remove the old belt (F, Fig. 27) and install the
new belt.
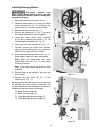
7. Since the wheel is still off, this is the most
convenient time to check the wheel and motor
pulley alignment. Jump to the Pulley Alignment
procedure (following page) at this time. At the
conclusion you will be redirected back here.
8. Reinstall the lower wheel, hex nut and washer
and tighten the hex nut.
9. Remove the wood block or support from below
the motor.
Important: Before operating the band saw, refer to
the sections listed below and perform the required
adjustments described in them.
Installing/Changing Blades (page 15)
Belt Tension (below)
Blade Tension (page 16)
Blade Tracking (page 16)
Upper Bearing Adjustments (page 17)
Lower Bearing Adjustments (page 18)
Belt Tension
The drive belt and pulleys are properly adjusted at
the factory. However, belt tension should be
occasionally checked. The belt will need to be re-
tensioned after belt replacement.
Disconnect machine from
power source before making any adjustments.
1. Release belt tension by loosening the two hex
cap screws (A, B, Fig. 25). The pivot bolt (B) is
not visible.
2. Set the belt tension by lightly pressing down on
Figure 25
Figure 26
Figure 27