


9
Assembly
The Band Saw should be
disconnected from power during assembly.
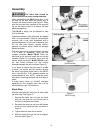
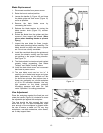
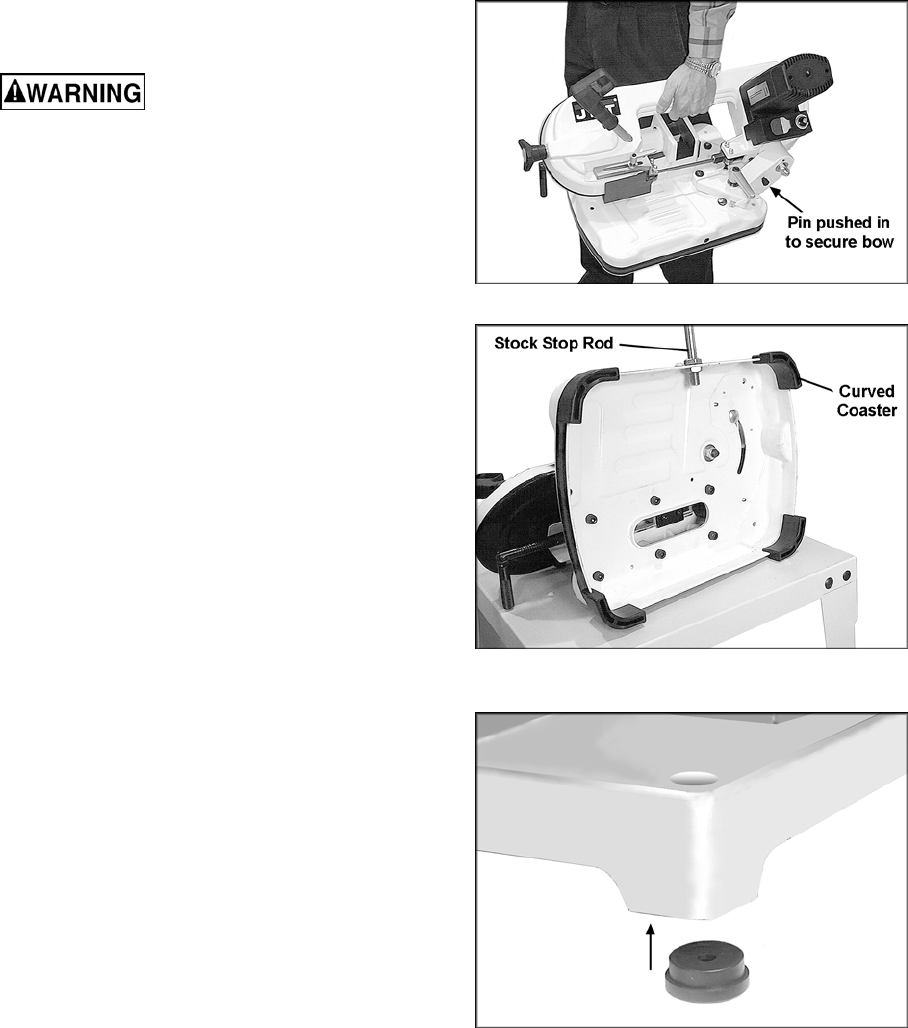
When transporting the PB-85 band saw, it can
be lifted by the bow when the cutting arm is
locked in the down position. See Figure 1. Make
sure the bow has been lowered all the way and
the pin has been pushed in to secure the bow
before transporting.
The PB-150 is heavy; use an assistant to help
lift it by the base.
Unpainted surfaces of the band saw are treated
with a rust preventative. Clean all rust protected
surfaces with a soft cloth dampened with a
cleaner/degreaser. Do not use an abrasive pad.
Do not use paint thinner, lacquer thinner,
gasoline or mineral spirits; these will damage
painted surfaces.
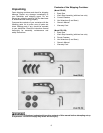
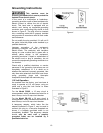
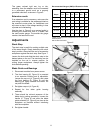
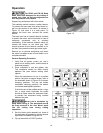
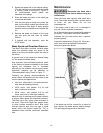
The band saw can be operated without securing
it to a table or workbench, using the four
coasters provided. Model PB-85: Place the
band saw on its side and install the four curved
coasters (Figure 2) by pushing them onto the
bottom edges as shown. Model PB-150: push
the four round coasters into the circular
recesses beneath the cast iron base (Figure 3).
If you desire to secure the band saw to a table
or stand, use screws and flat washers through
the holes in the base (three holes in the PB-85,
four in the PB-150). 5/16” diameter screws are
recommended for this. NOTE: Install the stock
stop before mounting the band saw to a table or
stand.
A metal stand (stock no. 414497) designed
especially for the portable band saw can be
purchased from your JET distributor.
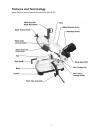
Stock Stop
With the band saw still resting on its side, install
the stock stop. See Figure 2.
1. Remove the outer hex nut from the stock
stop rod, and slide the rod into the hole at
the front of the band saw’s base.
2. Re-install the outer hex nut onto the threads
of the rod from inside the base, as shown in
Figure 2.
3. Tighten both hex nuts with a wrench.
4. Slide the stock stop onto the rod and tighten
the knob (see Figure 7).
Figure 1
Figure 2
(PB-85 shown)
Figure 3
(PB-150 only)