D-2
MAINTENANCE
D-2
BEARING MAINTENANCE
This welder is equipped with a double-shielded ball bearing
having sufficient grease to last indefinitely under normal ser-
vice. Where the welder is used constantly or in excessively
dirty locations, it may be necessary to add one-half ounce of
grease per year. A pad of grease one inch wide, one inch
long and one inch high weighs approximately one-half
ounce. Over greasing is far worse than insufficient greasing.
When greasing the bearings, keep all dirt out of the area.
Wipe the fittings completely clean and use clean equipment.
More bearing failures are caused by dirt introduced during
greasing than from insufficient grease.
COMMUTATOR AND BRUSH MAINTENANCE
Uncovered rotating equipment can be dangerous.
Use care so your hands, hair, clothing or tools do
not catch in the rotating parts. Protect yourself
from particles that may be thrown out by the rotat-
ing armature when stoning the commutator.
------------------------------------------------------------------------
The generator brushes are properly adjusted when the
welder is shipped. They require no particular attention.
DO NOT SHIFT THE BRUSHES or adjust the rocker
setting.
Shifting of the brushes may result in:
- Change in machine output
- Commutator Damage
- Excessive brush wear
Periodically inspect the commutator, slip rings and
brushes by removing the covers. DO NOT remove or
replace these covers while the machine is running.
Commutators and slip rings require little attention.
However, if they are black or appear uneven, have
them cleaned by an experienced maintenance man
using fine sandpaper or a commutator stone. Never
use emery cloth or paper for this purpose.
NOTE: If the welder is used in dirty or dusty locations,
or if the welder is not used for prolonged periods of
time, it may be necessary to clean the commutator and
slip rings more often.
Replace brushes when they wear within 1/4" of the pig-
tail. A complete set of replacement brushes should be
kept on hand. Lincoln brushes have a curved face to fit
the commutator. Have an experienced maintenance
man seat these brushes by lightly stoning the commu-
tator as the armature rotates at full speed until contact
is made across the full face of the brushes.
After stoning, blow out the dust with low pressure air.
To seat the slip ring brushes, position the brushes in
place. Then slide one end of a piece of fine sandpaper
between slip rings and brushes with the coarse side
against the brushes. With slight additional finger pres-
sure on top of the brushes, pull the sandpaper around
the circumference of the rings, in direction of rotation
only - until brushes seat properly. In addition, stone
slip ring with a fine stone. Brushes must be seated
100%. Arcing or excessive exciter brush wear indicates
a possible misaligned shaft. Have an authorized Field
Service Shop check and realign the shaft.
COOLING SYSTEM
The SAE400 WELD’N AIR is equipped with a pressure
radiator. Keep the radiator cap tight to prevent loss of
coolant. Clean and flush the cooling system periodi-
cally to prevent clogging the passage and overheating
the engine. When antifreeze is needed, always use the
permanent type.
ENGINE AND COMPRESSOR MAINTENANCE
COMPONENTS
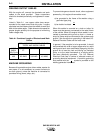
ITEM MAKE PART NUMBER
Engine Air Filter Donaldson P181052
Fan Belt Lincoln S19730
Gates 8129
Compressor Belt Lincoln S23887
Gates 2/A40
Fuel Filter Perkins 26561117
Engine Oil Filter Perkins 2654403
REPLACING AIR COMPRESSOR DRIVE BELT
Belt is tensioned using a automatic tensioning device.
Remove with care.
------------------------------------------------------------------------
To remove compressor belt:
1. Remove nut and lock washer from lower locking
bolt on idler tension flange.
2. Loosen center mounting bolt on idler tensioner 1/2
turn or until it moves freely.
3. Using a pipe wrench or equivalent tool, turn ten-
sioner body slightly to free locking bolt. Remove
locking bolt and slowly release tension on belt.
Remove belt.
Note: Do not loosen or remove compressor mounting
bolts. Pulley misalignment may result.
To install belt (after following above procedure):
1. Mount belt into pulley grooves and over idler pul-
ley.
2. Using a pipe wrench or suitable tool, turn idler
body to realign locking slot in idler flange with lock-
ing hole. Insert locking bolt and tighten before
releasing idler body.Tighten center mounting bolt.
Note: Ensure that both belt strands are running prop-
erly in pulley grooves.
SAE400 WELD’N AIR
WARNING
CAUTION


