


Py
thon-
P
lus
O
wner's Manual -
P
a
g
e
3
Driv
e
R
o
ll In
sta
ll
at
i
o
n/R
e
m
o
v
al
N
O
TE: N
e
i
t
h
e
r
of
t
h
e
h
a
n
d
l
es
n
eeds
to
be
r
e
m
o
v
ed
to
access
t
h
e
Driv
e
o
r I
d
l
e
r R
o
ll
s
.
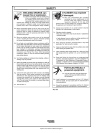
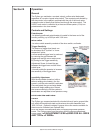
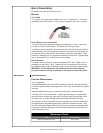
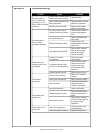
1
.
P
ull the
C
am Lever away
f
rom
t
h
e
i
d
l
e
r r
o
ll. Thi
s
will r
e
li
e
v
e
th
e
pressure against the drive roll (as
shown in Figure 1
)
.
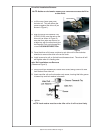
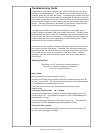
2.
Ali
gn t
h
e
D
r
i
ve
R
o
ll
R
emova
l
T
oo
l
(
P
/
N 931-0100
)
over the
fl
ats o
f
the
d
rive roll
(
as shown in Fi
g
ure 2
)
.
Hold
t
he
t
o
r
ch
w
i
t
h
o
n
e
ha
n
d
o
r
o
n
a table top, with the other hand give
t
he Removal Tool a quick snap-turn
i
n t
he
CLOCKWISE DIRECTIO
N
.
3. Once the drive roll is loose, continue to s
p
in drive roll in the clockwise
d
irection to remove the drive roll
f
rom the torch.
4
. In
s
t
a
ll
a
n
e
w
d
riv
e
r
o
ll
o
n th
e
l
ef
t-h
a
n
d
thr
eaded
s
h
af
t. Th
e
d
riv
e
r
o
ll will
self-tighten when it is feeding wire.
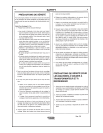
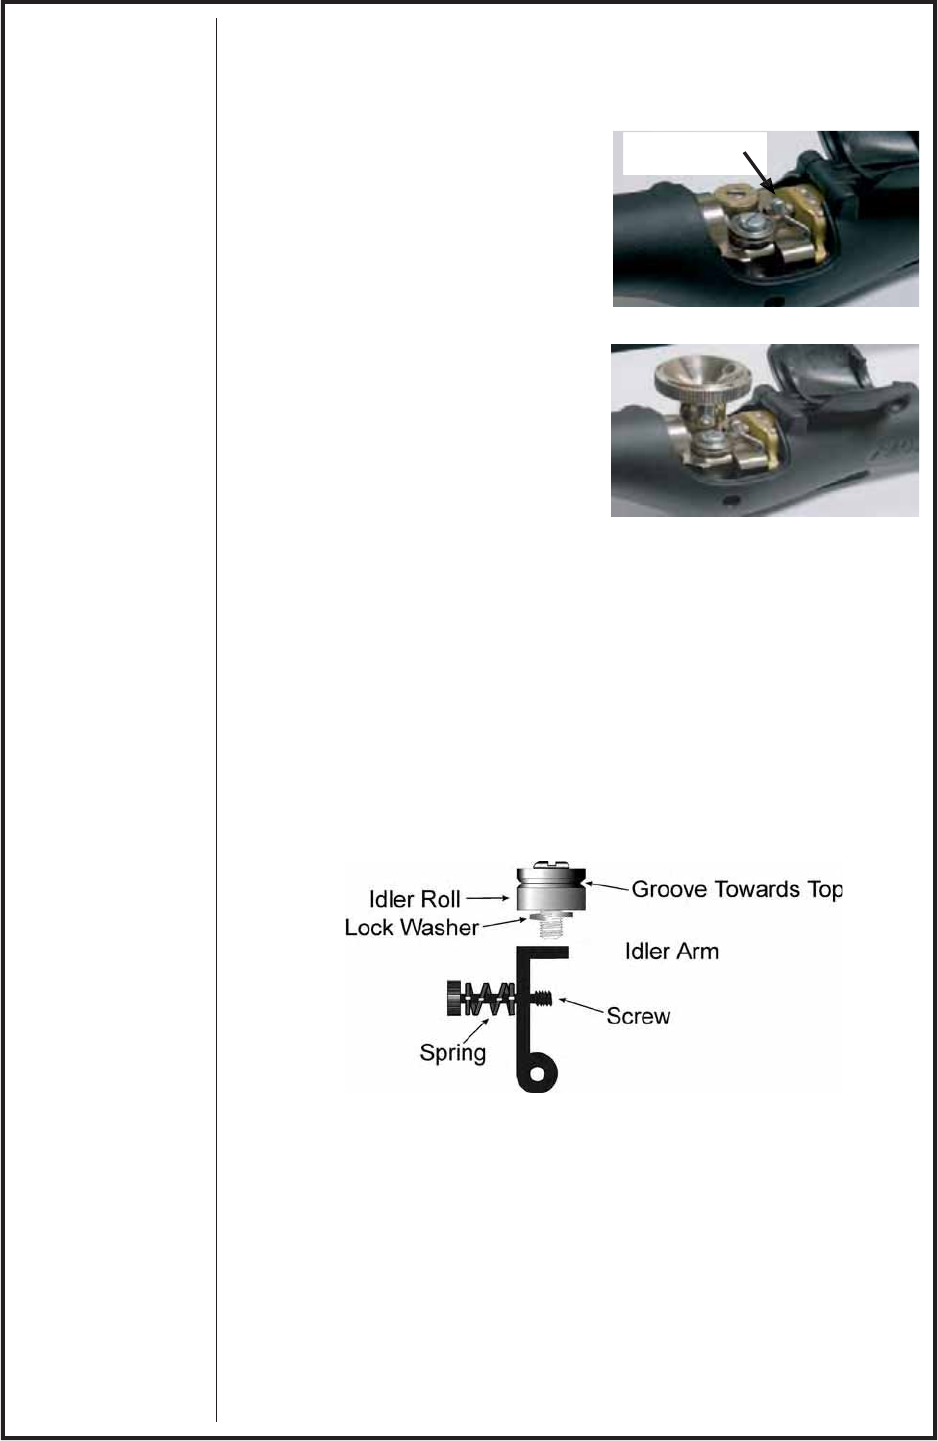
Id
l
e
r R
o
ll In
sta
ll
at
i
o
n
a
n
d
R
e
m
o
v
al
(
Re
f
erence Fi
g
ure 3
)
1
.
U
s
i
ng a s
l
ot type screw
d
r
i
ver,
l
oosen
idl
er screw, ta
ki
ng care not to
l
ose
l
oc
k w
as
h
e
r
u
n
de
r i
d
l
e
r r
o
ll.
2.
I
nsert new
idl
er ro
ll
an
d
l
oc
k
was
h
er onto screw,
i
nsur
i
ng t
h
at
idl
er groove
i
s towar
d
top an
d
l
oc
k
was
h
er
i
s
b
eneat
h
.
3
.
T
ighten.
N
OTE: Lock washer must be under idler roll or it will not turn freel
y
.
C
am Lever
Figure
2
F
igure
1
F
igure
3